18.5.5 Mid-Block Shared Use Path Crossings
It is preferable for mid-block crossings to intersect the roadway at a 90 degree angle to minimize the crossing distance and maximize sight distance. Mid-block crossings crossings may be controlled (signalized) or uncontrolled (signing and markings only). Designers should consider traffic volumes and speeds of motorists, sight distances, the bicyclist target design user profile, and the walking speed of pedestrians when designing mid-block crossings. This is particularly important for uncontrolled crossings because the crossing users are reliant on motorist stopping and yielding or finding gaps in traffic. The
provides recommendations for appropriate treatments to consider for uncontrolled crossings, which can be used for shared use path crossings. Additionally,
signal warrants may be used (with bicyclists counted as pedestrians) to identify if a full signal is appropriate. The signal warrant should consider the anticipated volumes of pathway users during the peak riding period (which may be on weekends).
through
illustrate various examples of mid-block crossing control treatments. These figures show typical pavement marking and sign crossing treatments. The diagrams are illustrative and are not intended to show all signs and markings that may be necessary or advisable, or all types of design treatments that are possible at these locations. Each figure assumes the appropriate minimum sight distances are provided for the roadway and the shared use path. Refer to the
guide for recommended treatments and countermeasures to address motorist stopping and yielding
Refer to the
for additional guidance for shared use path crossings

Figure 18-52: Road Stops
(Refer to the
and
for additional signing and pavement marking guidance.)
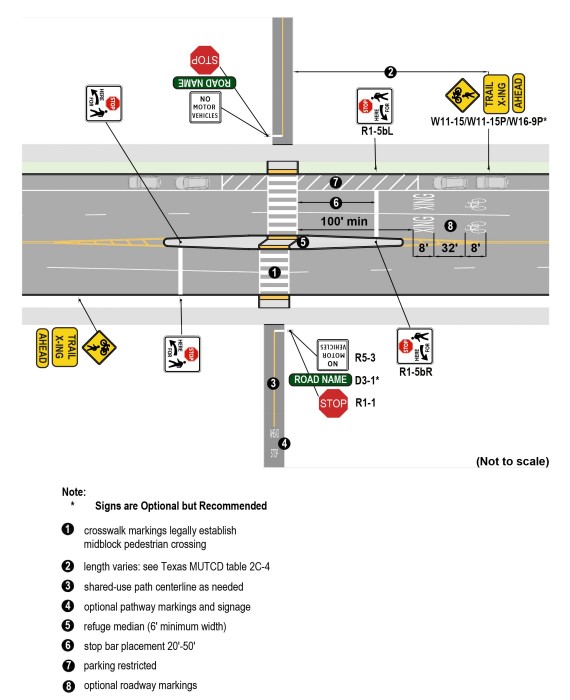
Figure 18-53: Multilane Road Uncontrolled with Advance Stop Bar Line
(Refer to the
and
for additional signing and pavement marking guidance.)
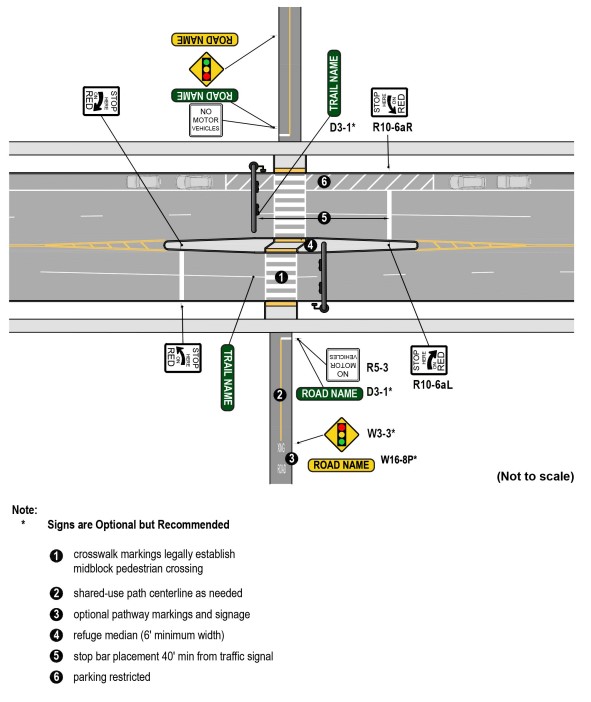
Figure 18-54: Multilane Road with Signals
(Refer to the
and
for additional signing and pavement marking guidance.)