Examples of Assembly Arrangements
Figures 3-20, 3-21, and 3-22 illustrate arrangements of route sign assemblies for intersections with 2, 3, and 4 route signs, respectively. When an Option A or Option B is presented in the figures, Option A is the correct arrangement to be used provided all of the conditions under 'Double Arrow Sign' are met (see page 3-12). Option A will require fewer route marker signs. When arranging route marker assemblies, the arrangement hierarchy is always determined first by direction, then highway class, and then highway number as described above under 'Arrangement Hierarchy' (see page 3-17). Horizontal arrangements are preferred if sufficient right-of-way width is available.
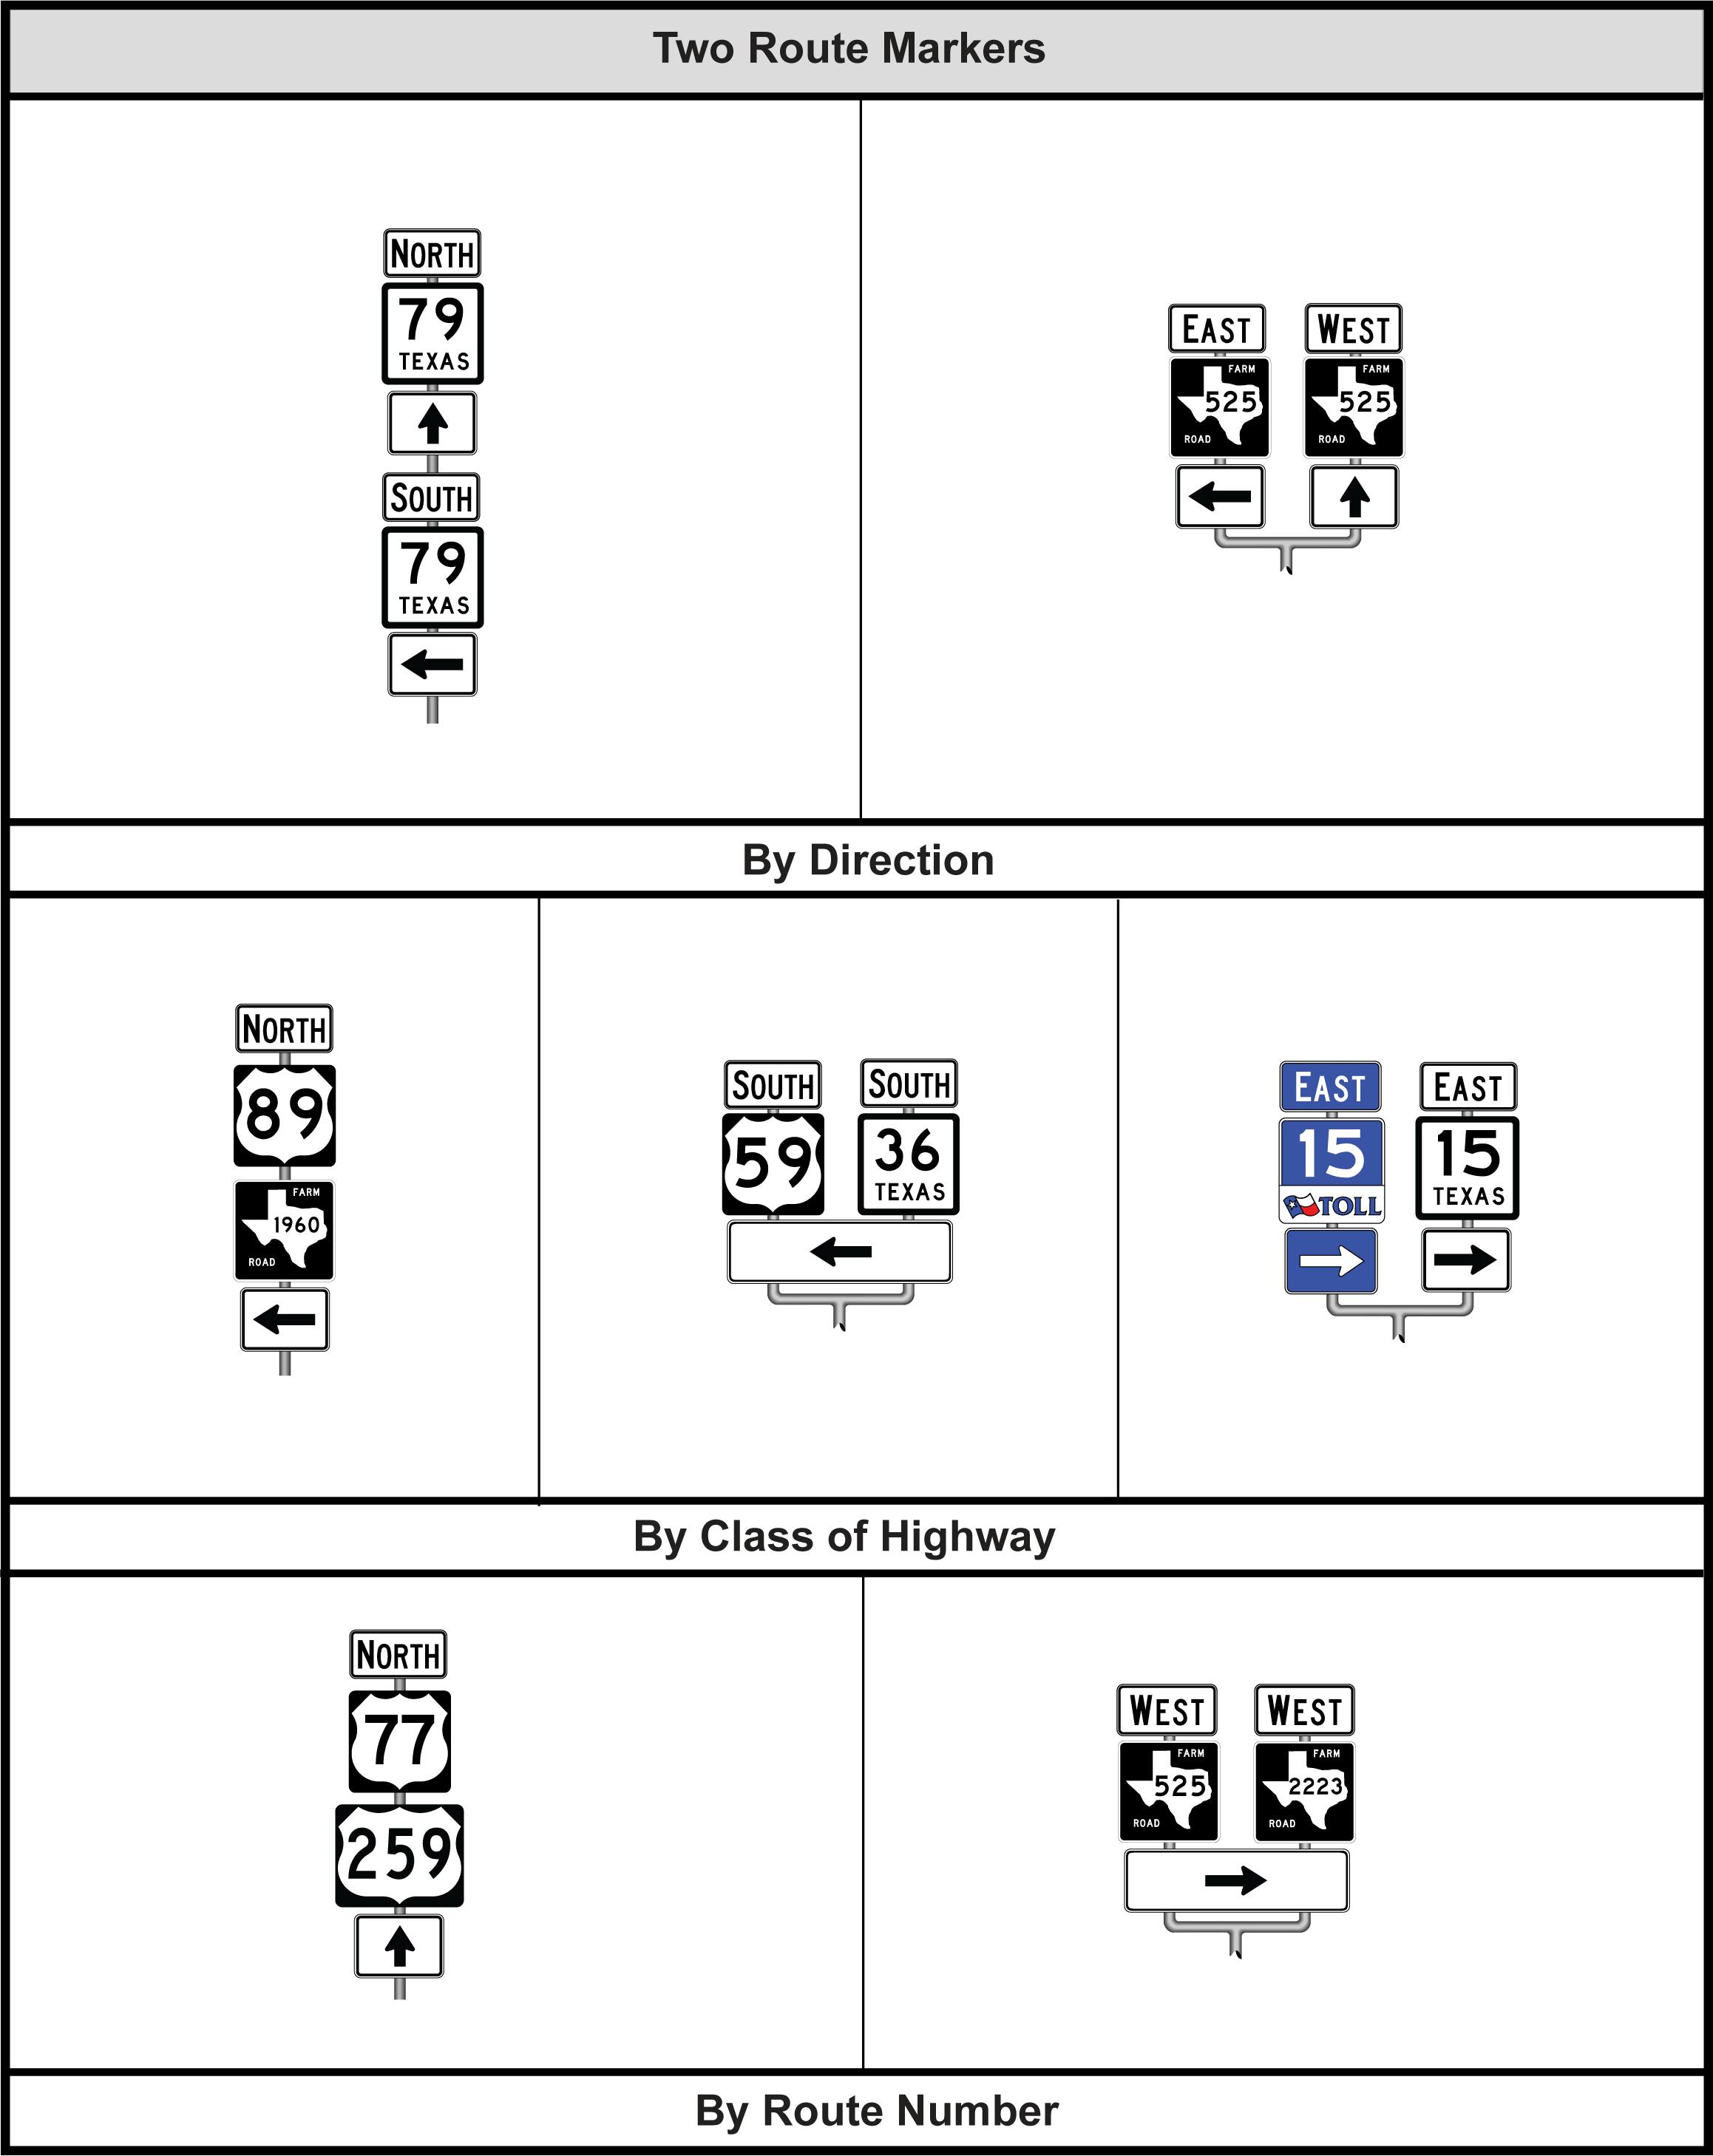
Figure 3-20. Route Sign Assembly for Intersection with Two Route Signs
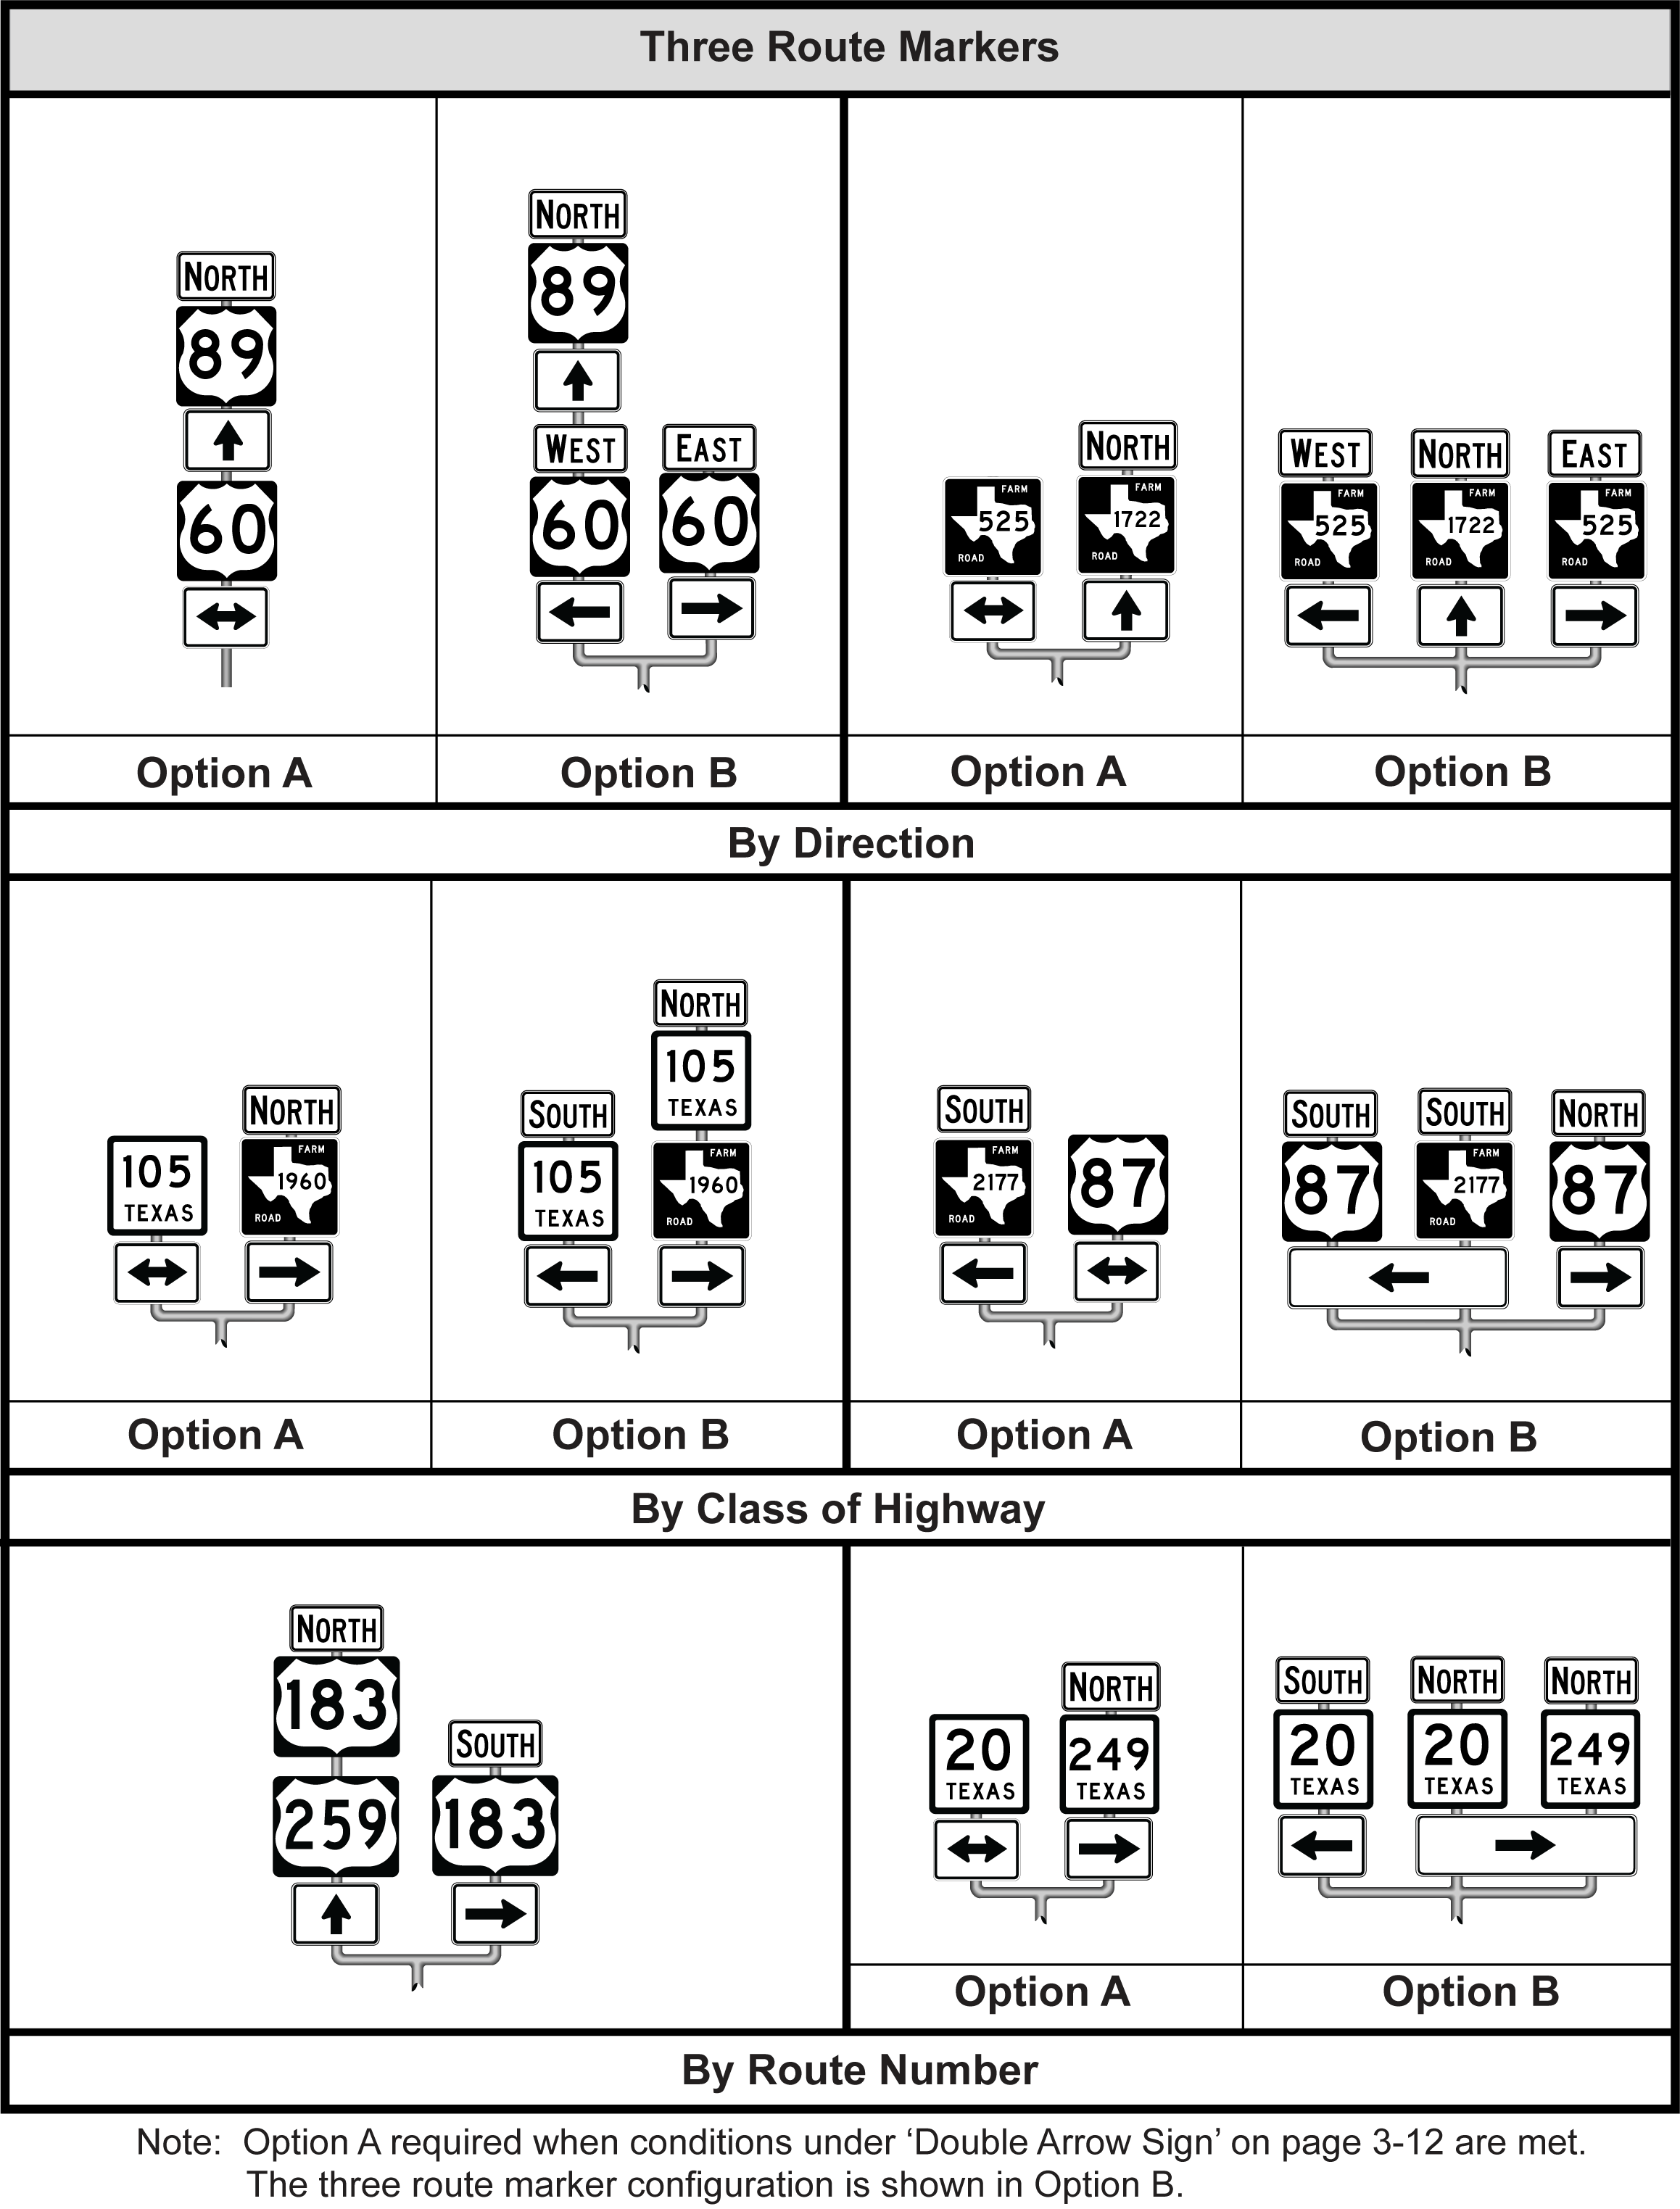
Figure 3-21. Route Sign Assembly for Intersection with Three Route Signs
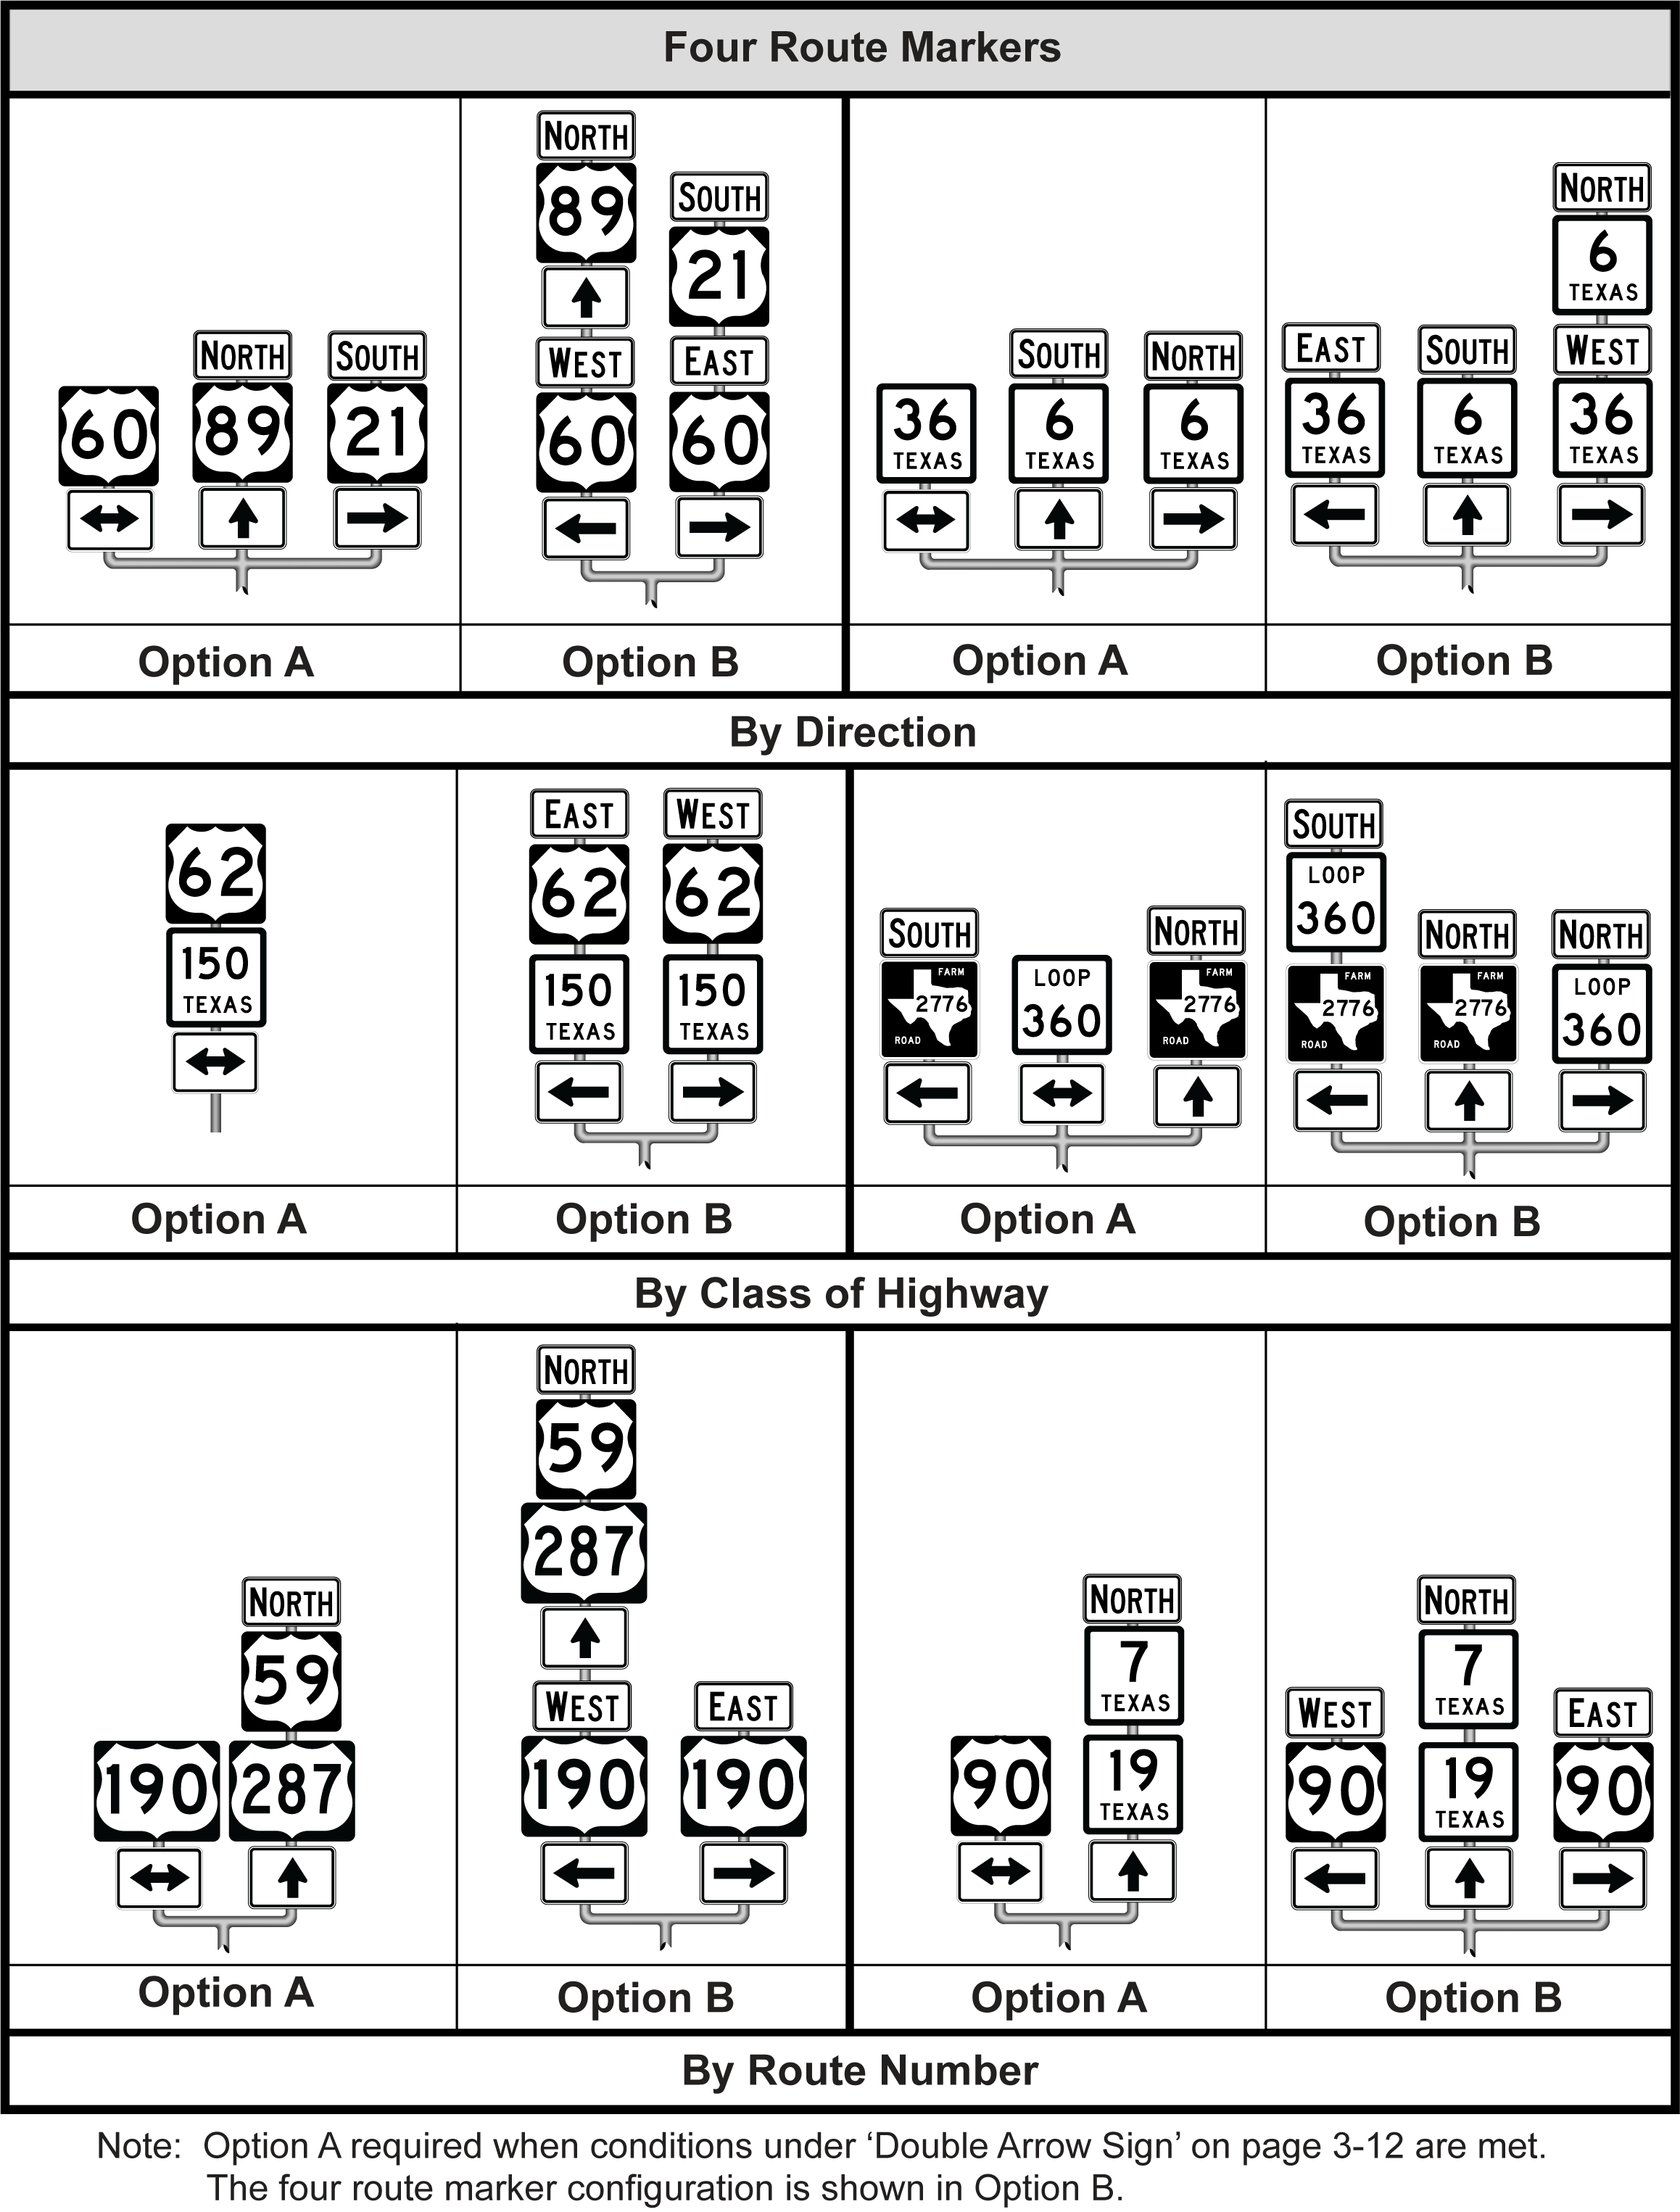
Figure 3-22. Route Sign Assembly for Intersection with Four Route Signs