Section 5: Applications
Introduction
This section provides examples of typical roadside marker
treatments that may be encountered during day-to-day activities.
The examples provided are intended to provide guidance and are not meant
to be standards.
Application Illustrations
Figures 8-16 to 8-24 illustrate various uses of object markers, delineators, and barrier reflectors. This section presents the following examples:
- Figure 8-16: Two-way, two-lane road or bridge with guardrail and no change in approach width.
- Figure 8-17: Two-way, two-lane road or bridge with guardrail and reduced width approach.
- Figure 8-18: Two-way, two-lane bridge with no approach rail.
- Figure 8-19: Multi-lane undivided, two-way road or bridge with guardrail.
- Figure 8-20: One-way road or bridge (or divided highway) with guardrail.
- Figure 8-21: Two-way road over culvert.
- Figure 8-22: Freeway delineation with tangent ramps.
- Figure 8-23: One-way curved ramp detail.
- Figure 8-24: Emergency Crossover.
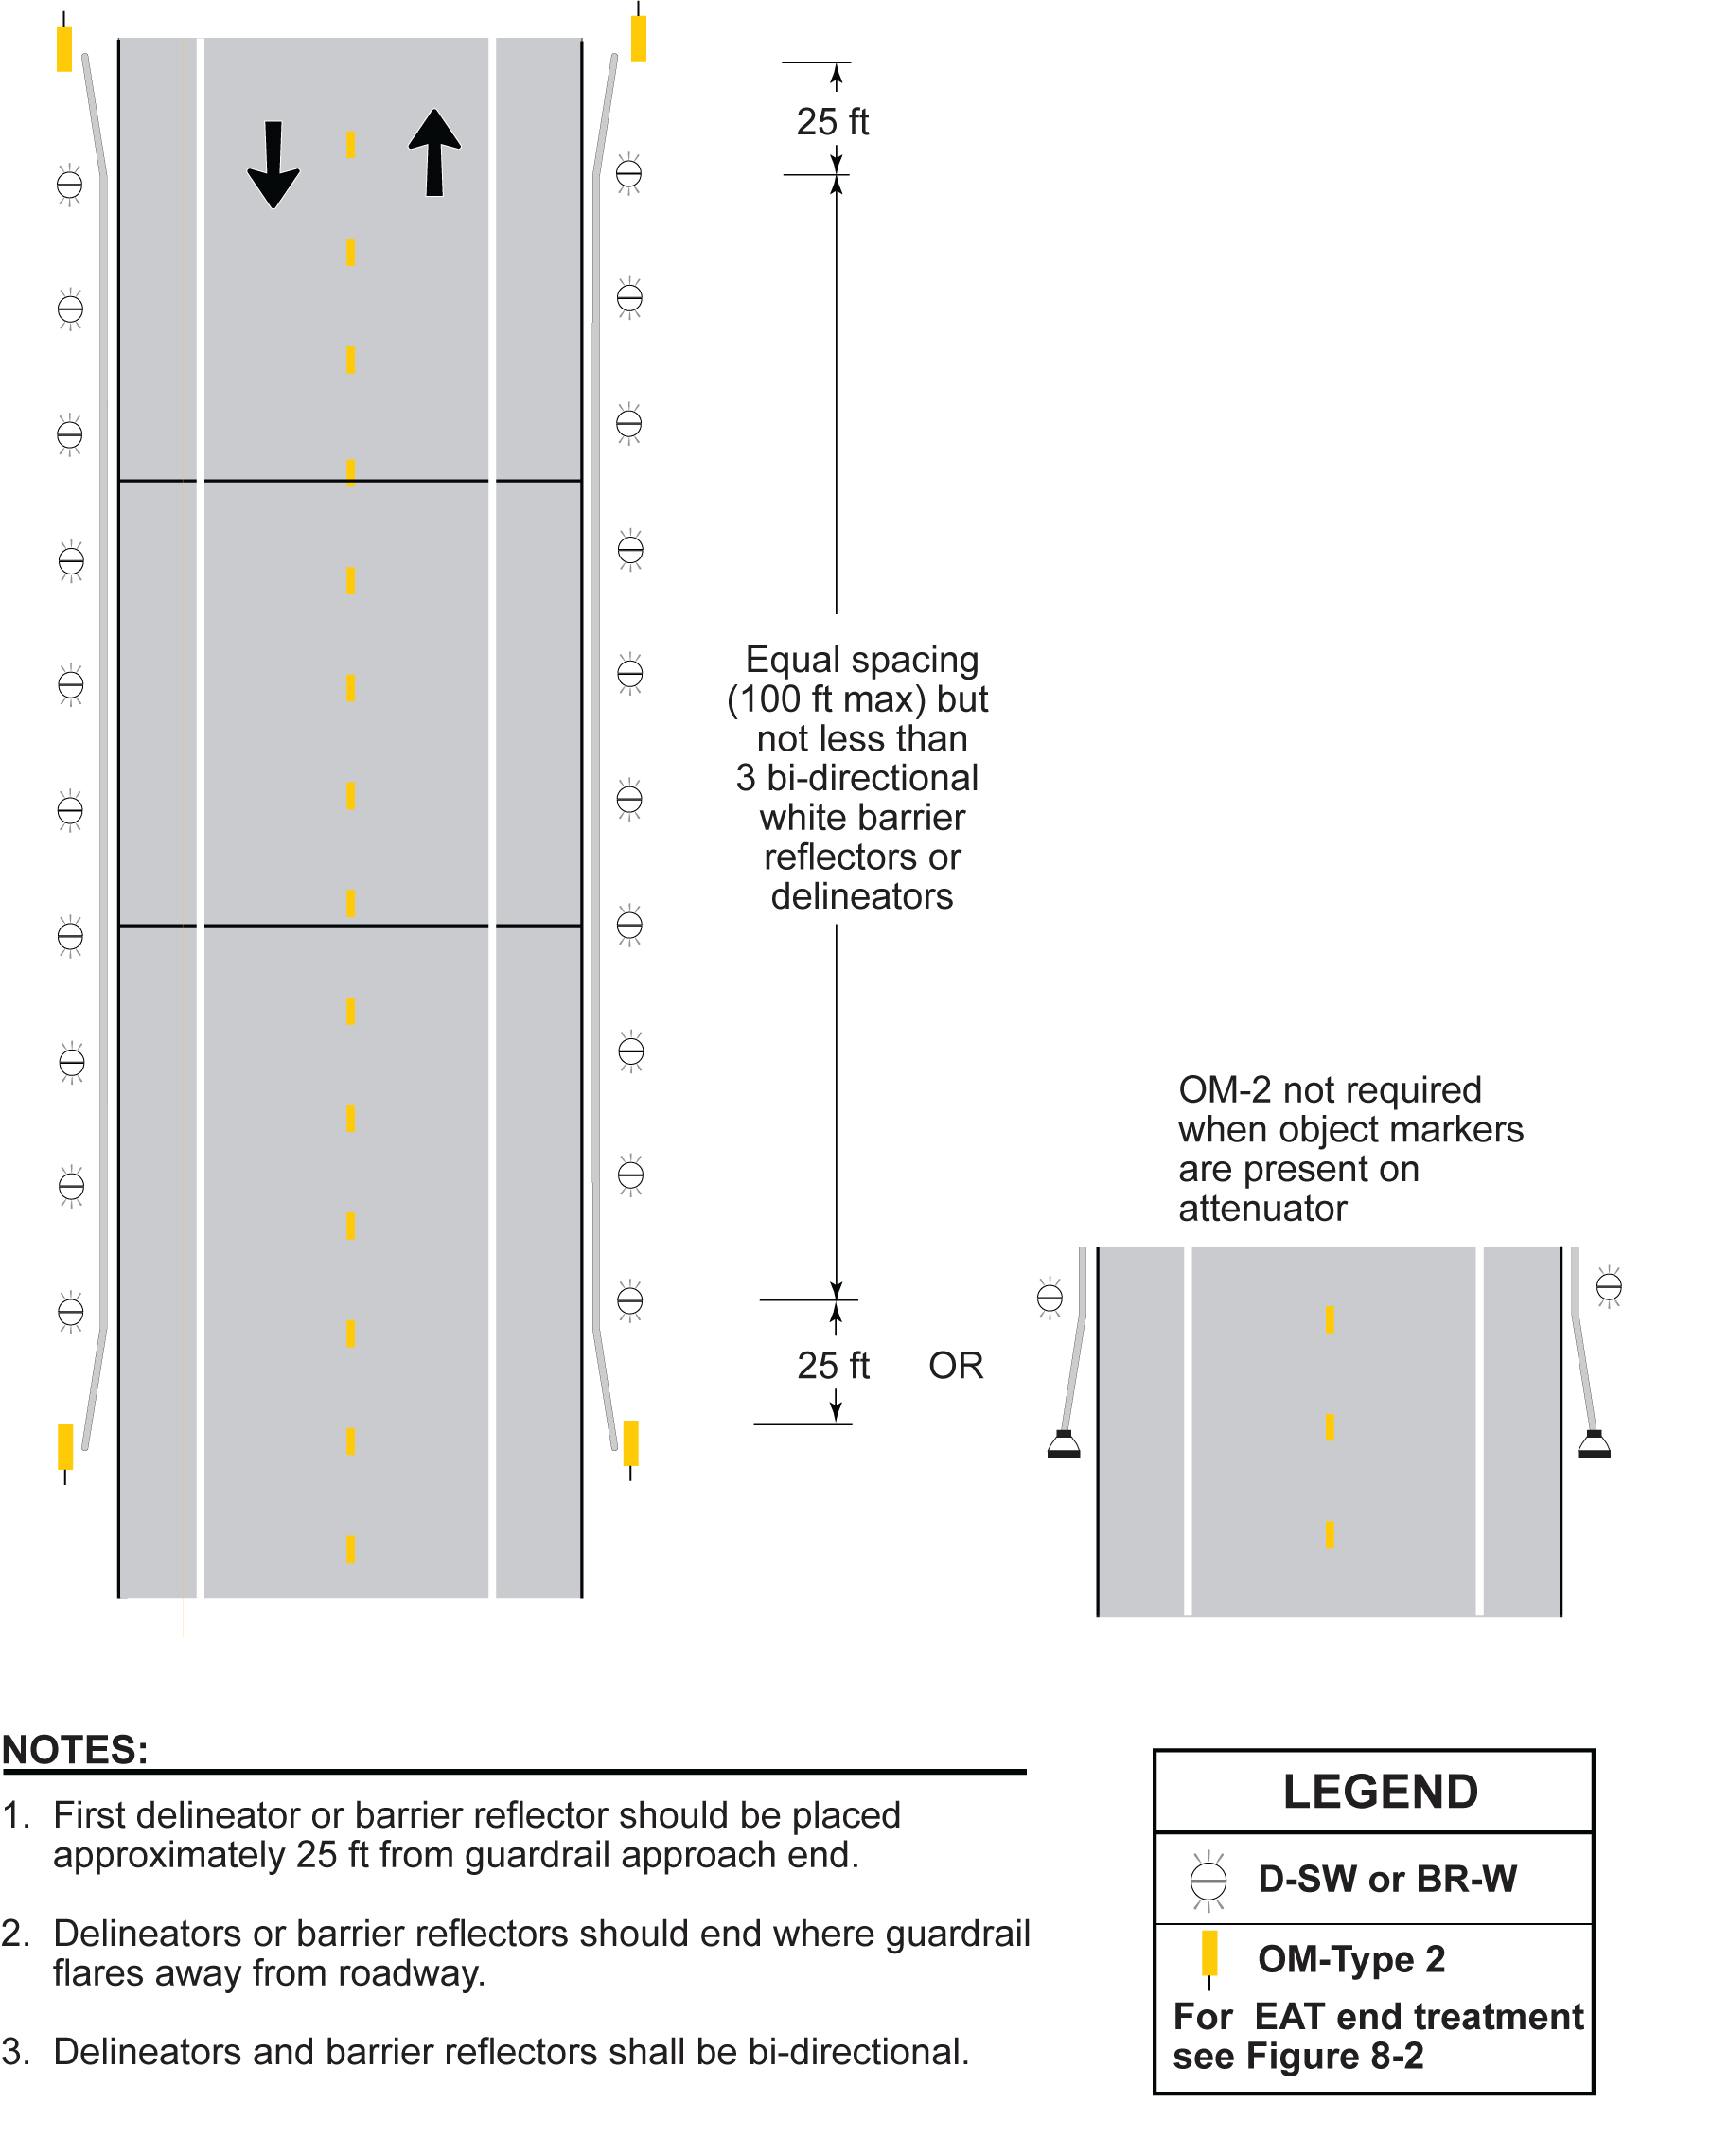
Figure 8-16. Two-Way Two-Lane Road or Bridge with Guardrail and No Change in Approach Width
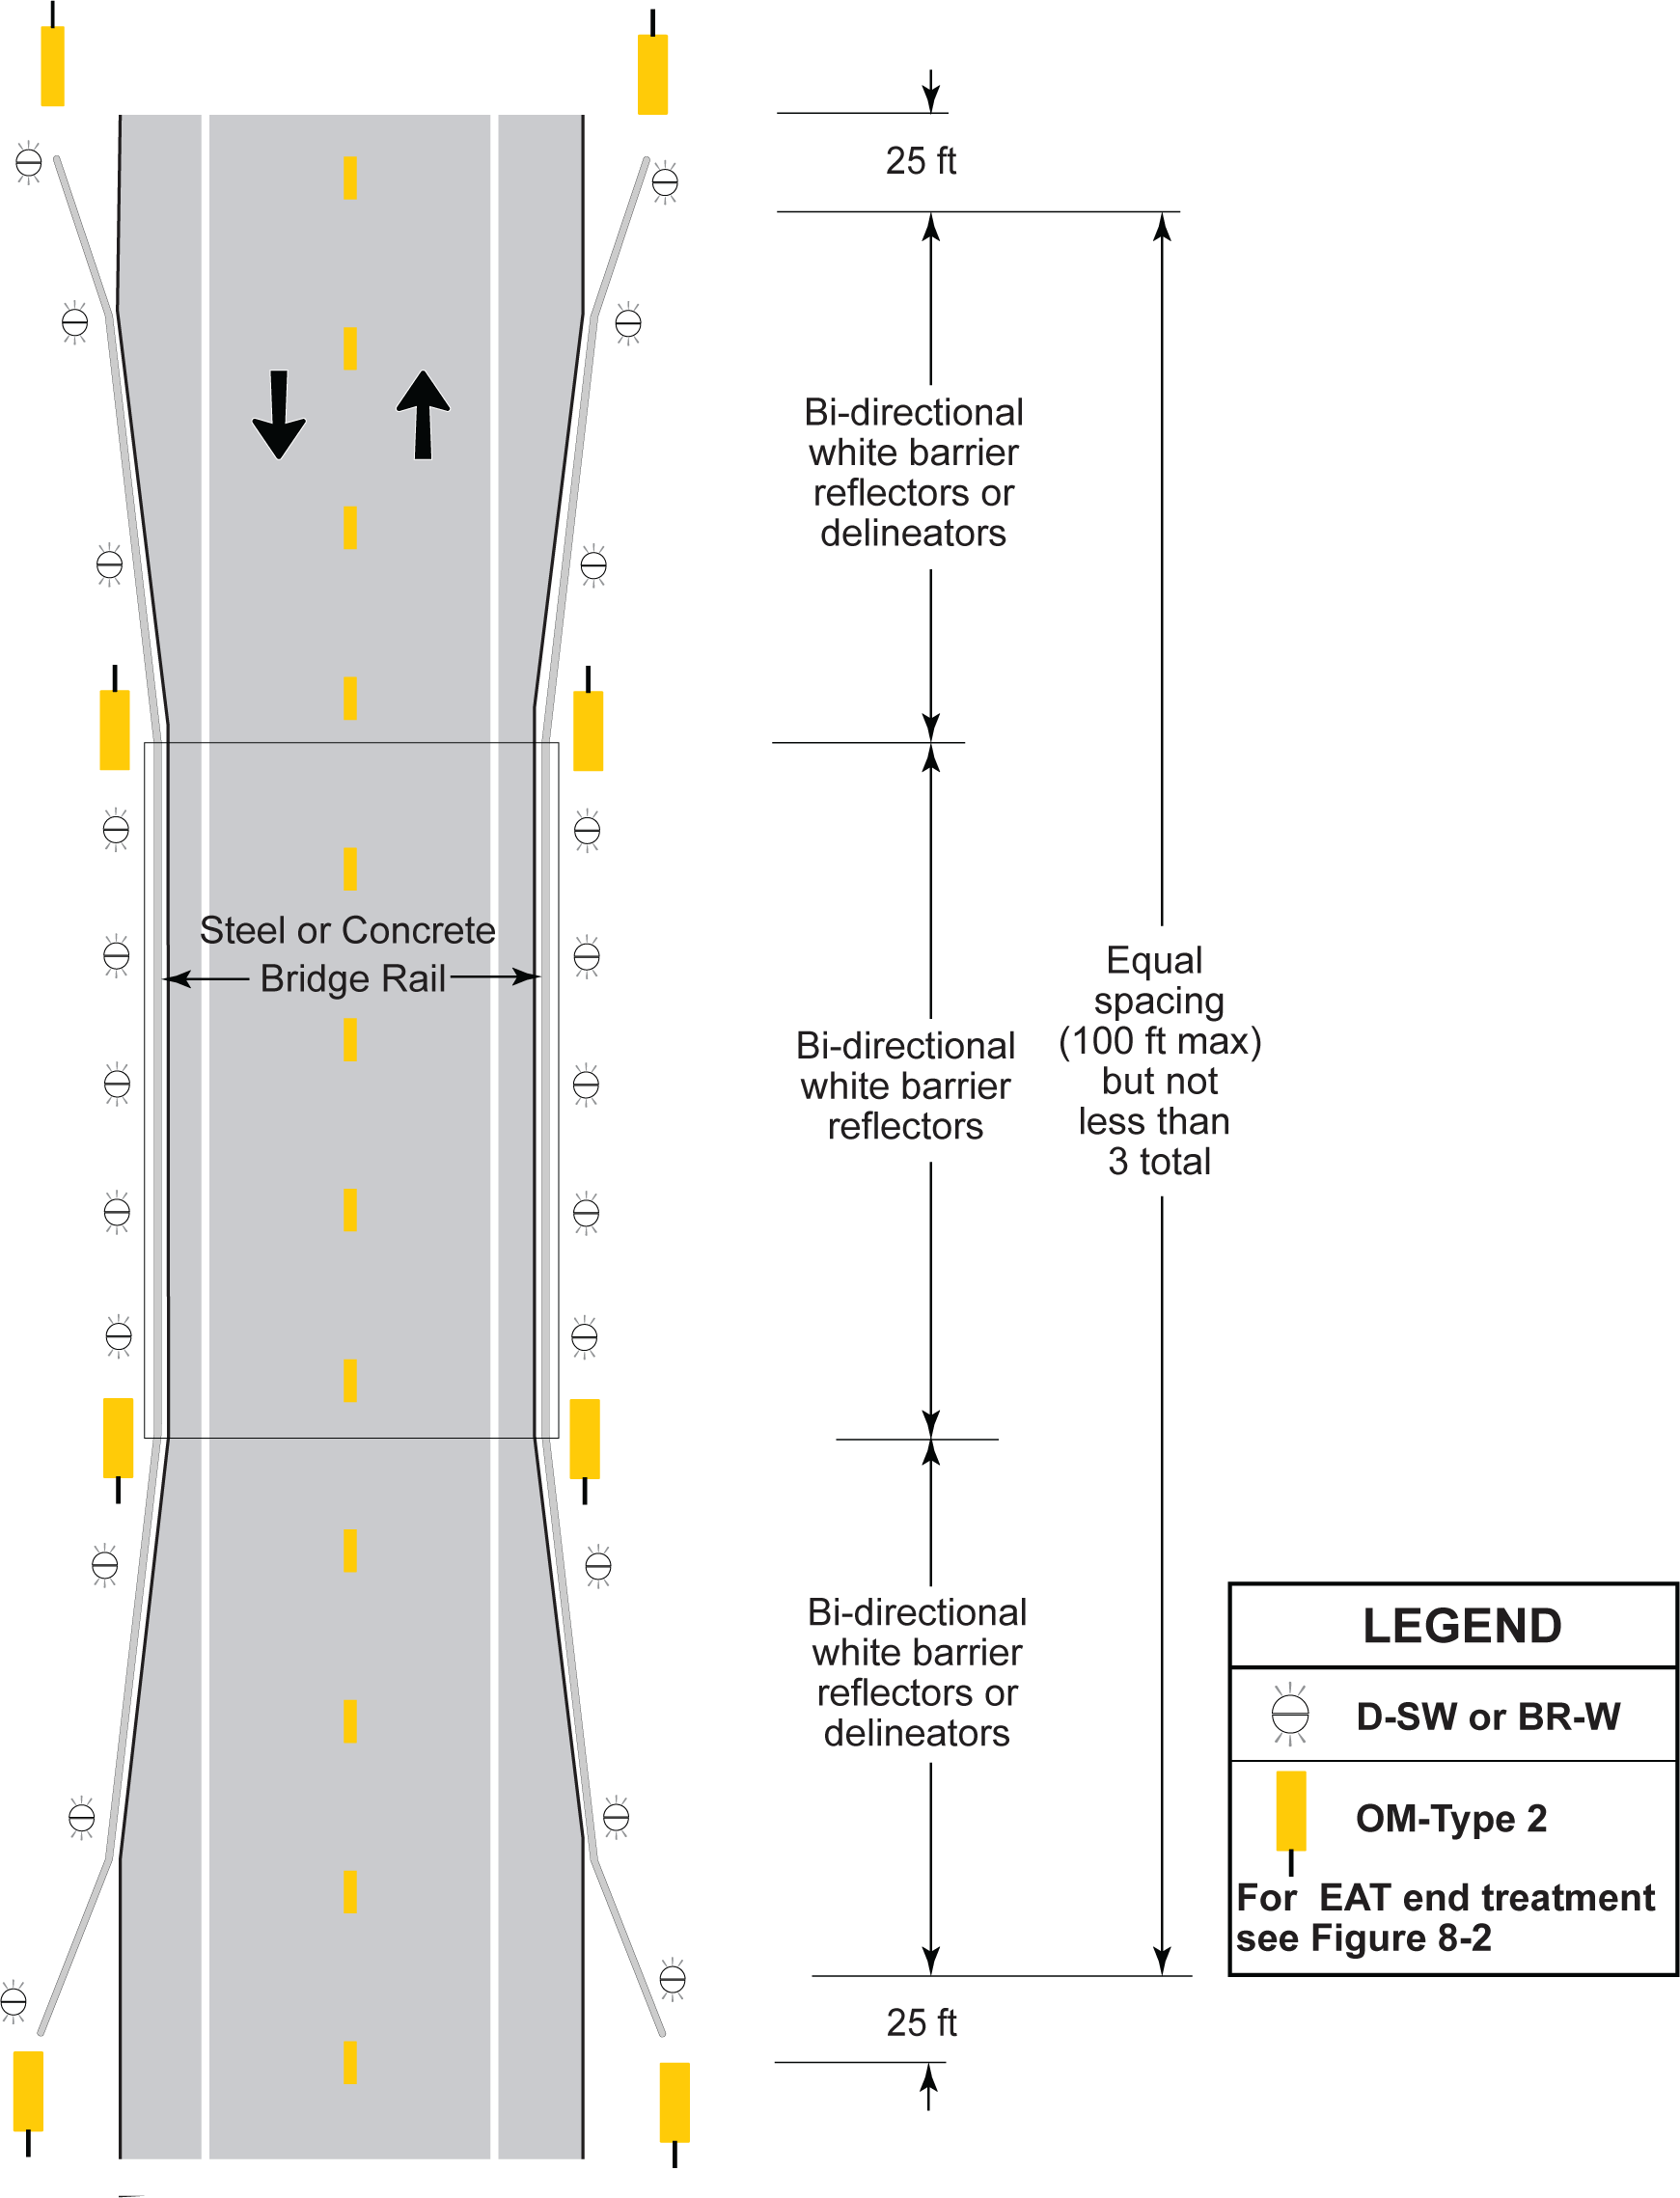
Figure 8-17. Two-Way Two-Lane Road or Bridge with Guardrail and Reduced Width Approach
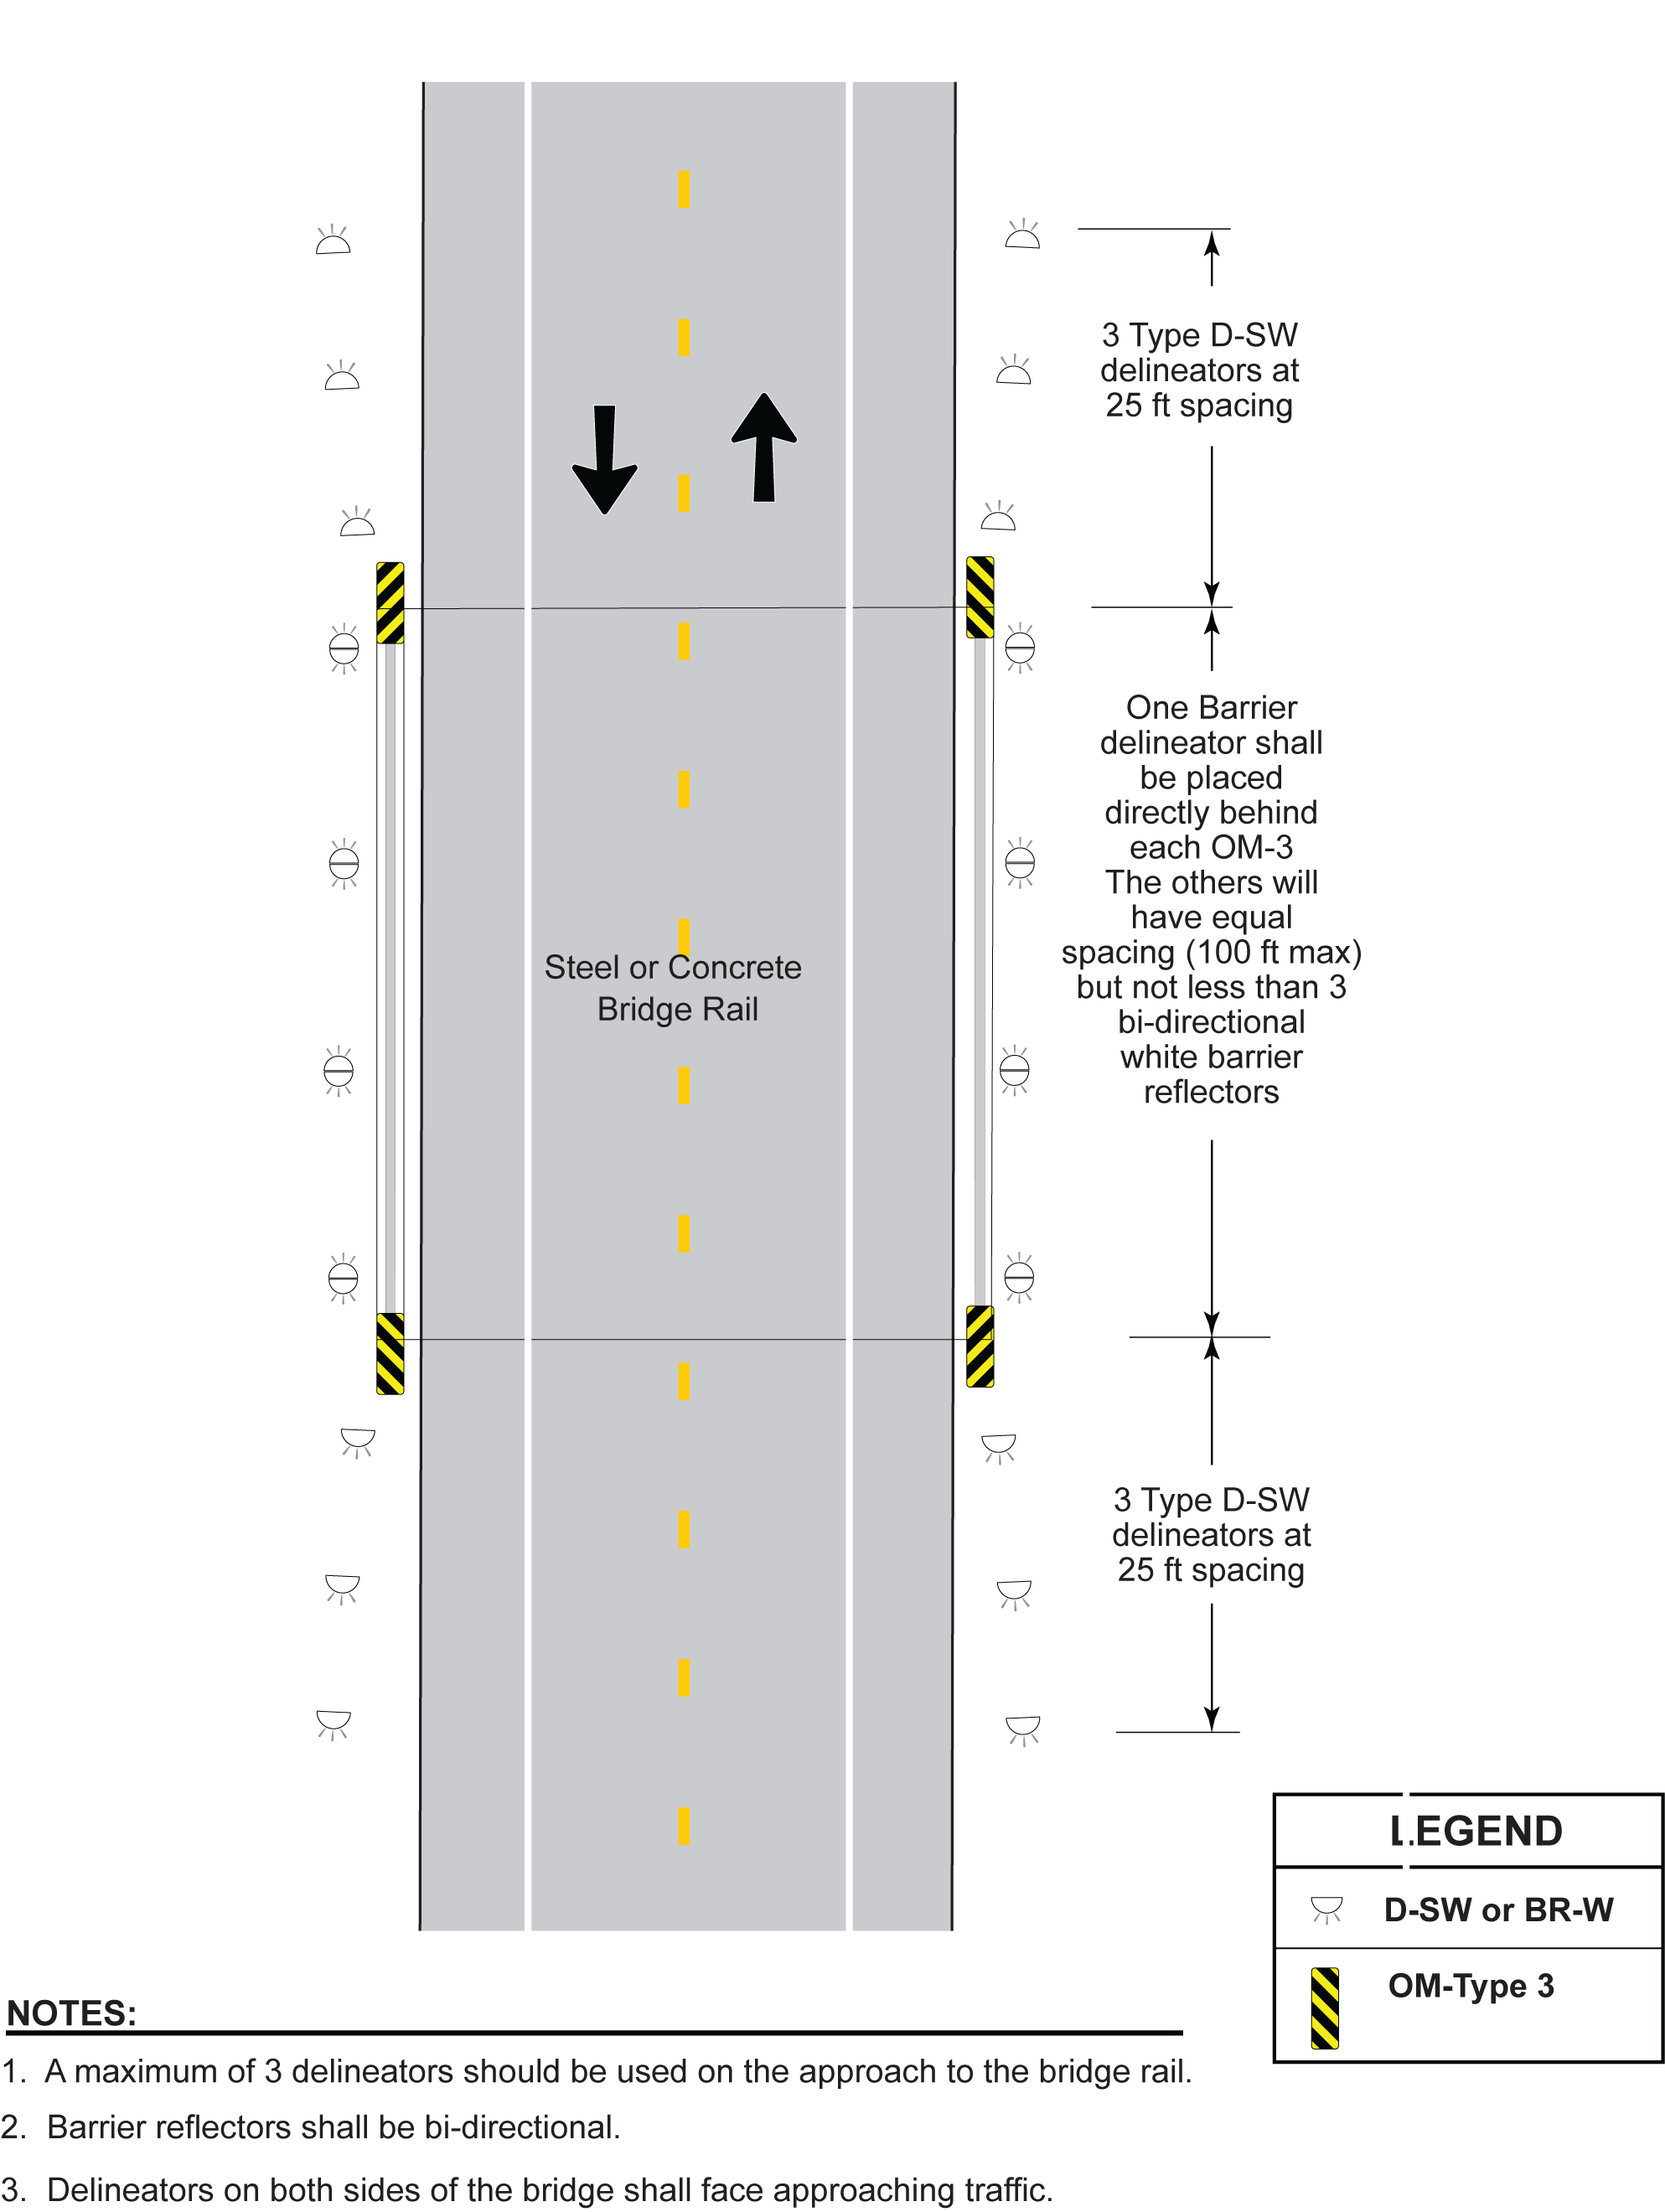
Figure 8-18. Two-Way Two-Lane Bridge with No Approach Rail (Bridge Rail Only)
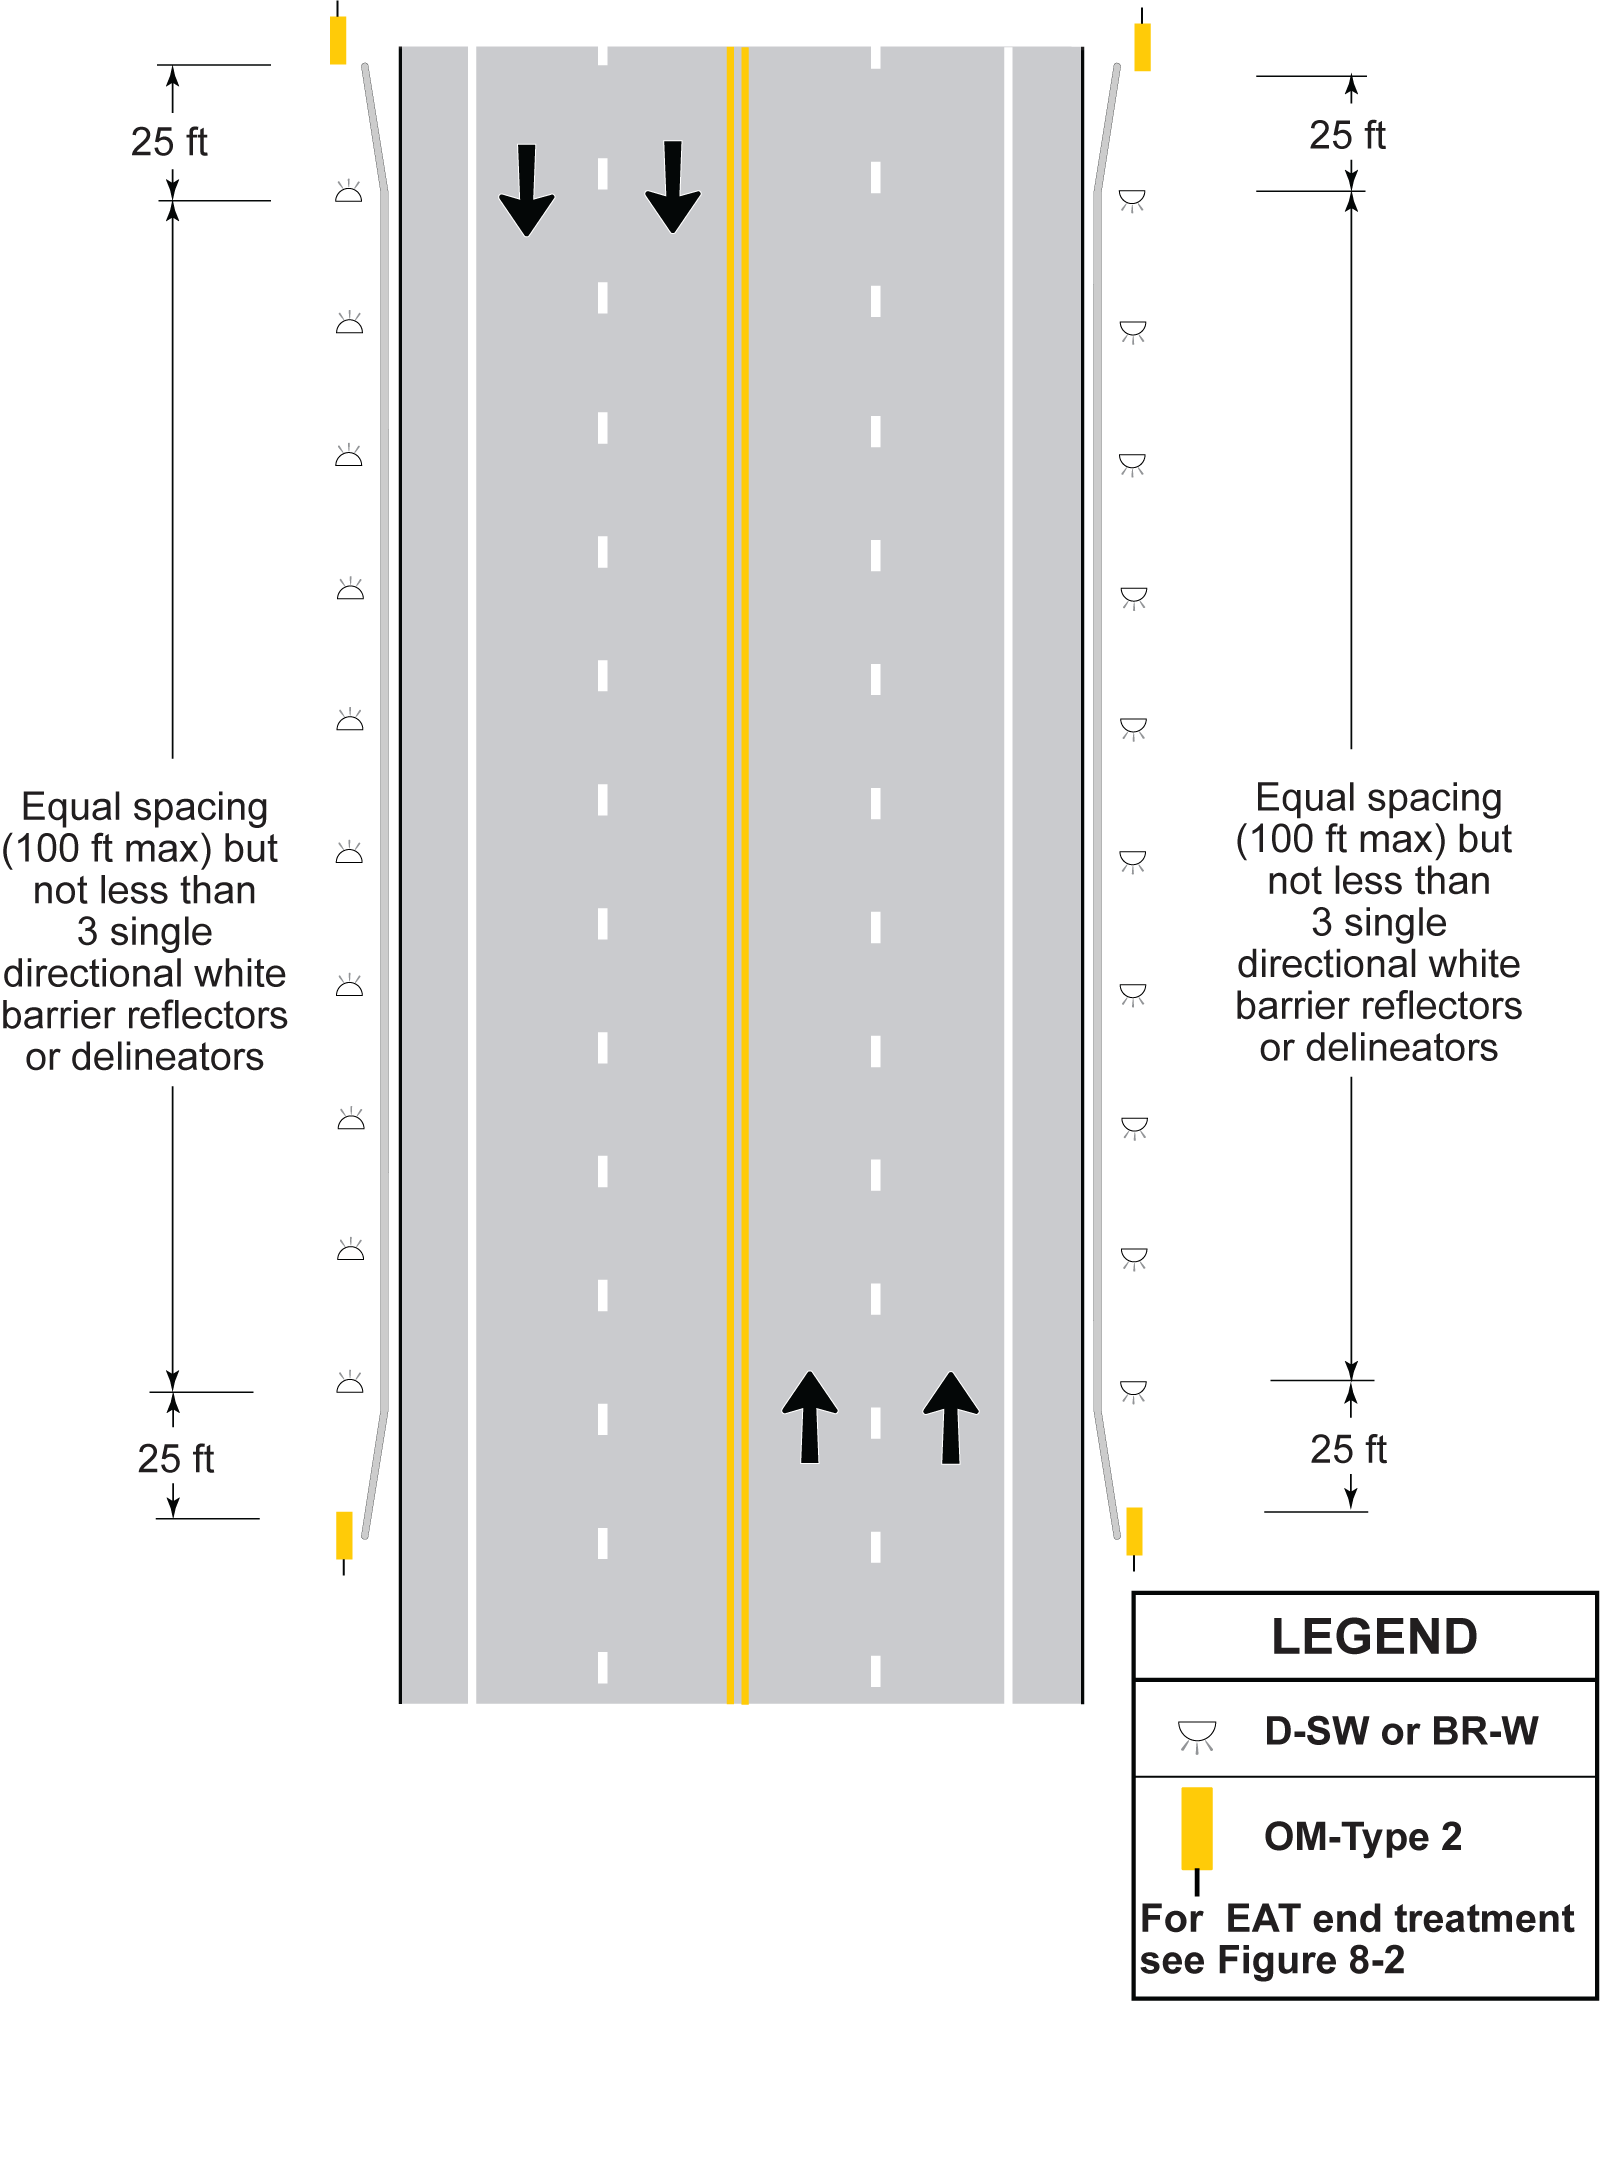
Figure 8-19. Multi-Lane Undivided Two-Way Road or Bridge with Guardrail
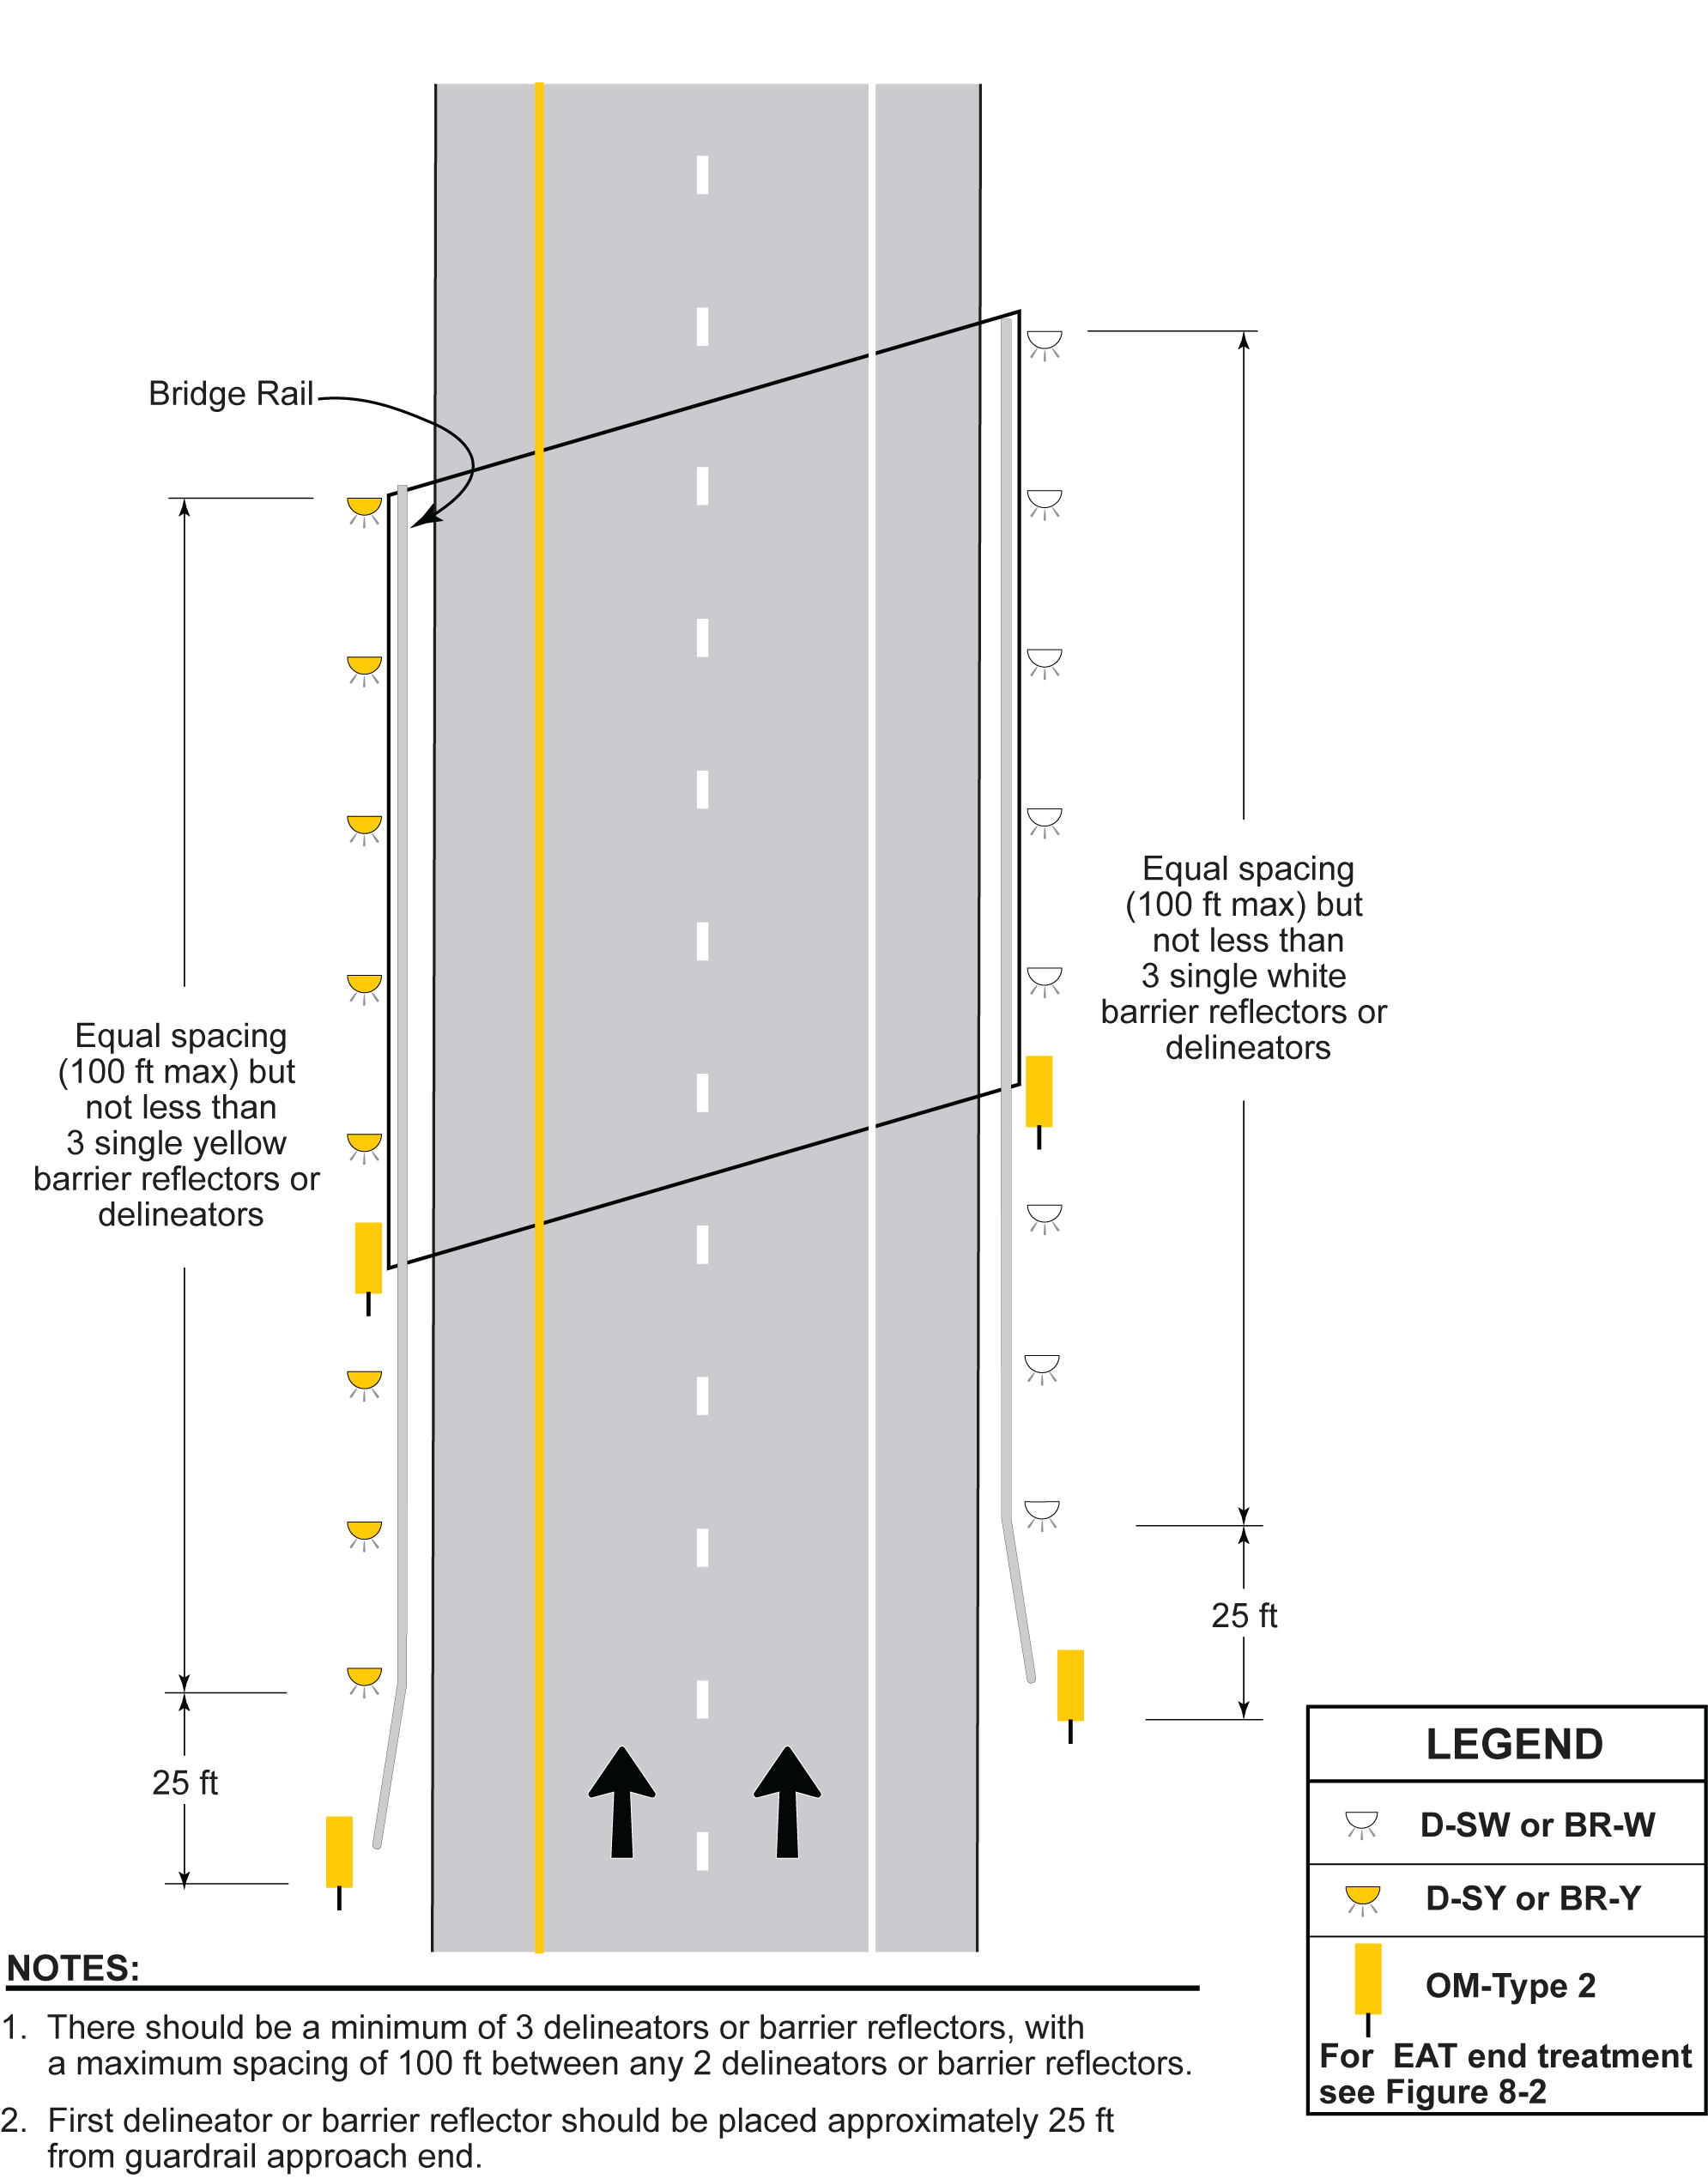
Figure 8-20. One-Way Road or Bridge (or Divided Highway) with Guardrail
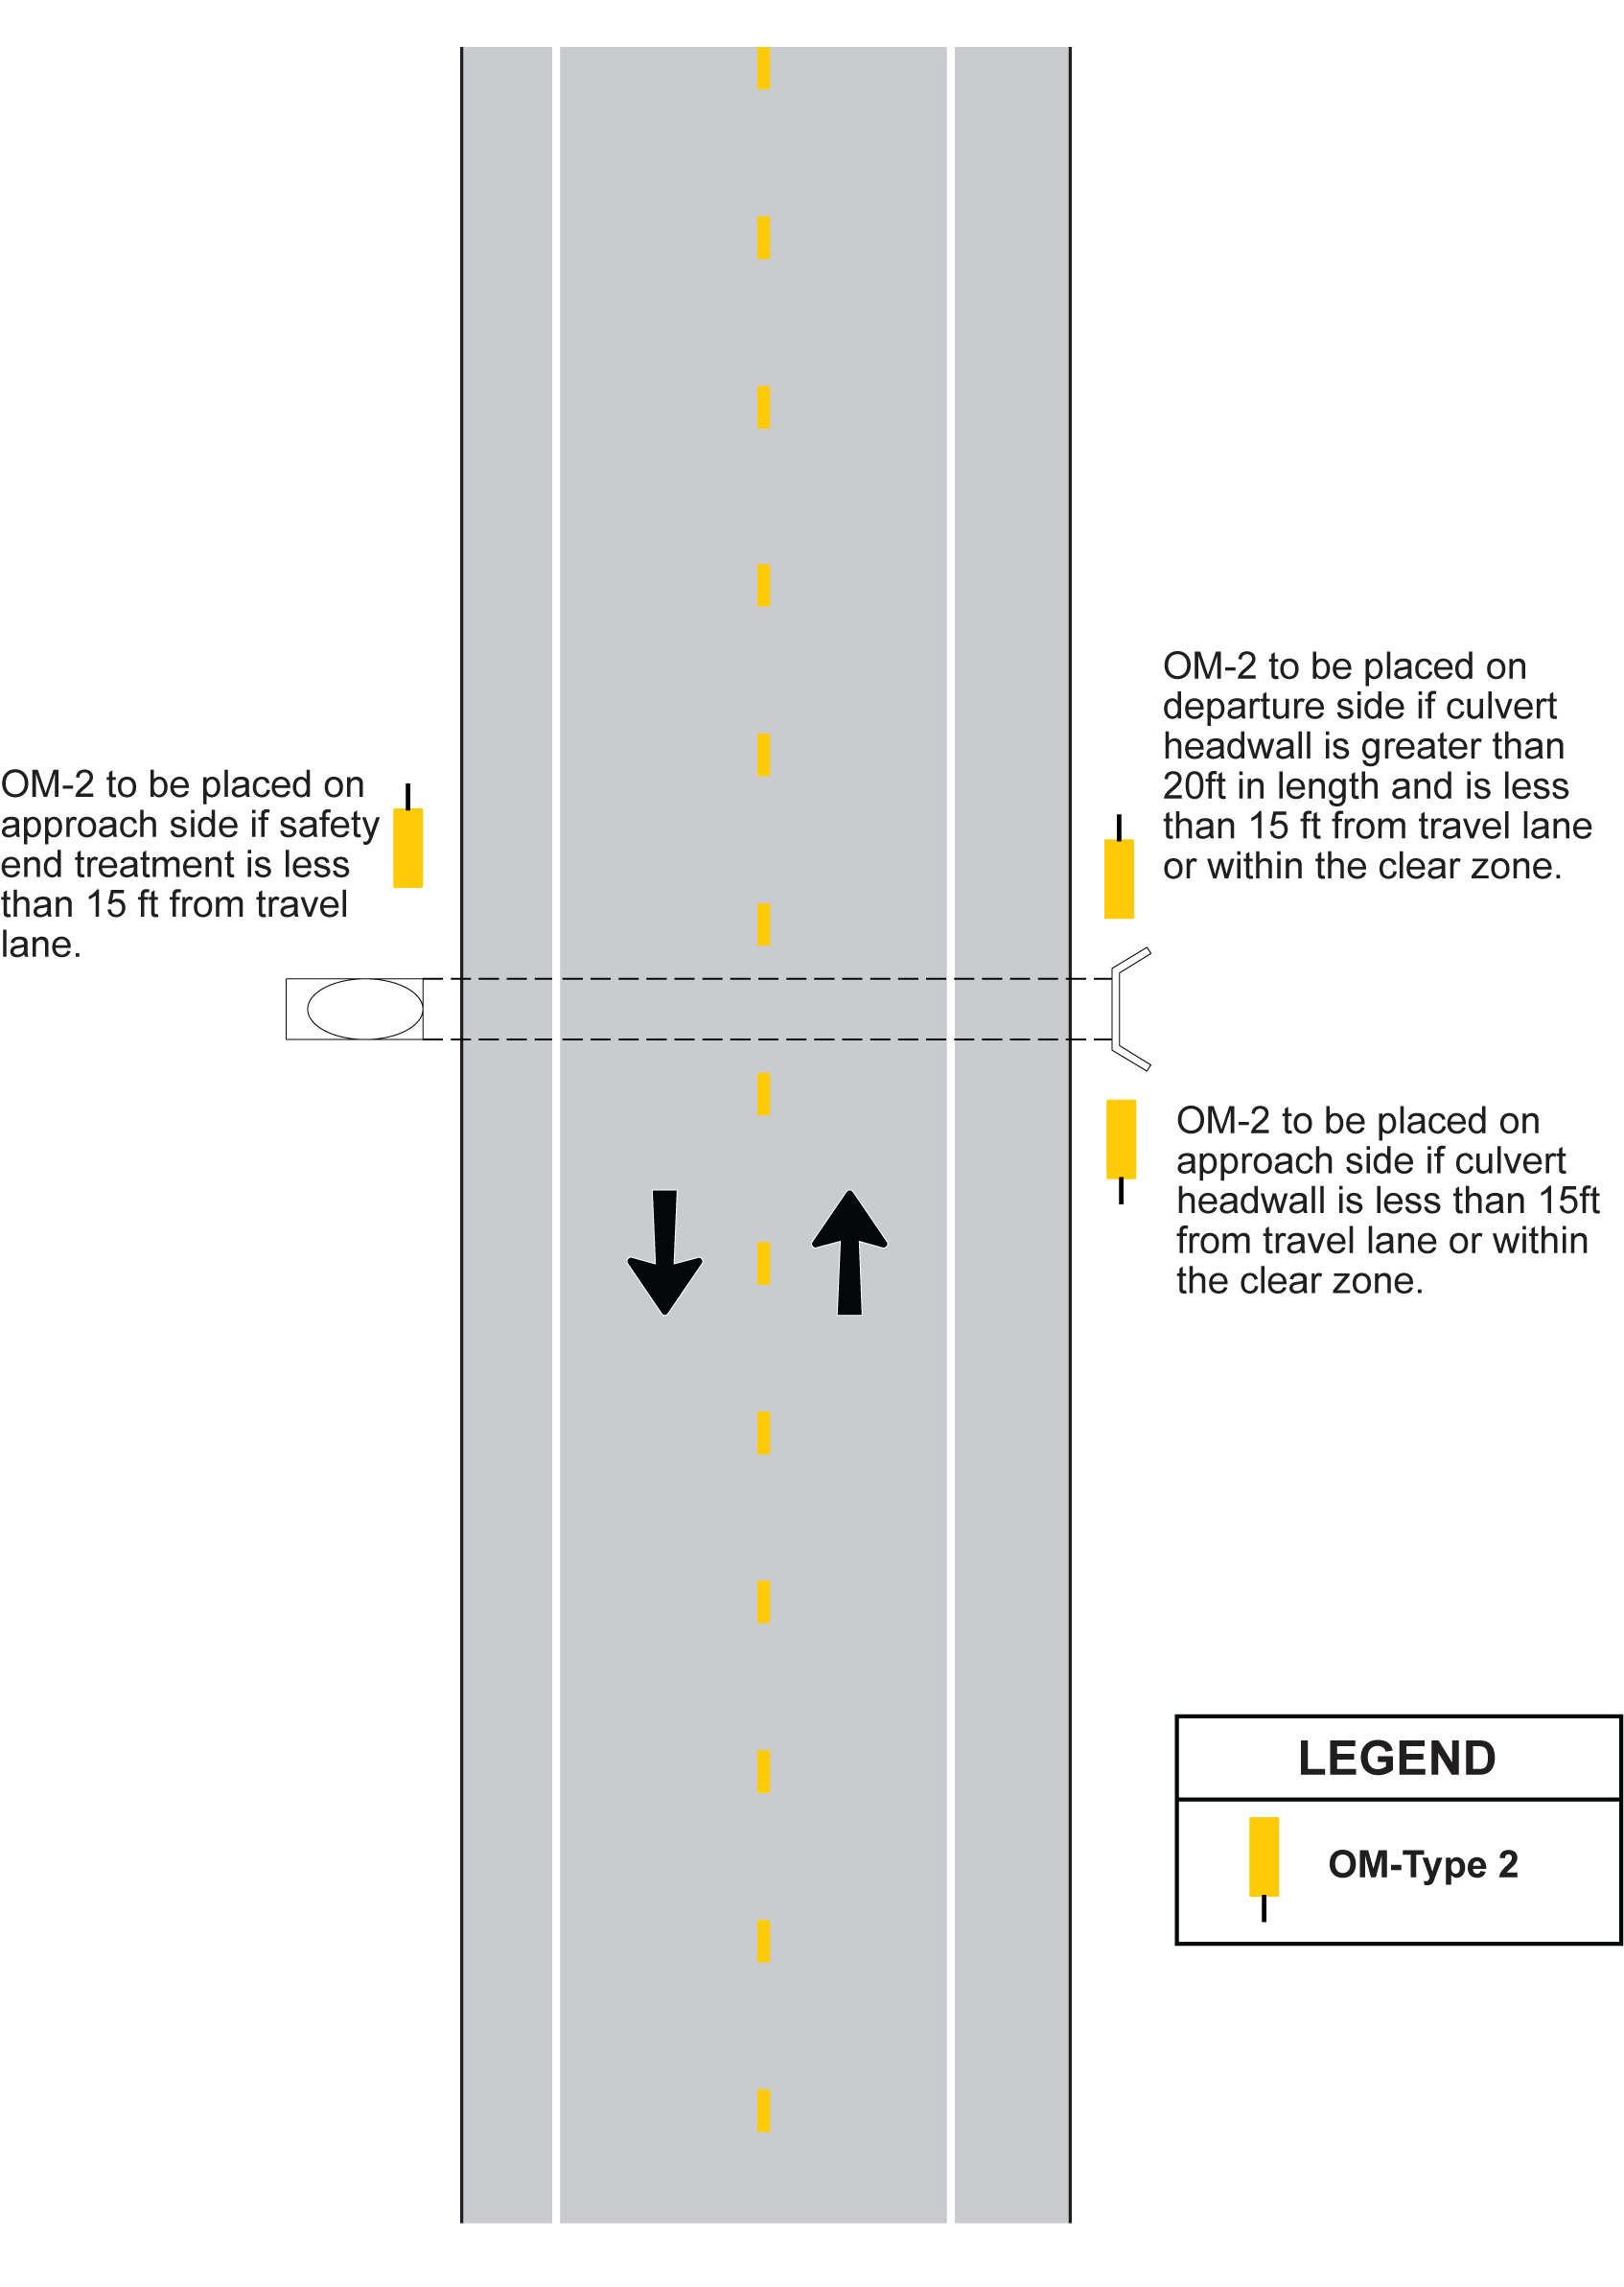
Figure 8-21. Two-Way Road Over Culvert
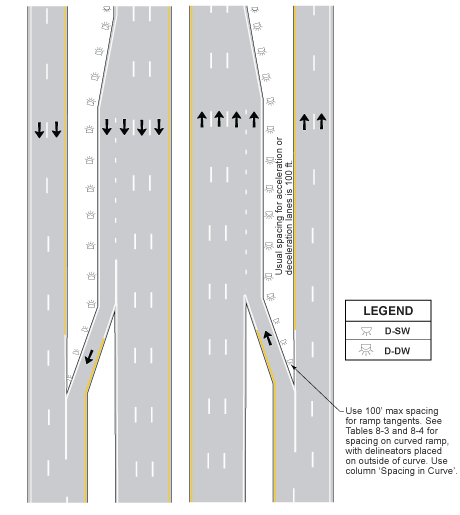
Figure 8-22. Freeway Delineation with Tangent Ramps
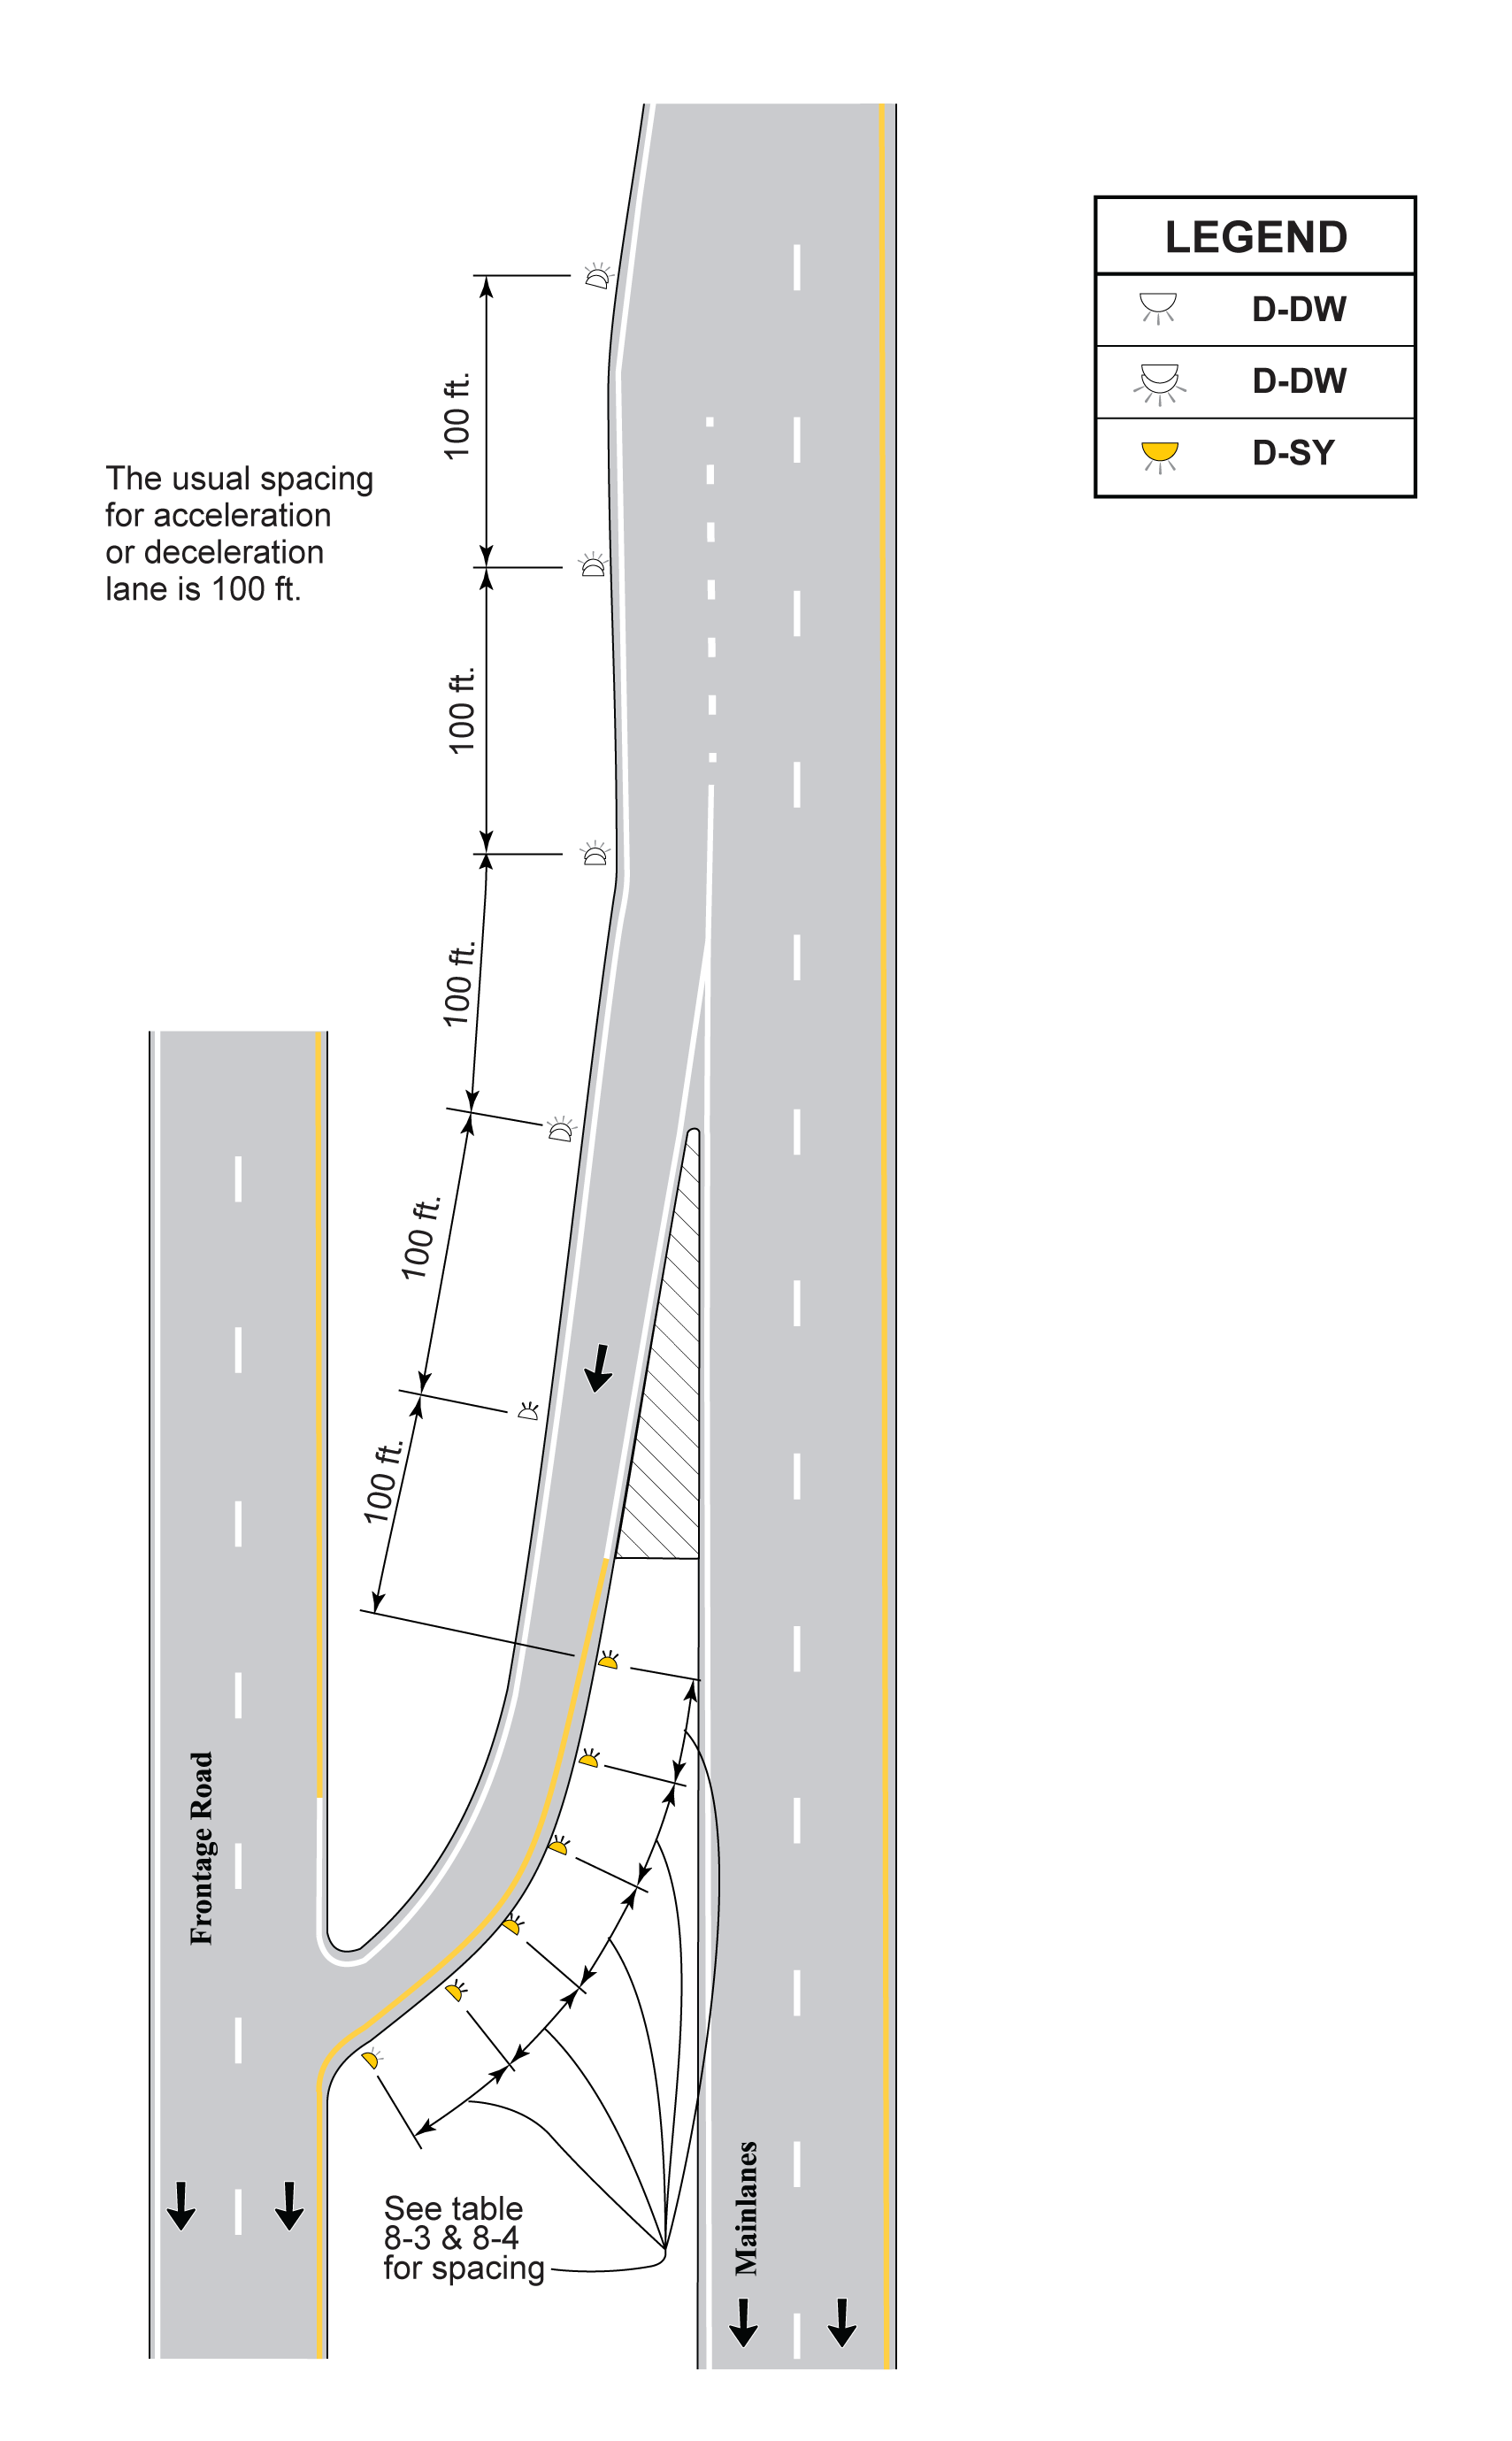
Figure 8-23. One-Way Curved Ramp Detail
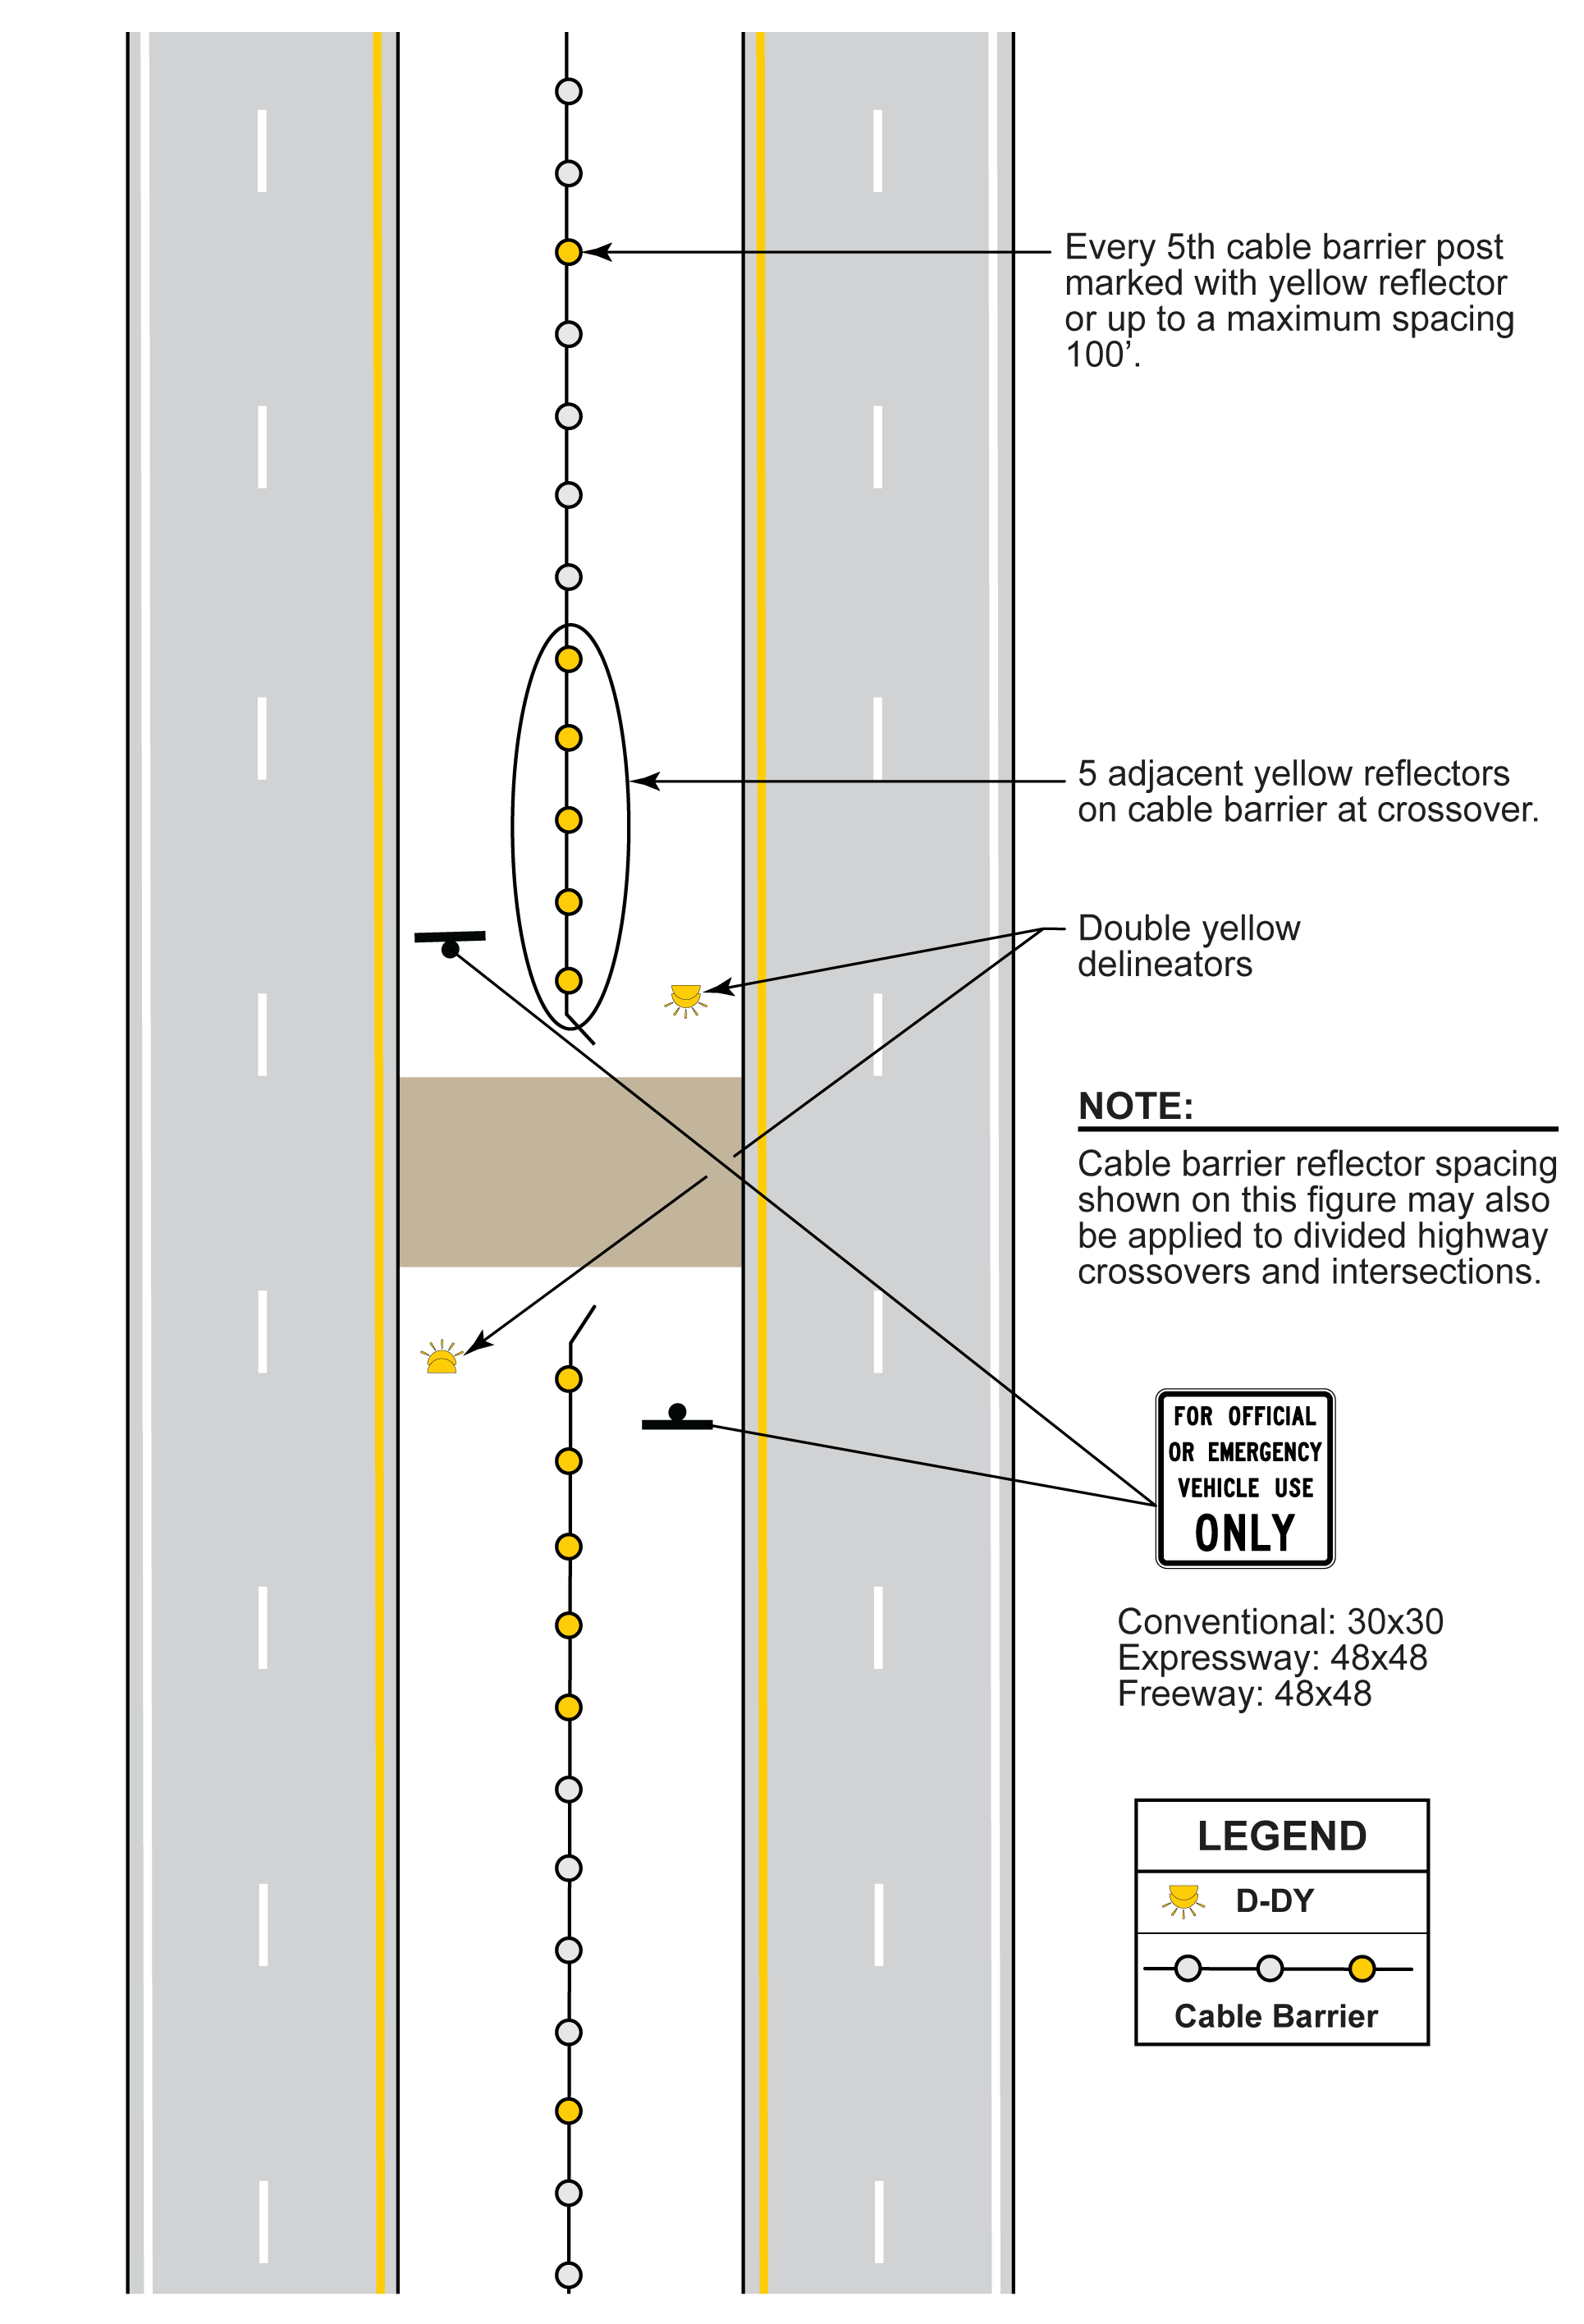
Figure 8-24. Emergency Crossover