Mailbox Bracket
The TxDOT universal mailbox bracket provides a single bracket that can be used to mount a small, medium, or large mailbox to a single or multiple support. Figure 9-11 illustrates the basic mailbox bracket. The extensions are used only with a medium or large mailbox. Bolts with a 3/8 inch diameter should be used to provide a tighter fit and prevent the mailbox from rocking. Figures 9-12 to 9-15 illustrate the attachment of the bracket to mailbox supports.
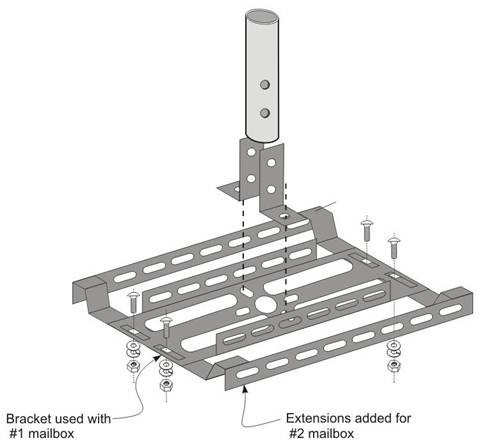
Figure 9-11. Mailbox Bracket (shown upside down)
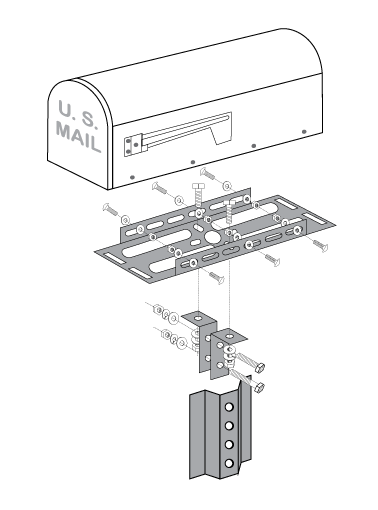
Figure 9-12. Attaching the Bracket to a Single Support
Figure 9-13. Use of the Adapter Plate for a Double Mailbox Installation
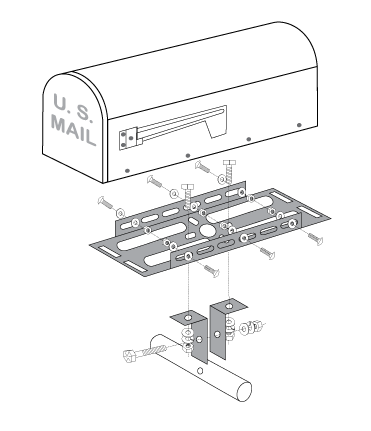
Figure 9-14. Attaching the Bracket to the Multiple Support
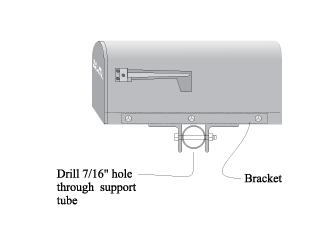
Figure 9-15. Bolting the Bracket to a Multiple Support Tube
The following list of tasks provides step-by-step instructions for putting the bracket together:
- Attach extension bracket (if required):
- For a small mailbox, no extension brackets are used.
- For a medium mailbox, an extension bracket is used on one side only.
- For a large mailbox, extension brackets are installed on each side.
- Bolt angle brackets to bottom of mailbox bracket:
- See Figures 9-12 and 9-13 for orientation with a single or double mailbox support.
- See Figures 9-14 and 9-15 for orientation with a multiple support.
- Bolt bracket to mailbox.
- Bolt assembled bracket/mailbox to support.