Section 3: Intersection Departure Illustrations
Introduction
Figures 6-1, 6-2, and 6-3 illustrate the placement of signs on the departure, the no sign zone concept, and the minimum separation distance between signs.
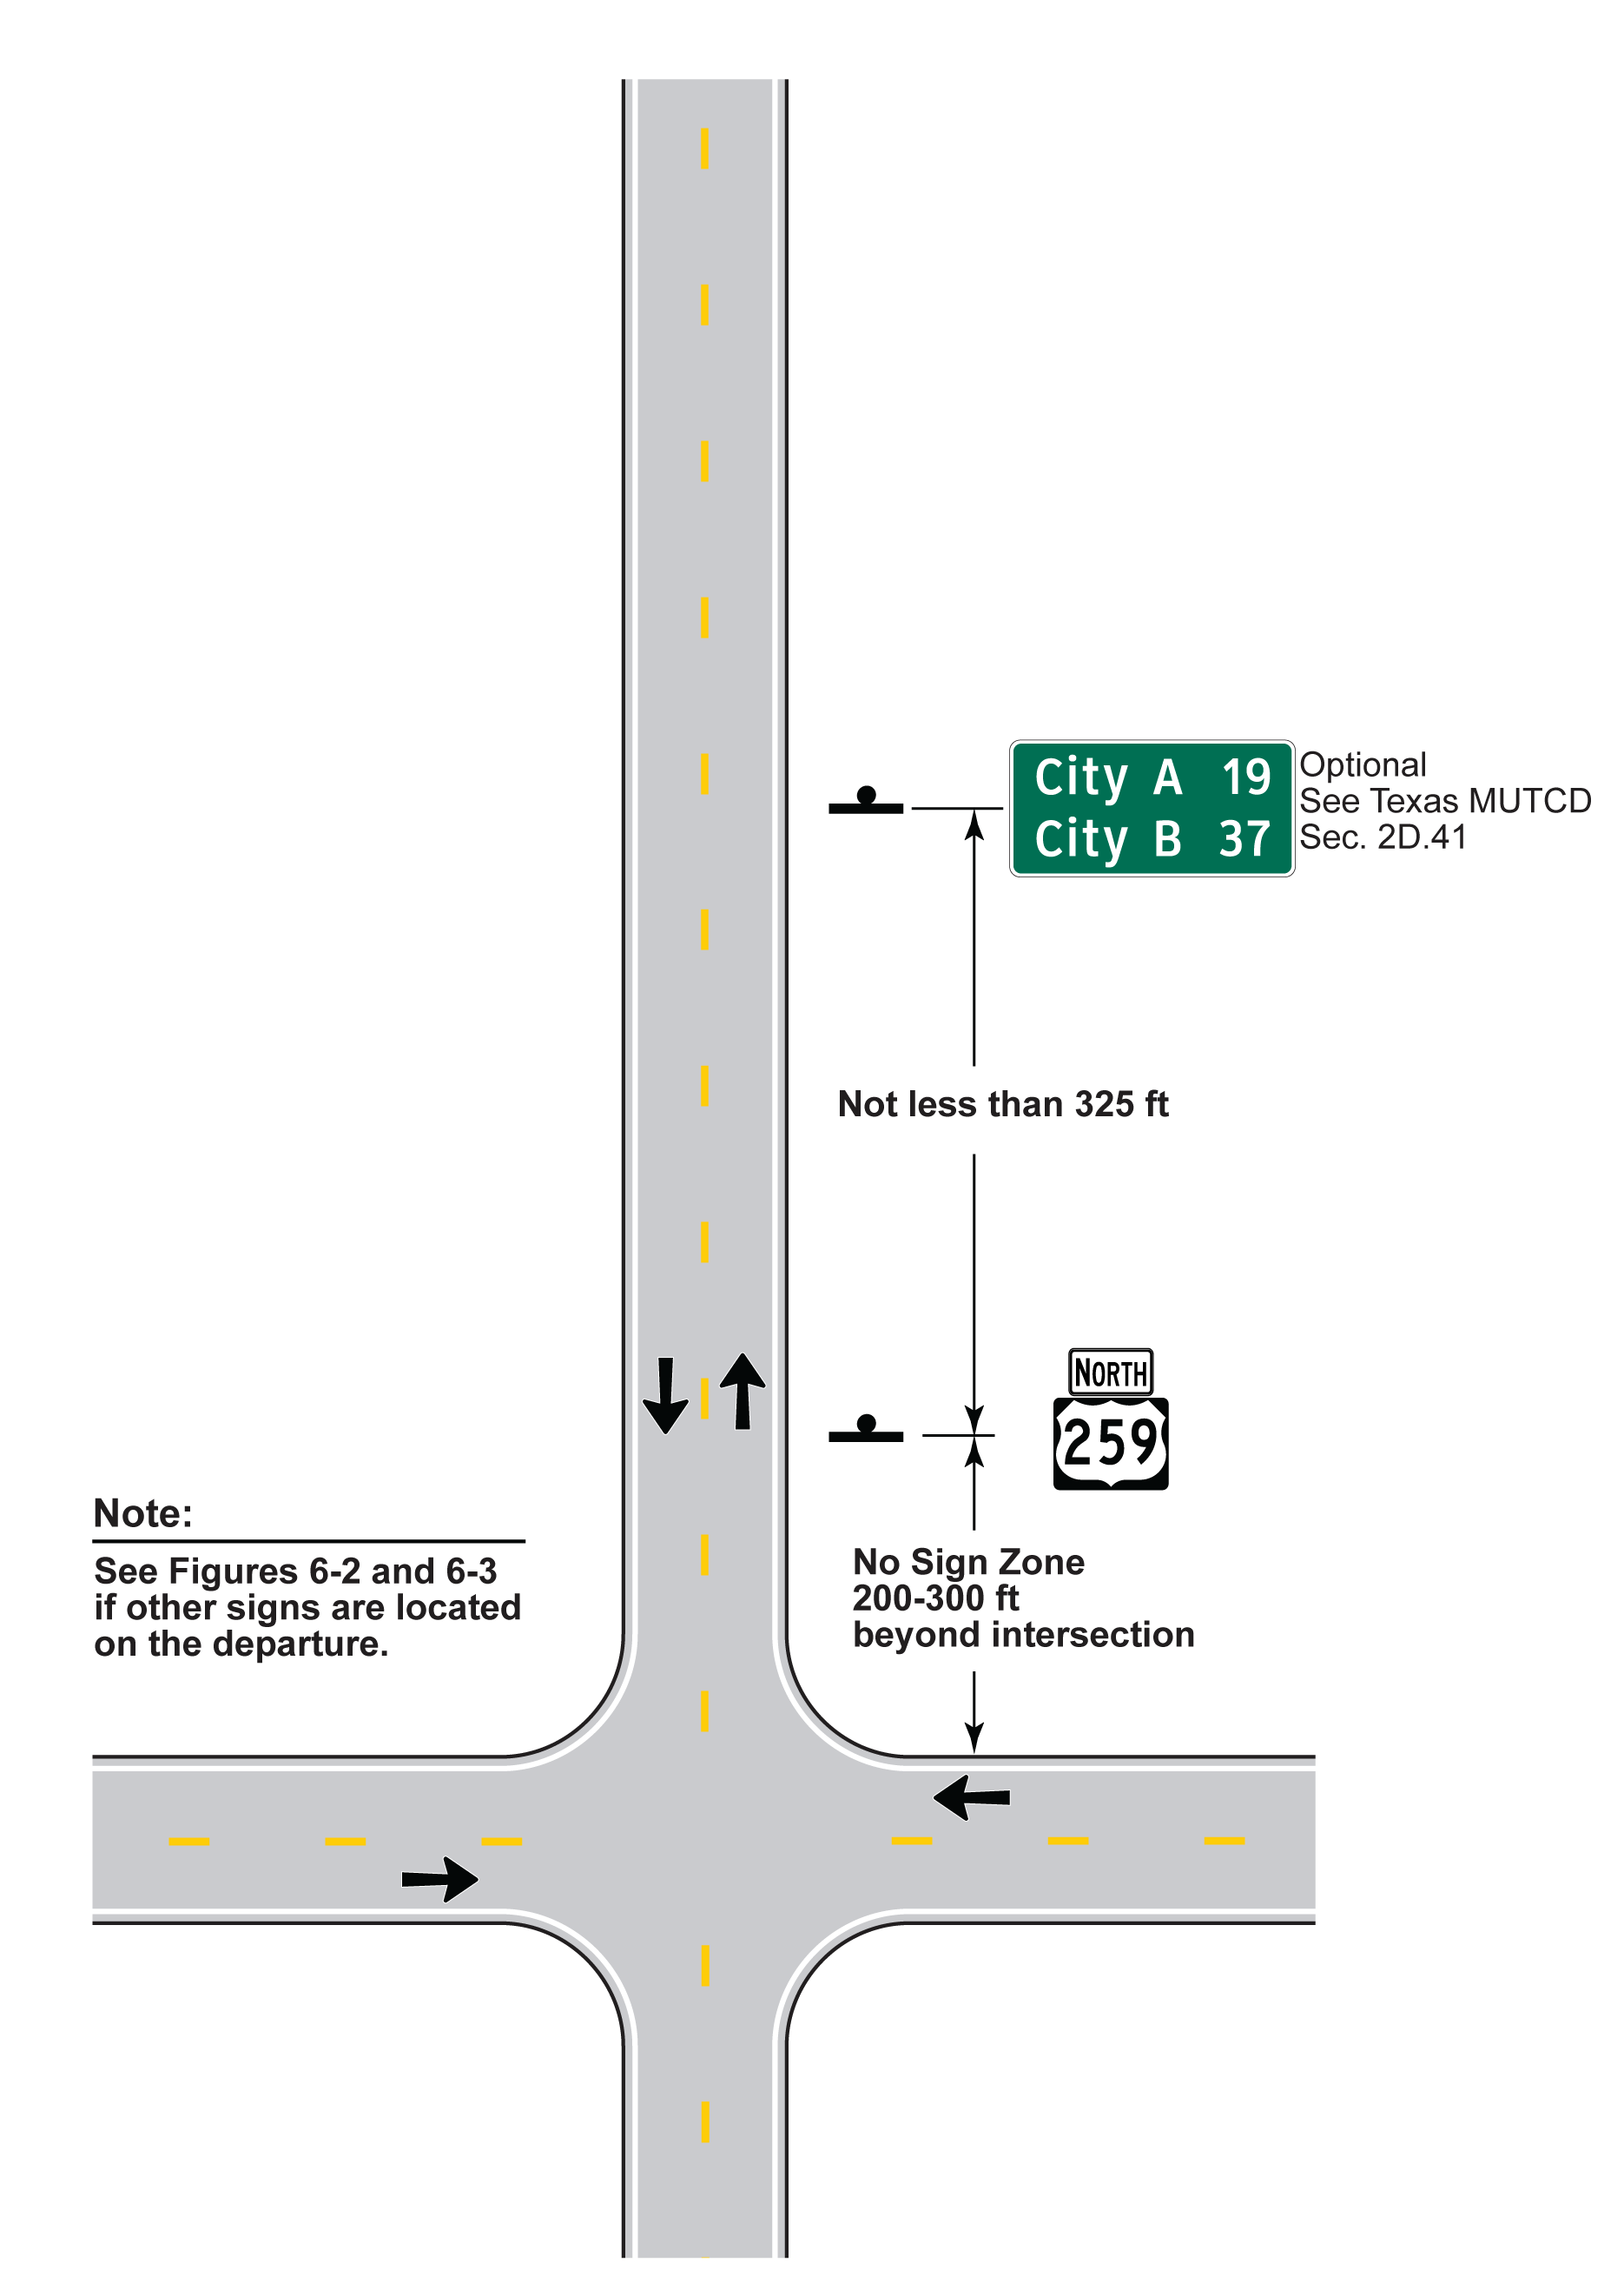
Figure 6-1. Departure Sign Placement, Guide Signs Beyond the No Sign Zone

Figure 6-2. Departure Sign Placement, Multiple Signs Beyond the No Sign Zone
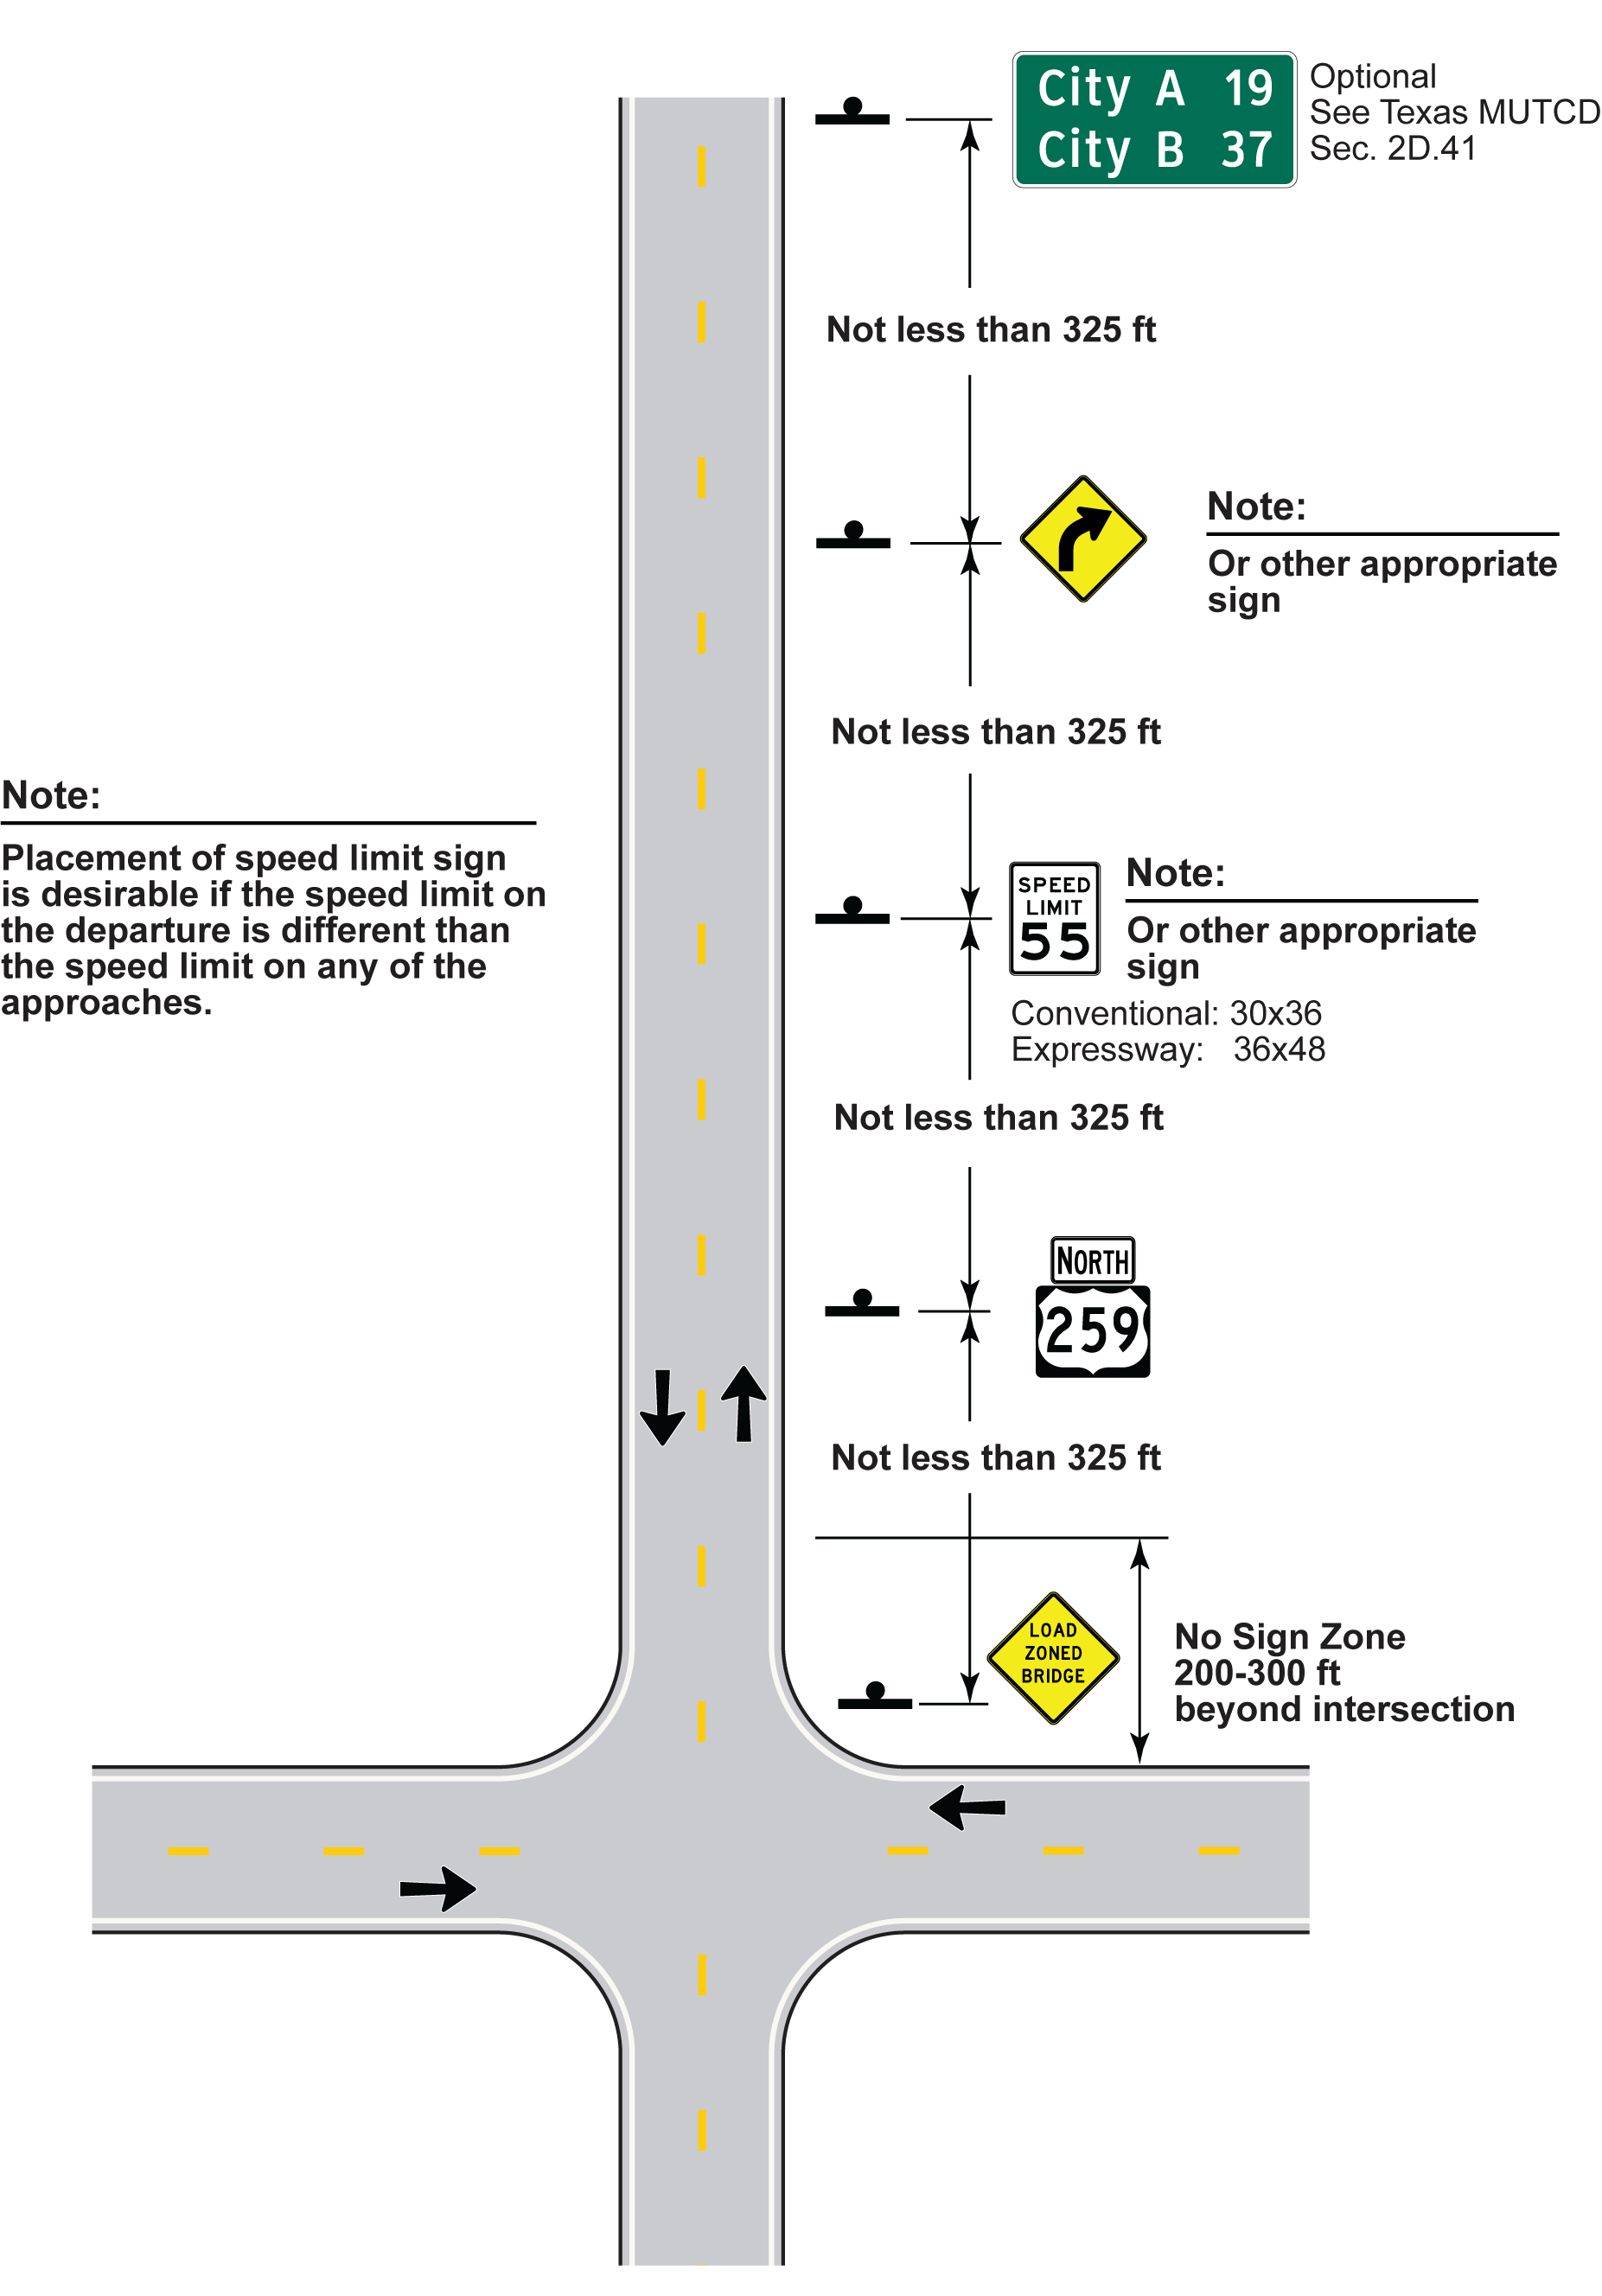
Figure 6-3. Departure Sign Placement, Signs Located Within the No Sign Zone