Section 3: 3-Leg T Intersection Illustrations
Introduction
This section illustrates the signing placement for the approach to a 3-leg T intersection. The figures are drawn so that the signed approach is intersecting a main roadway. Each of the figures illustrates how different intersection characteristics affect the signing on the approach.
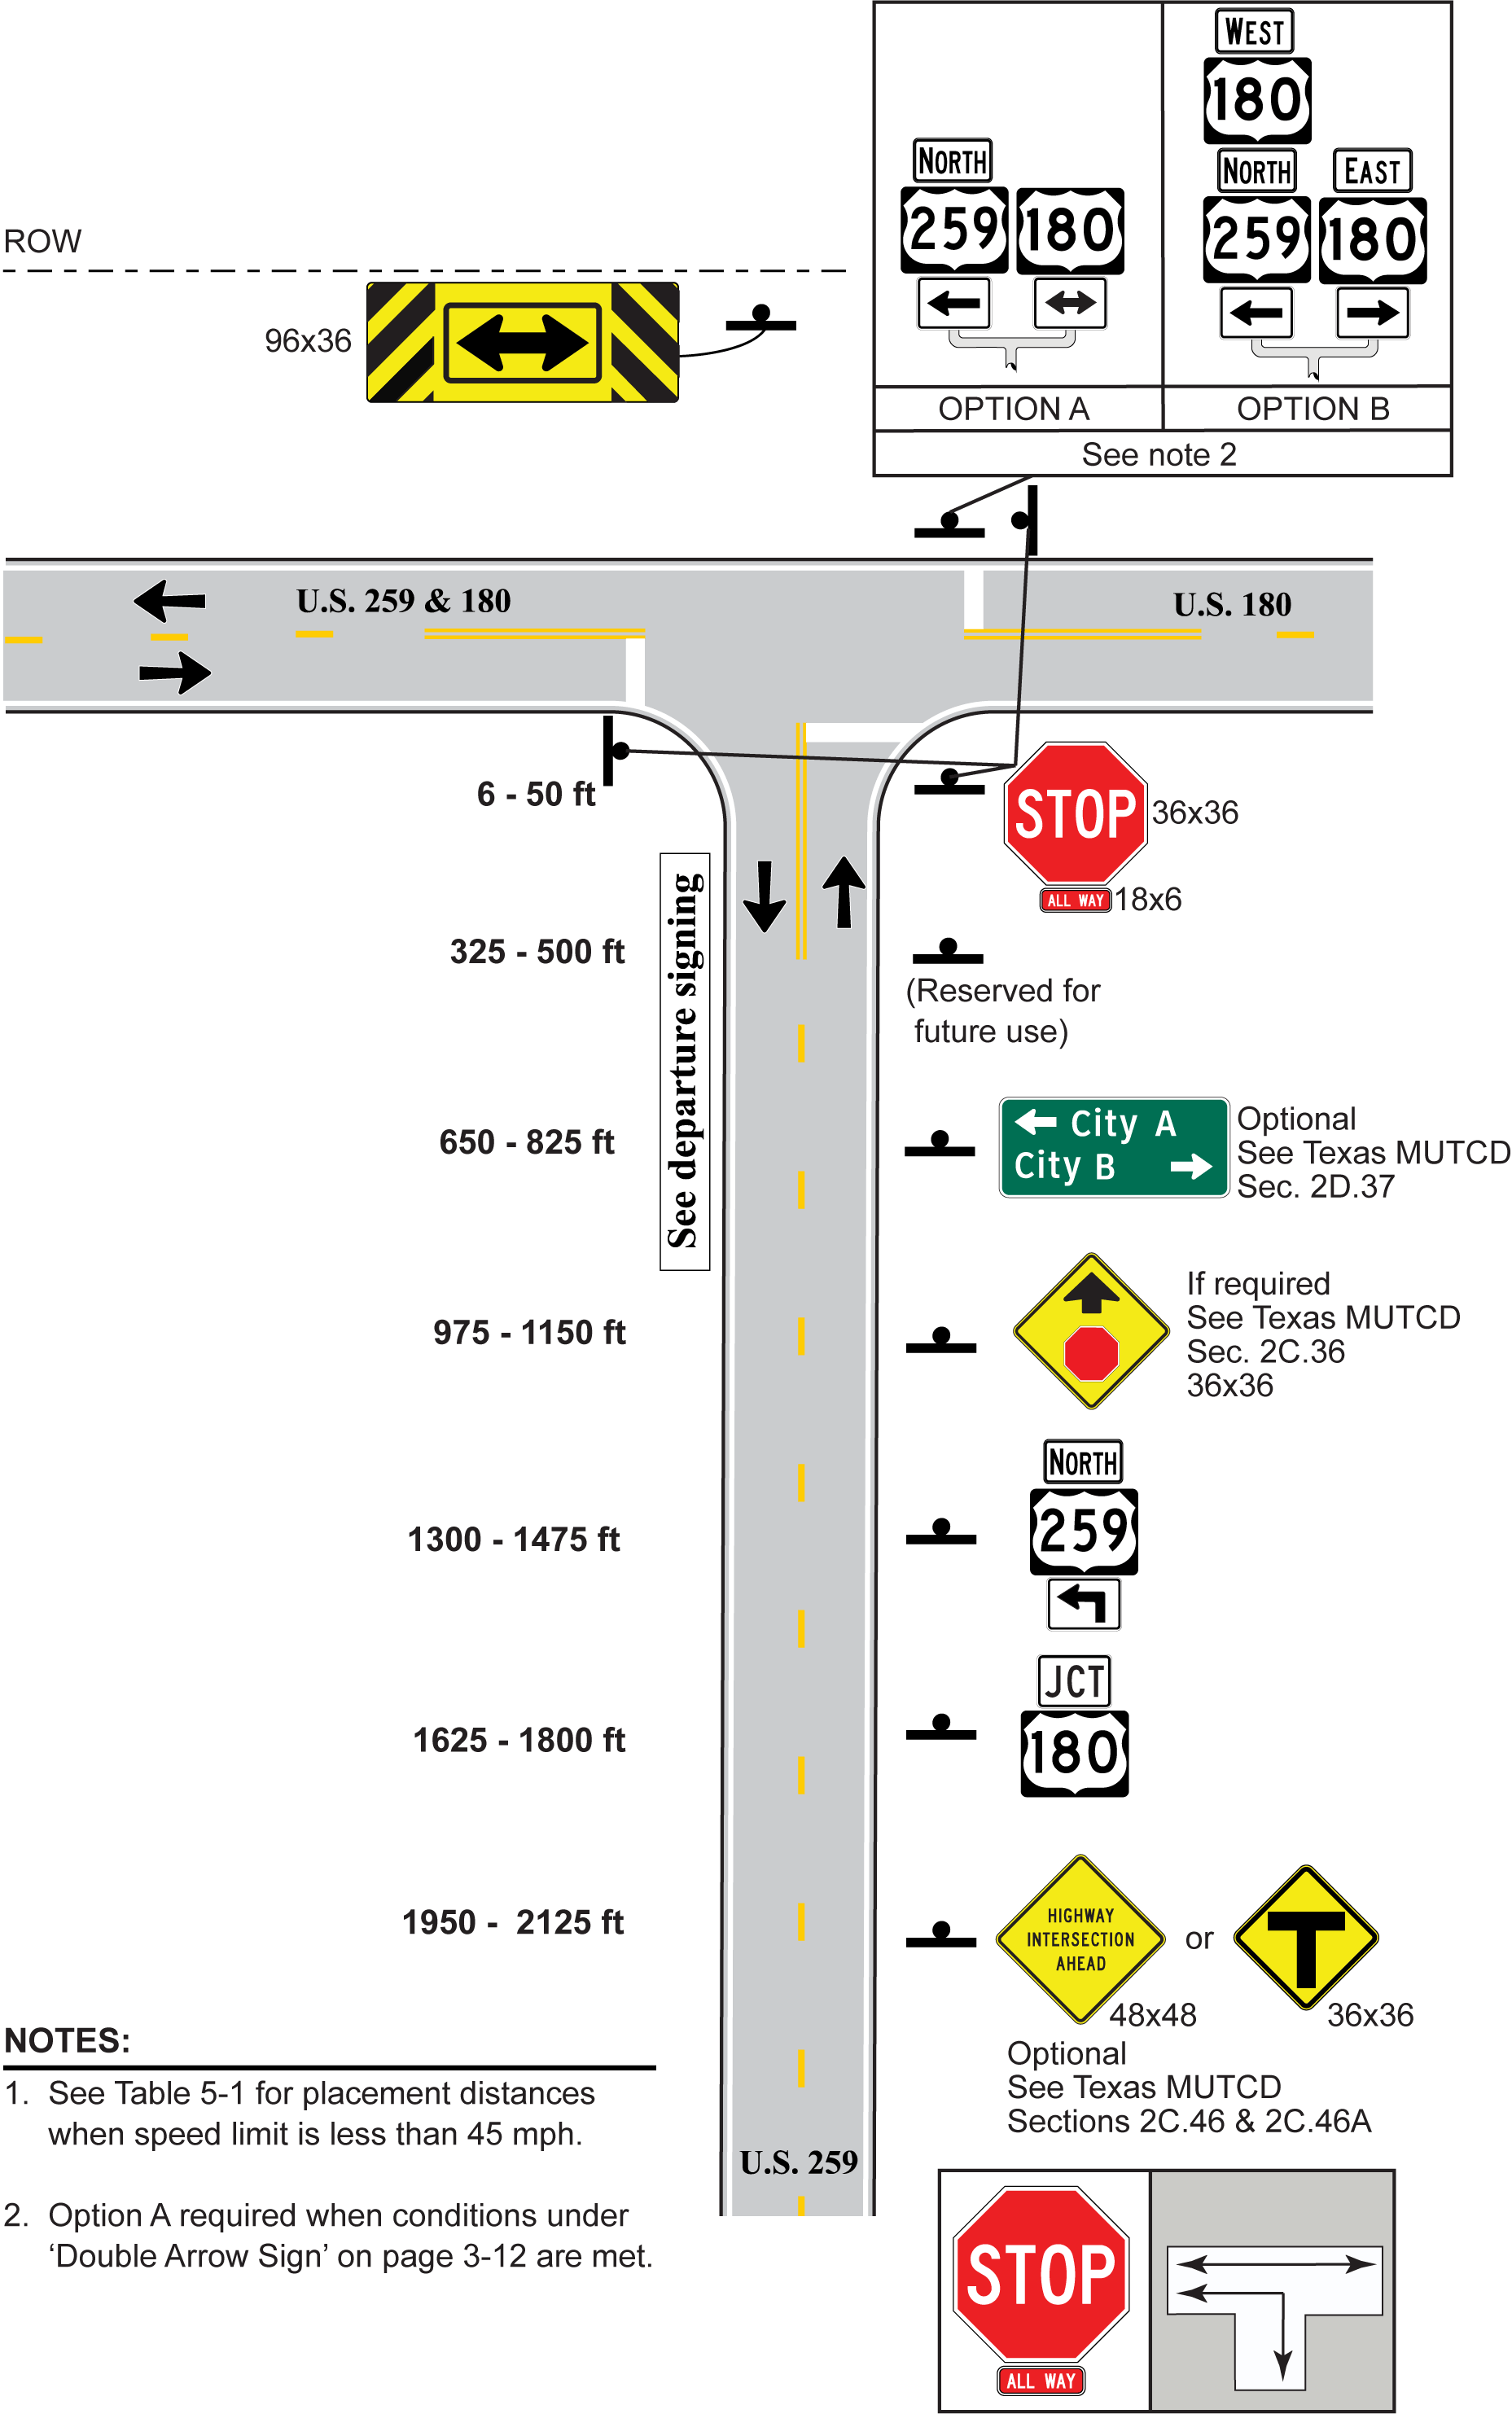
Figure 5-4. 3-Leg T, 1 Approach Lane, Stop Control, Approach Route Goes Left
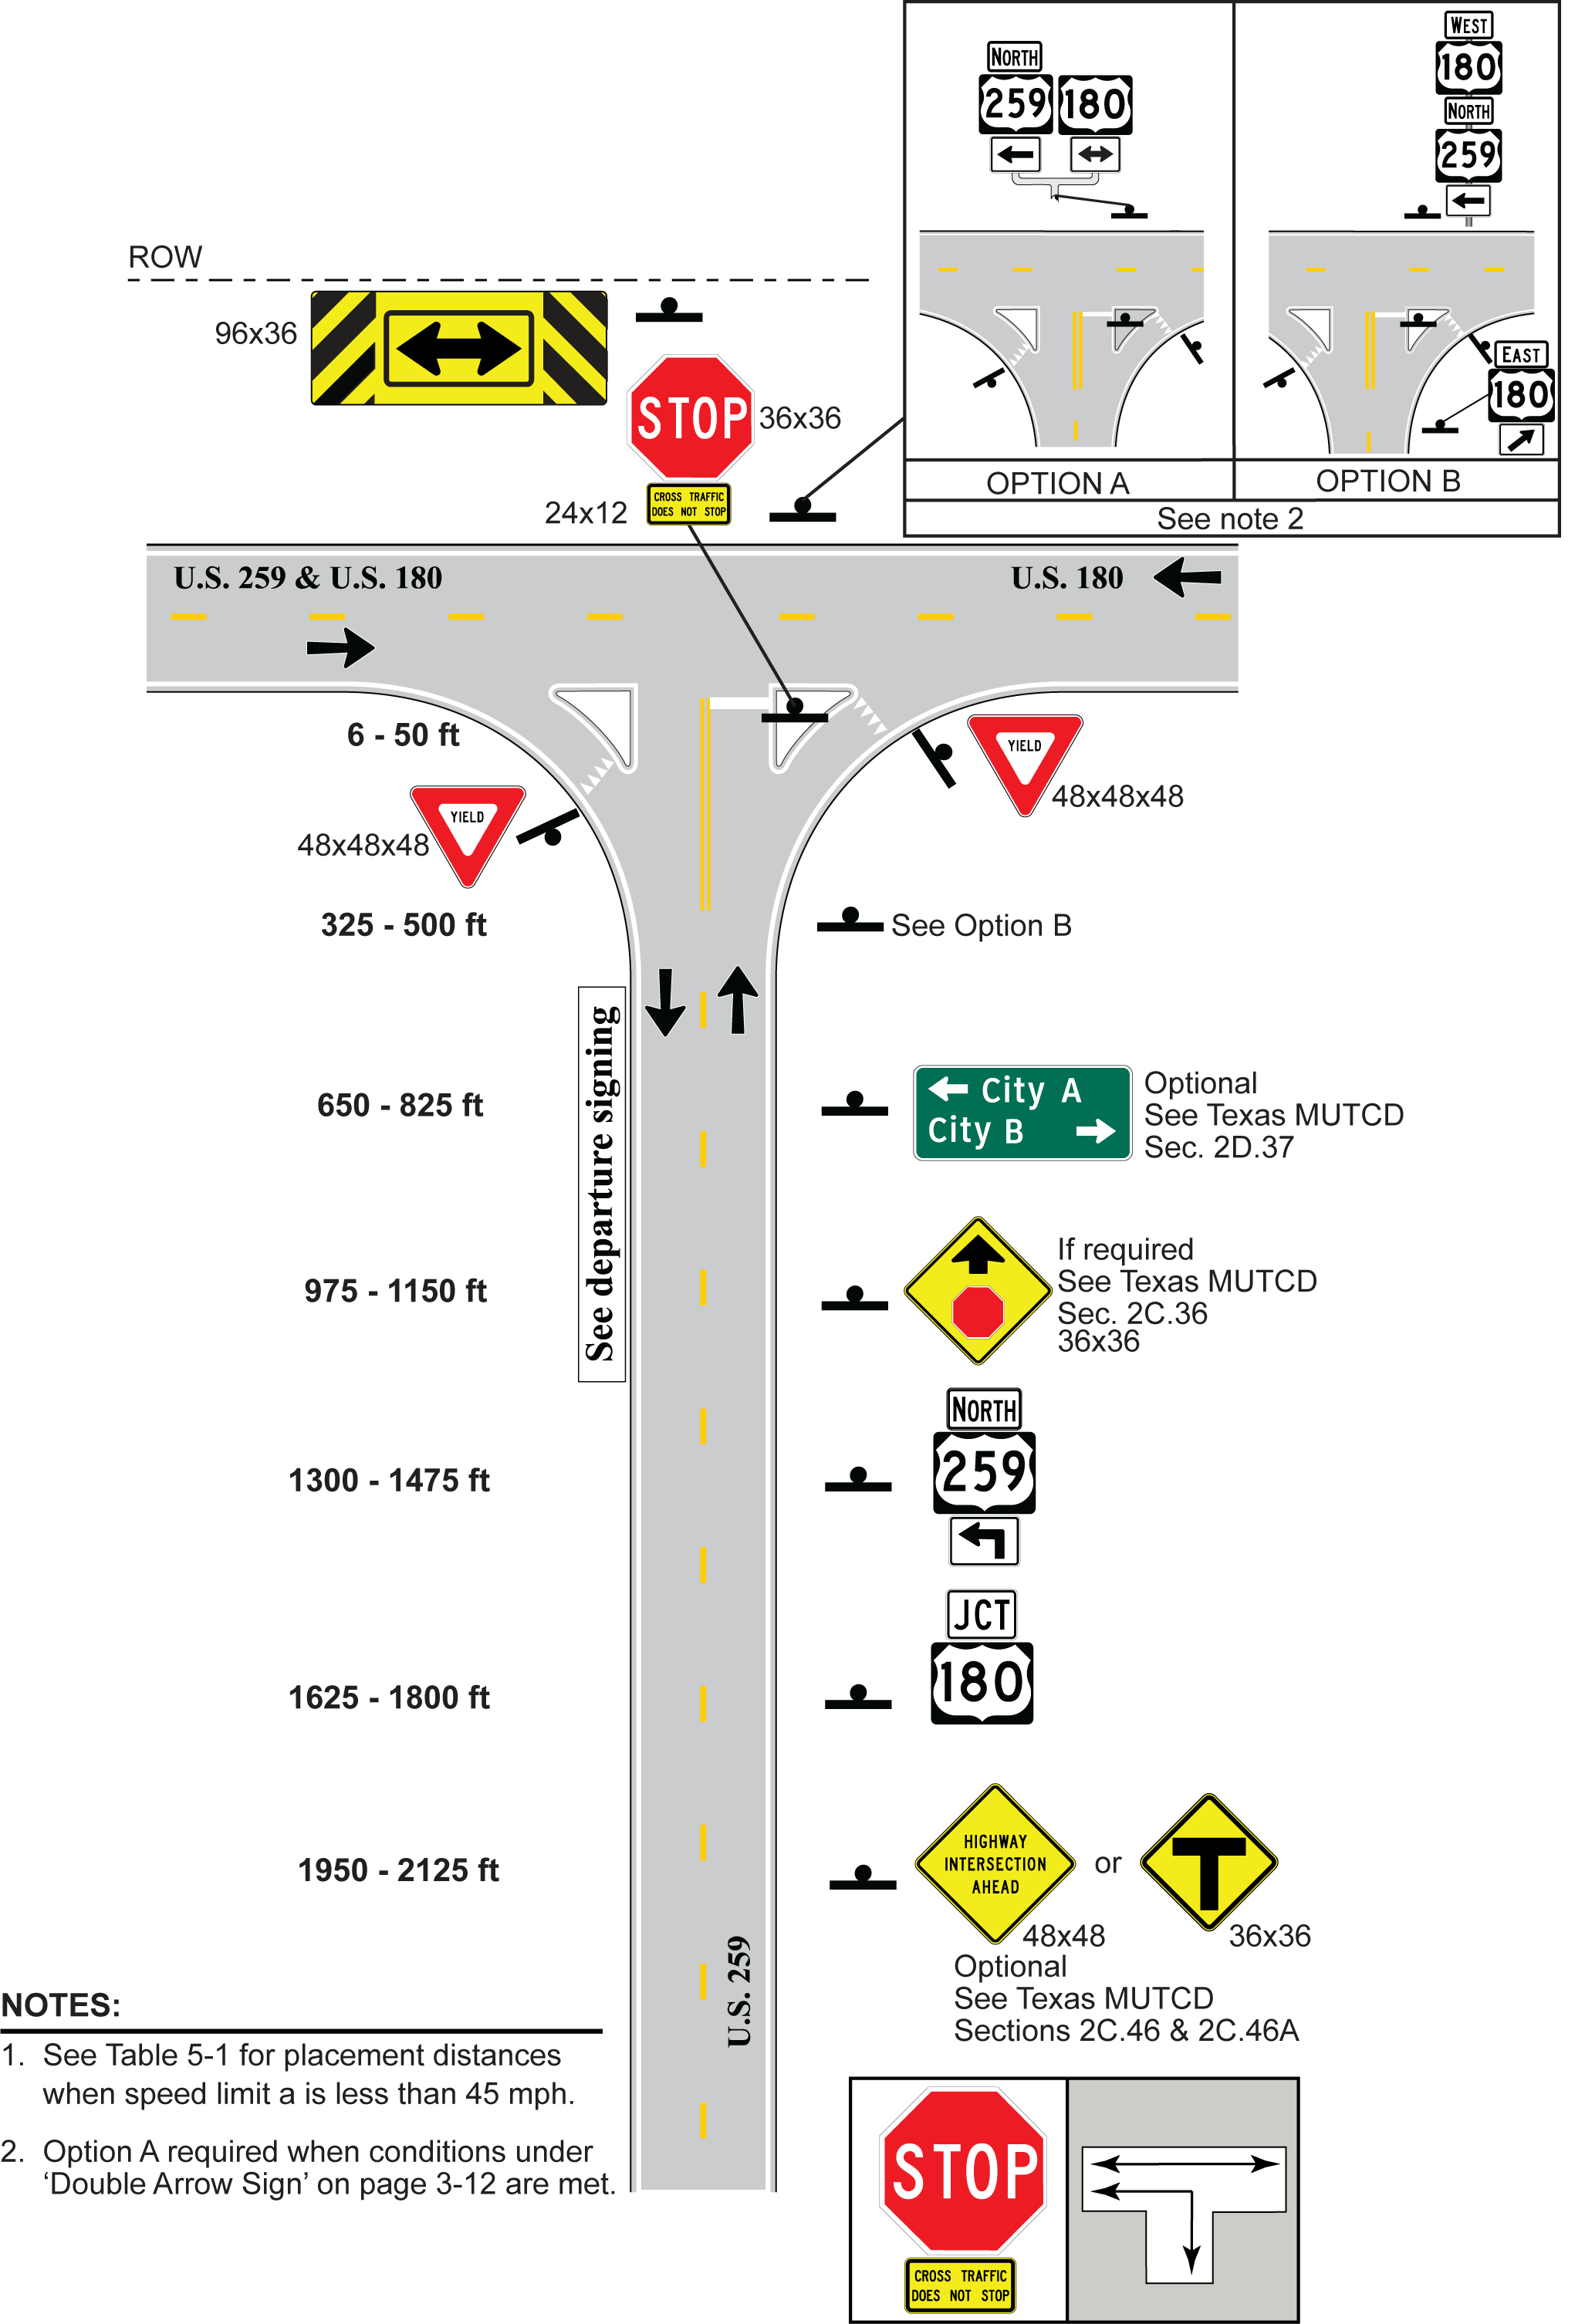
Figure 5-5. 3-Leg T, 1 Approach Lane with Free Right Turn, Stop Control, Approach Route Goes Left
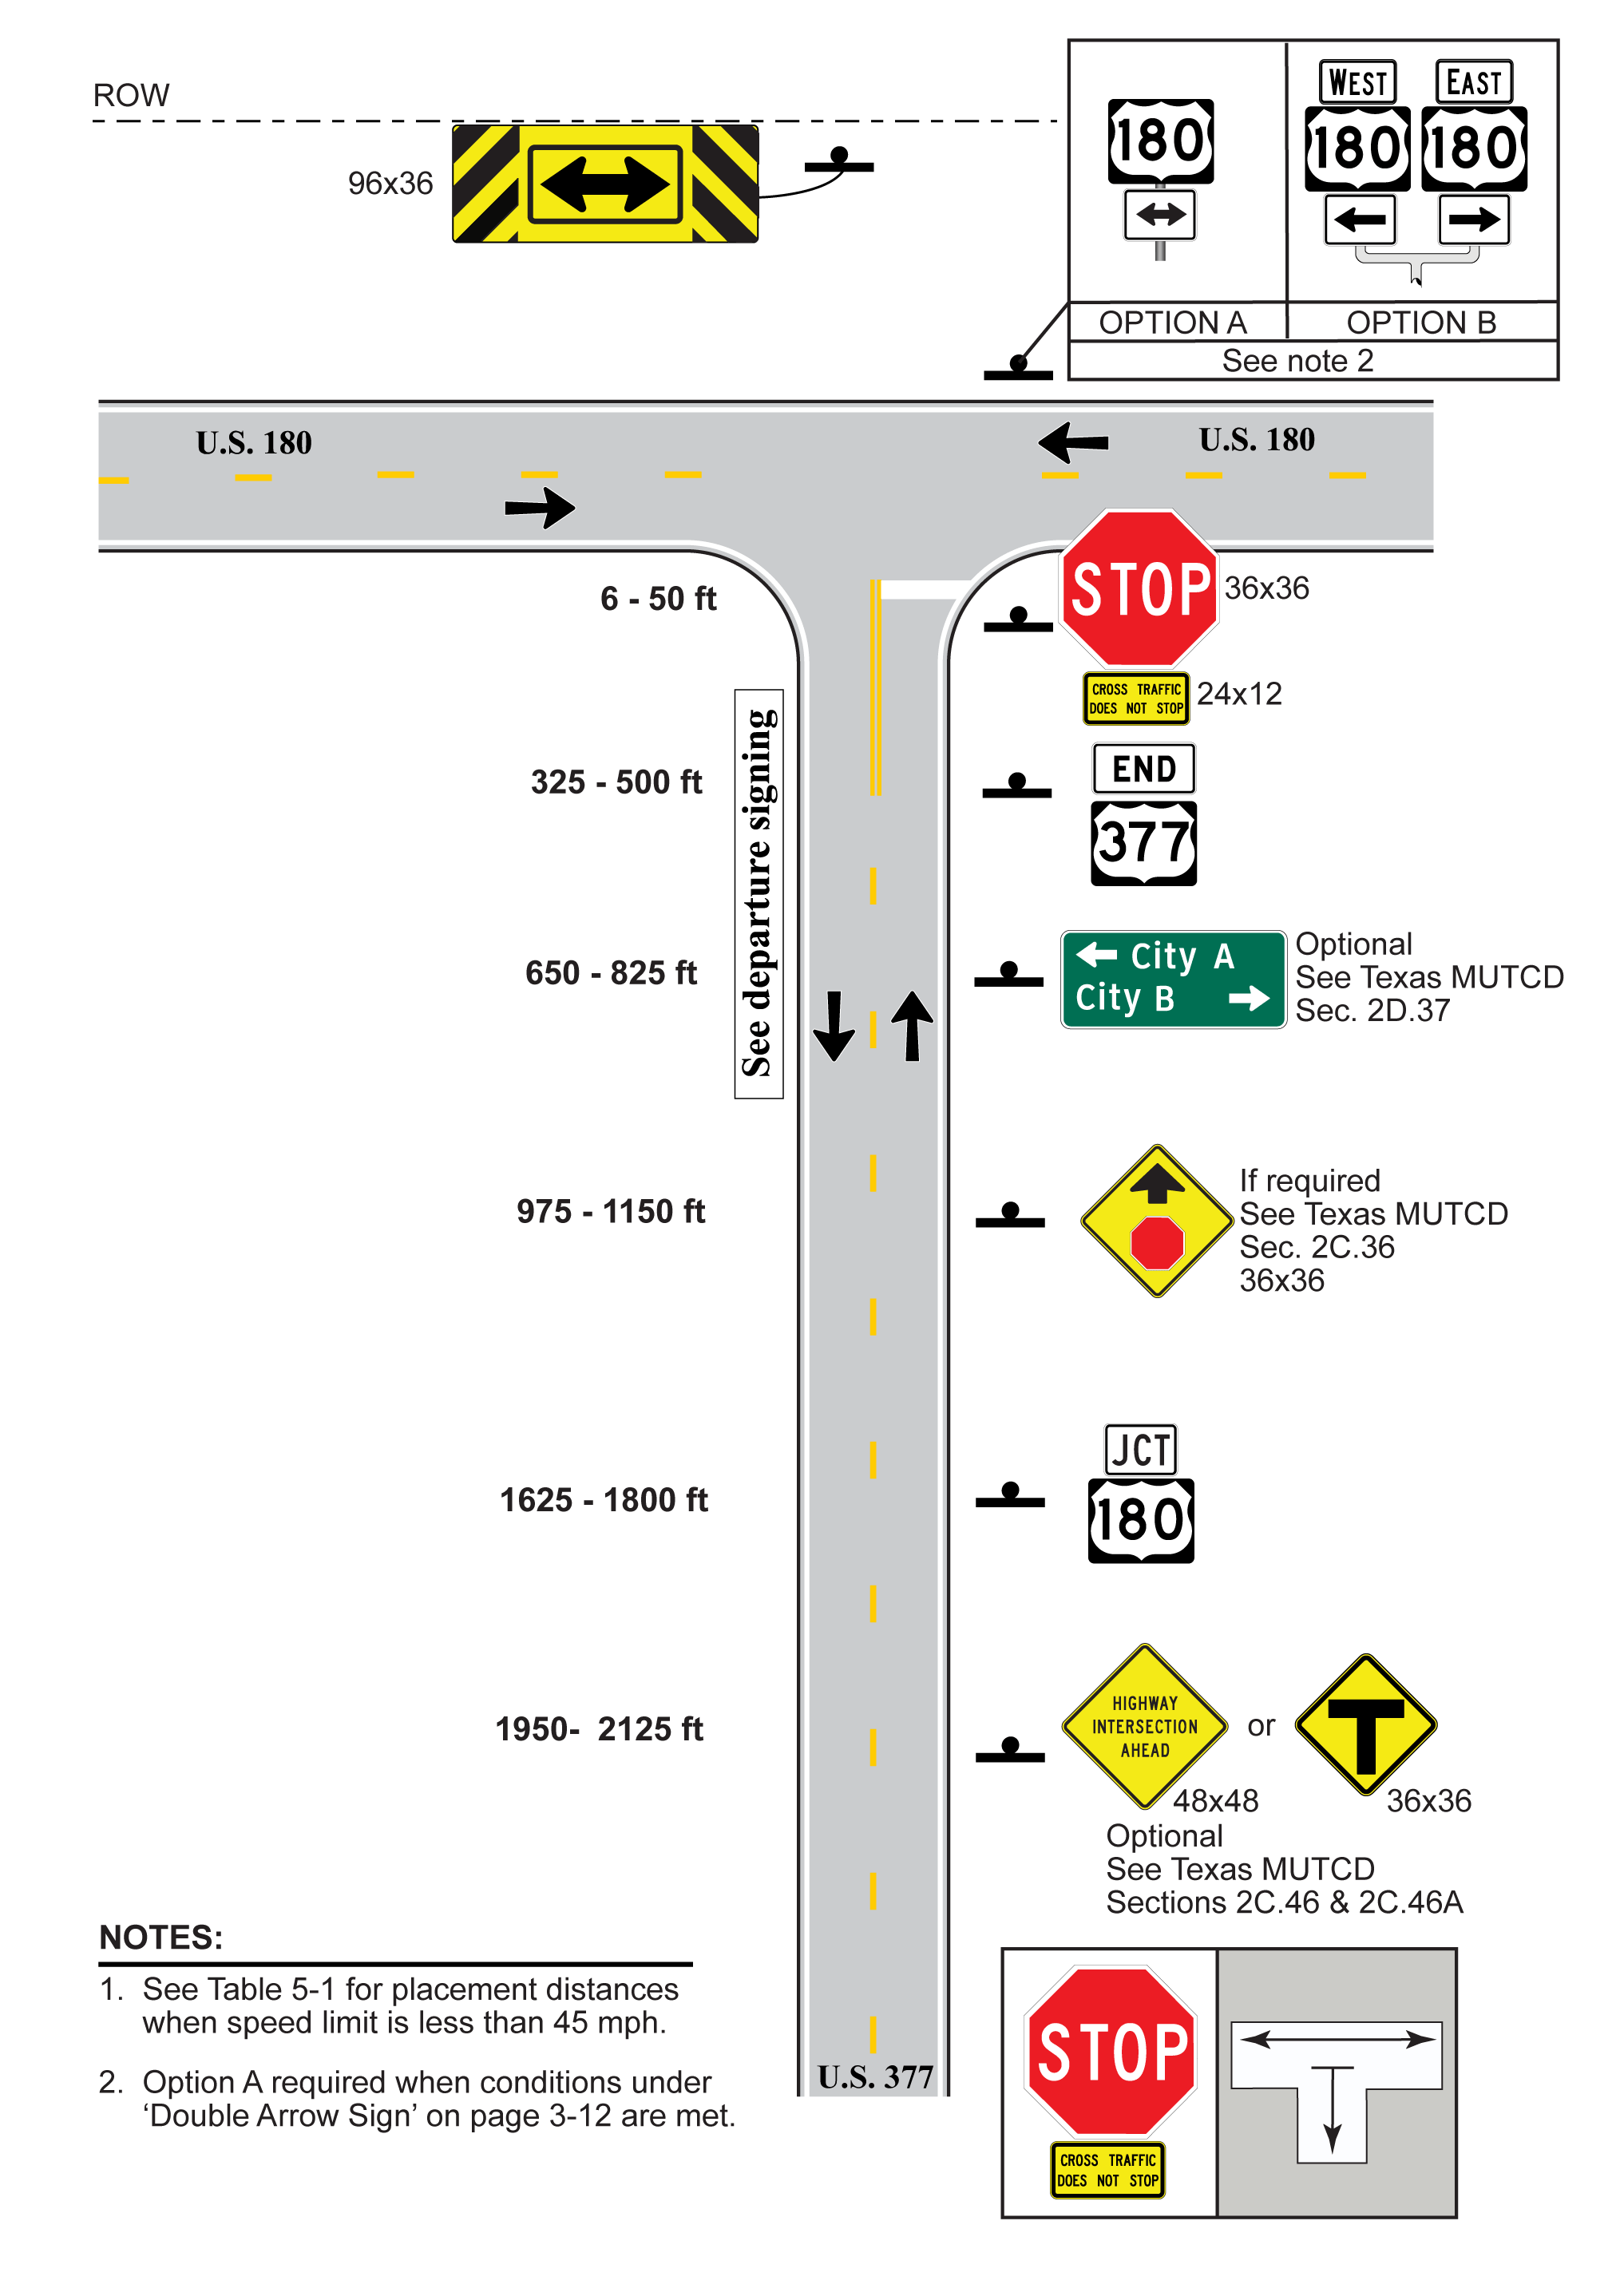
Figure 5-6. 3-Leg T, 1 Approach Lane, Stop Control, Approach Route Ends
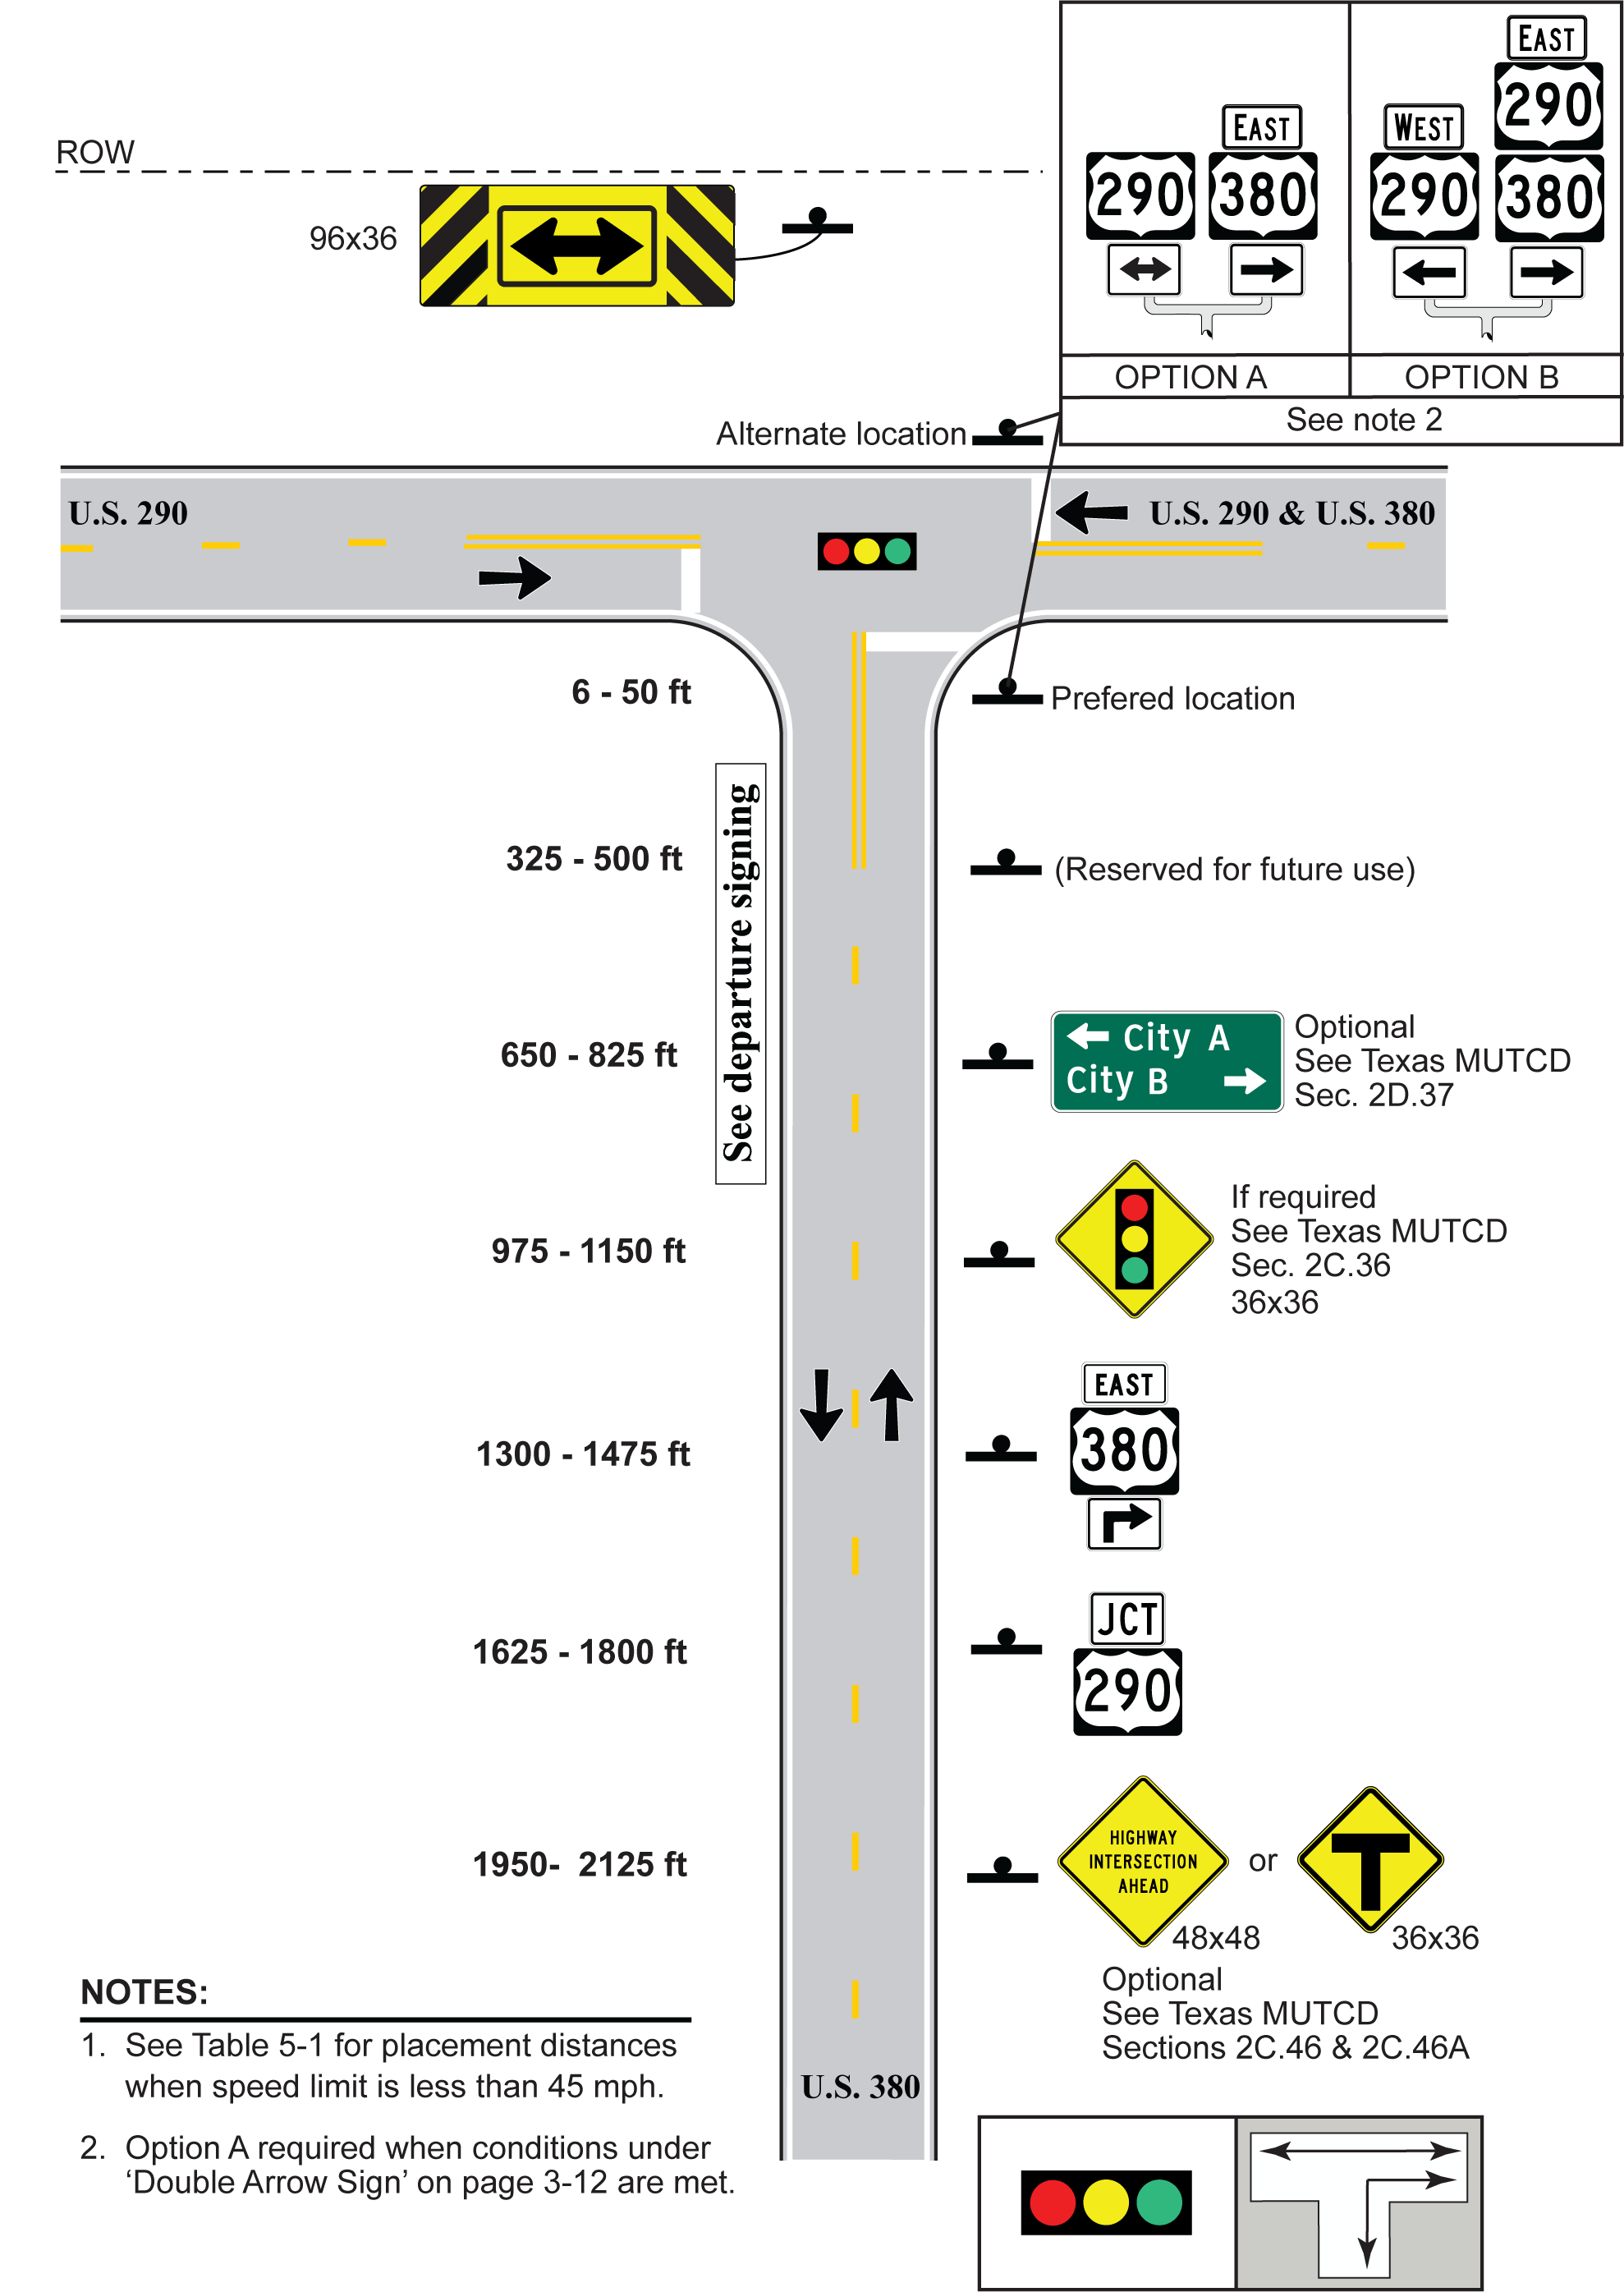
Figure 5-7. 3-Leg T, 1 Approach Lane, Signal Control, Approach Route Goes Right
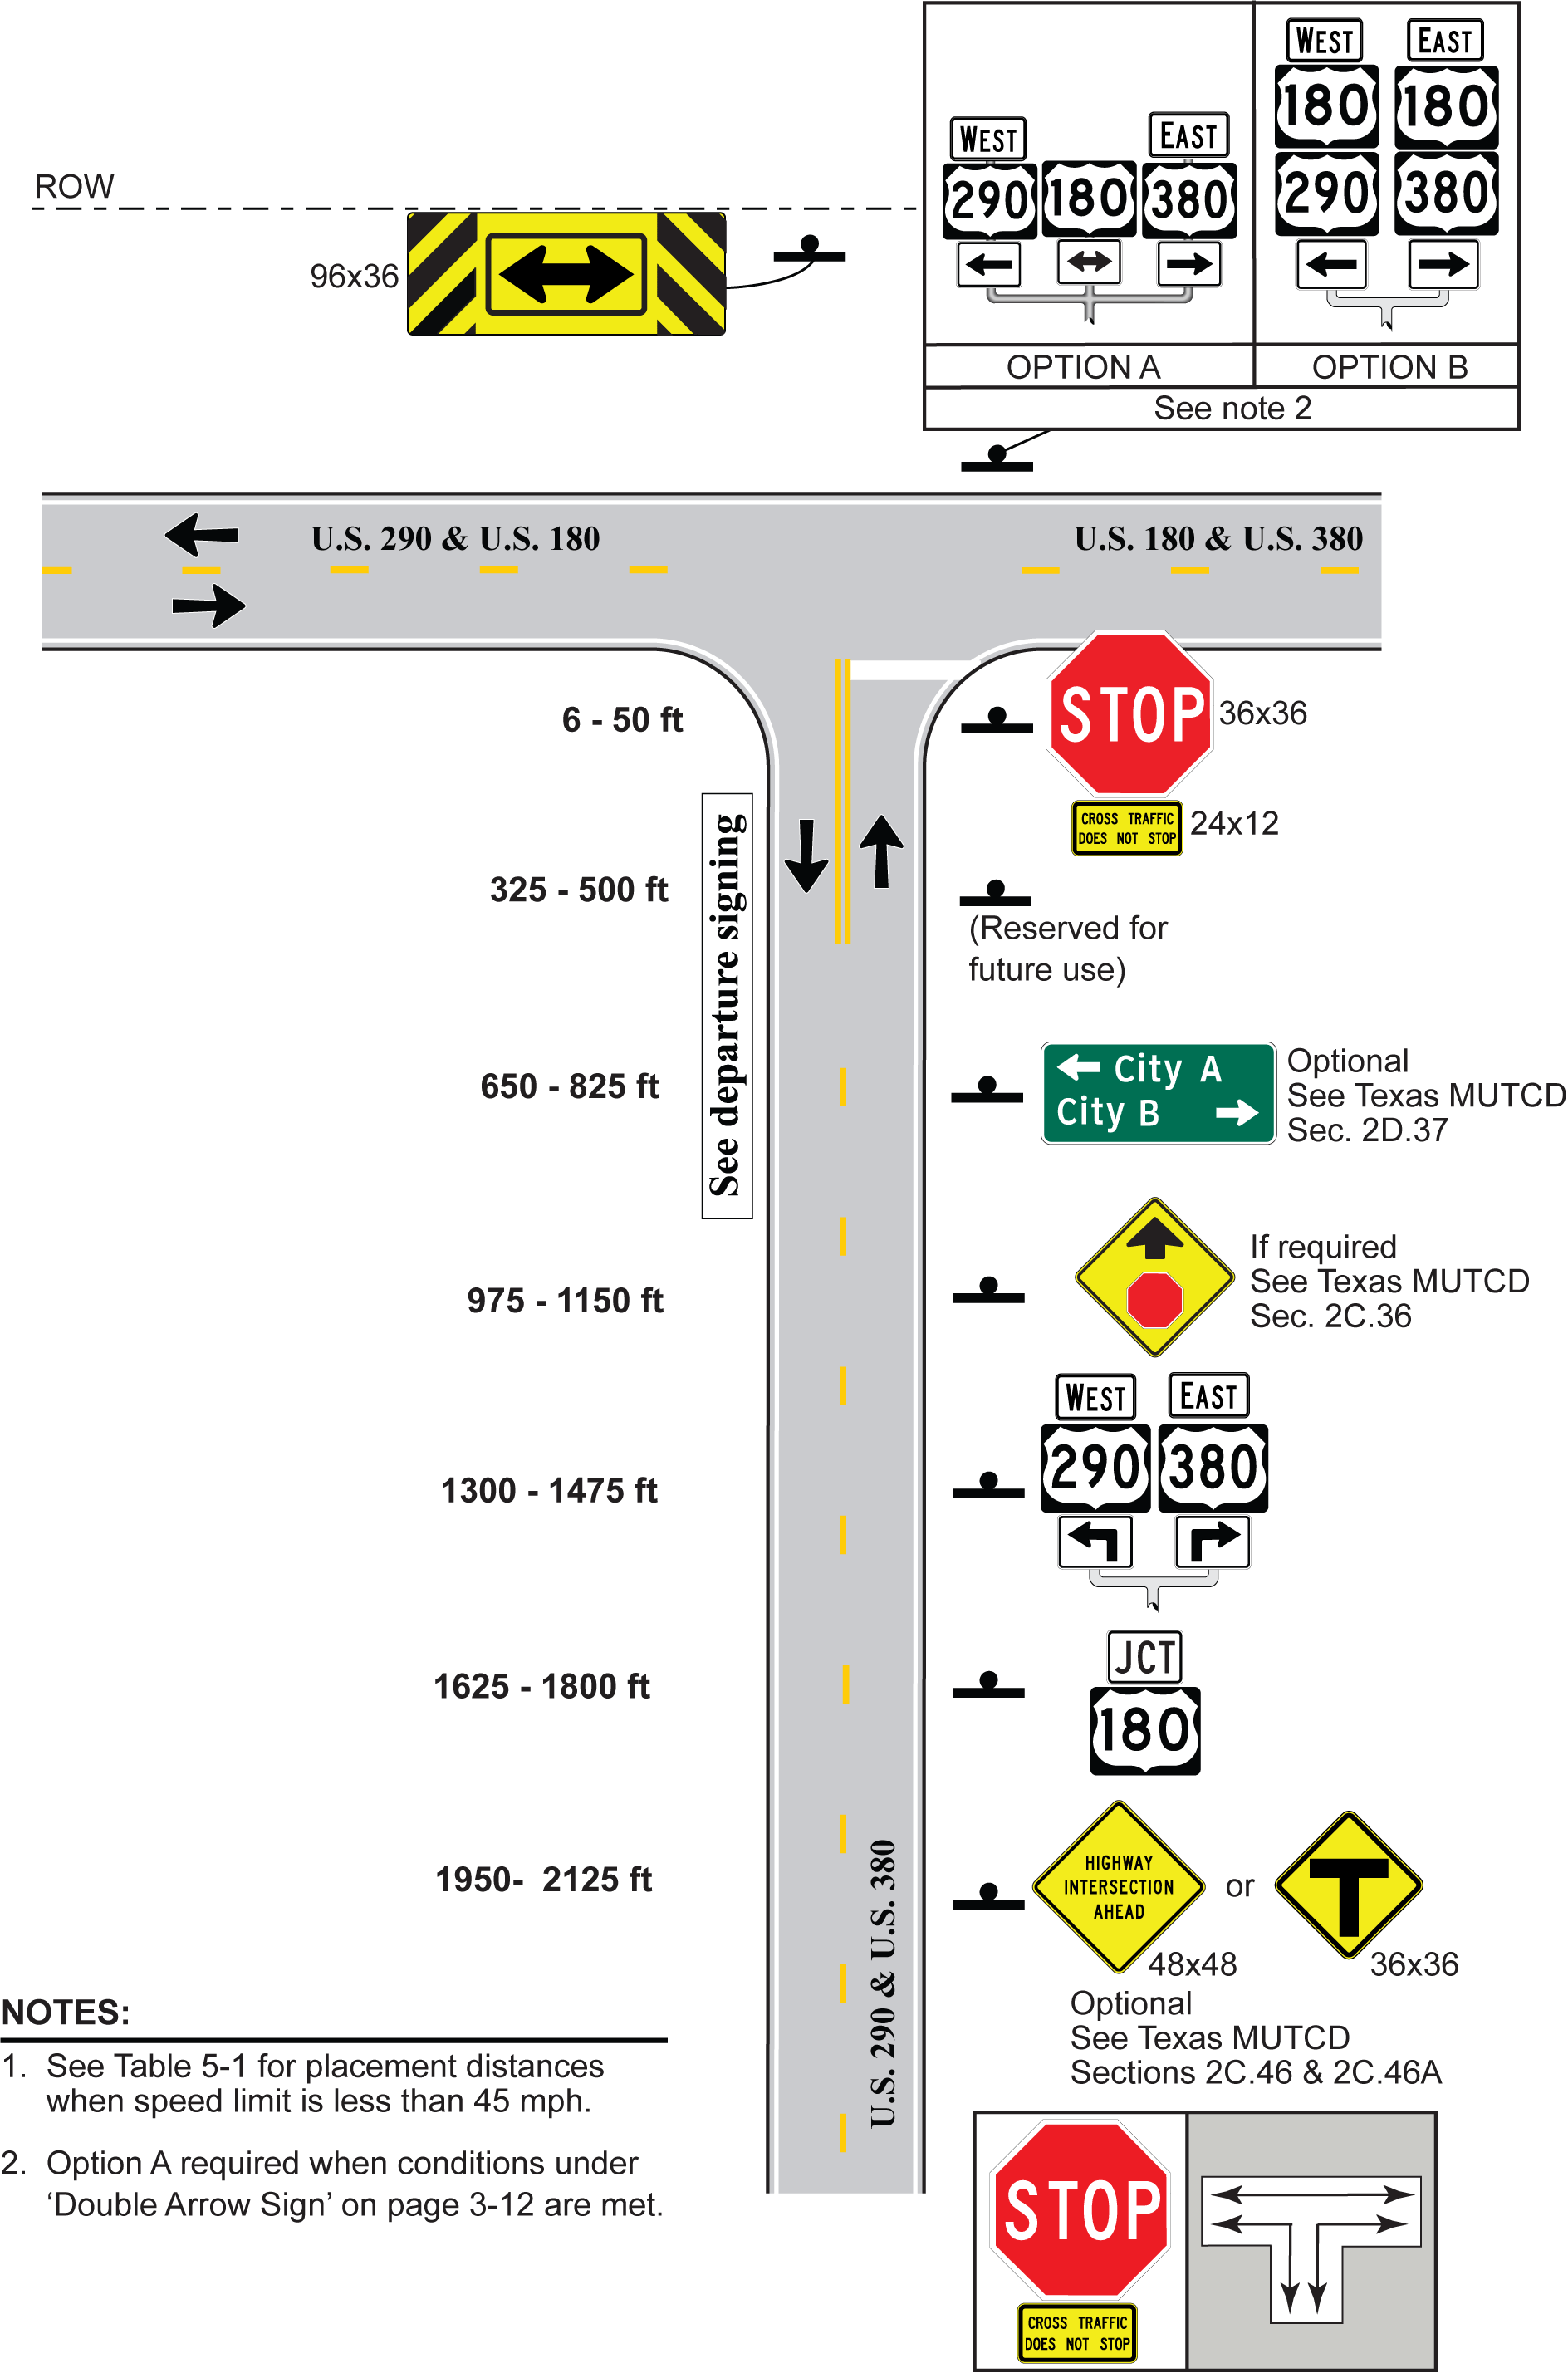
Figure 5-8. 3-Leg T, 1 Approach Lane, Stop Control, Approach Routes Go Left and Right
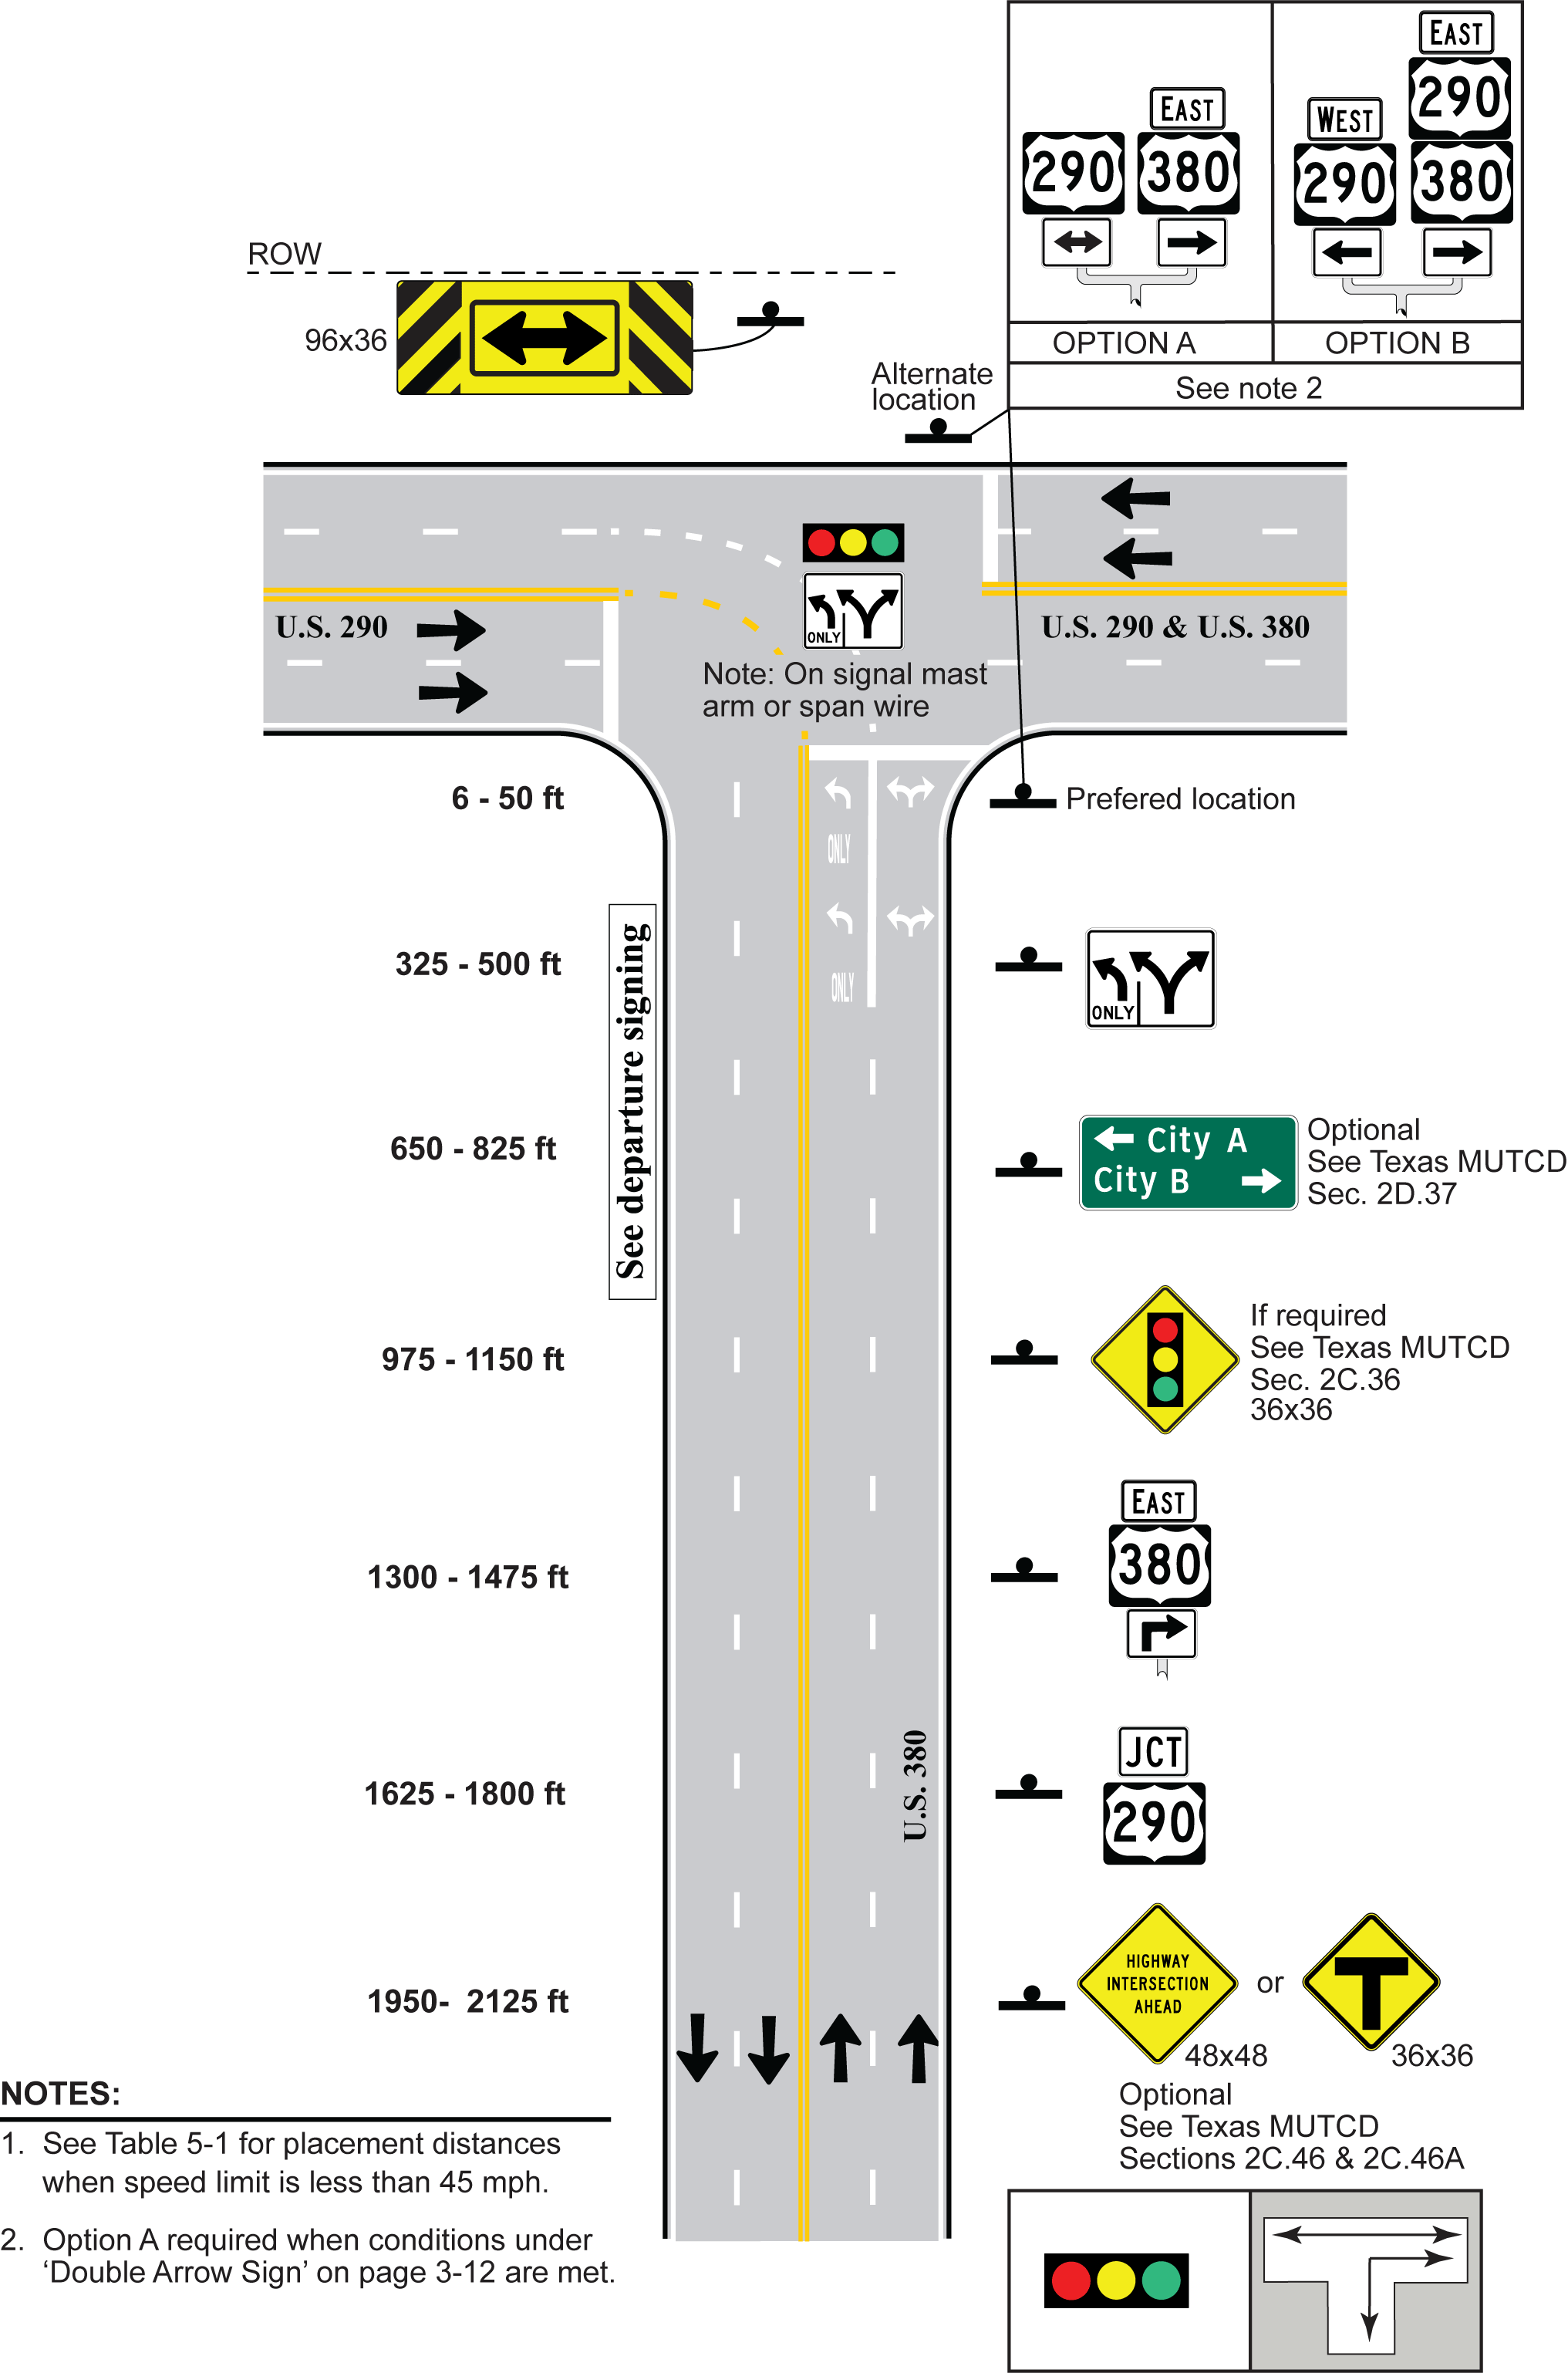
Figure 5-9. 3-Leg T, 2 Approach Lanes with Dual Left, Signal Control, Approach Route Goes Right