Section 5: 4-Leg Intersection Illustrations
Introduction
This section illustrates the signing placement for an approach to a 4-leg intersection. Each of the figures illustrates how different intersection characteristics affect the signing on the approach.
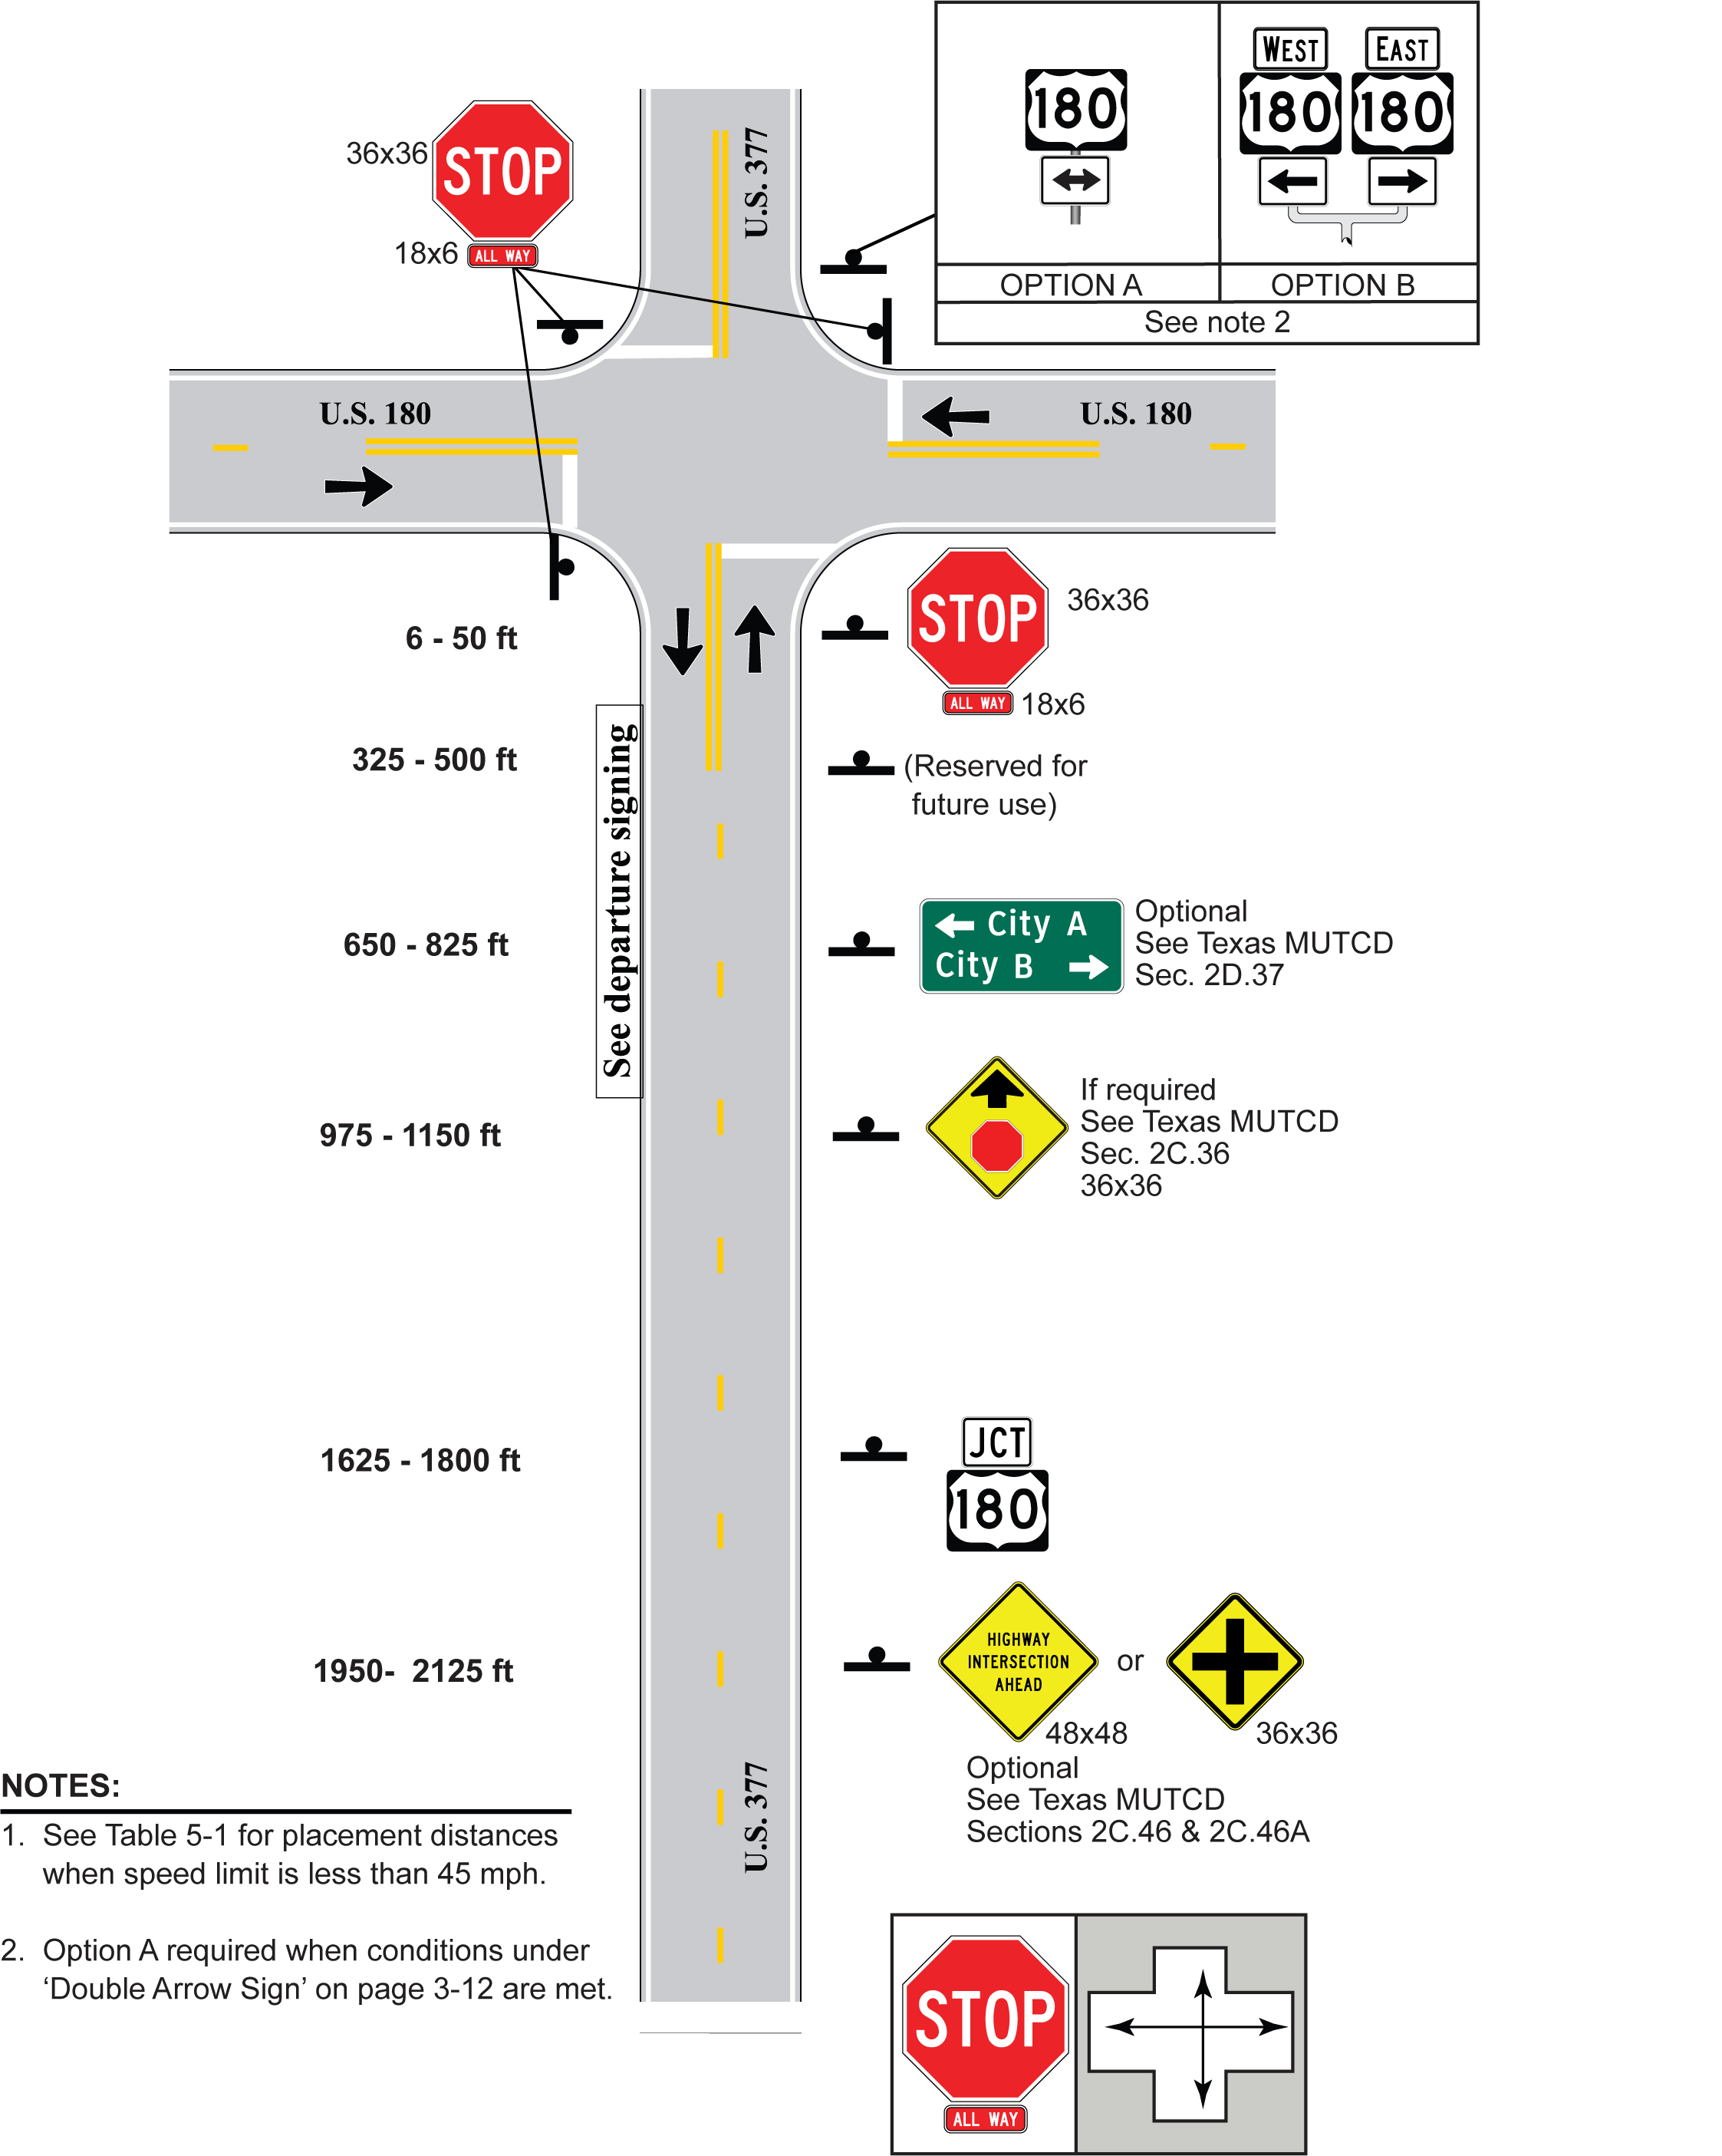
Figure 5-17. 4-Leg, 1 Approach Lane, Stop Control, Approach Route Goes Through

Figure 5-18. 4-Leg, 1 Approach Lane with Free Right Turn, No Control, Approach Lane Goes Through
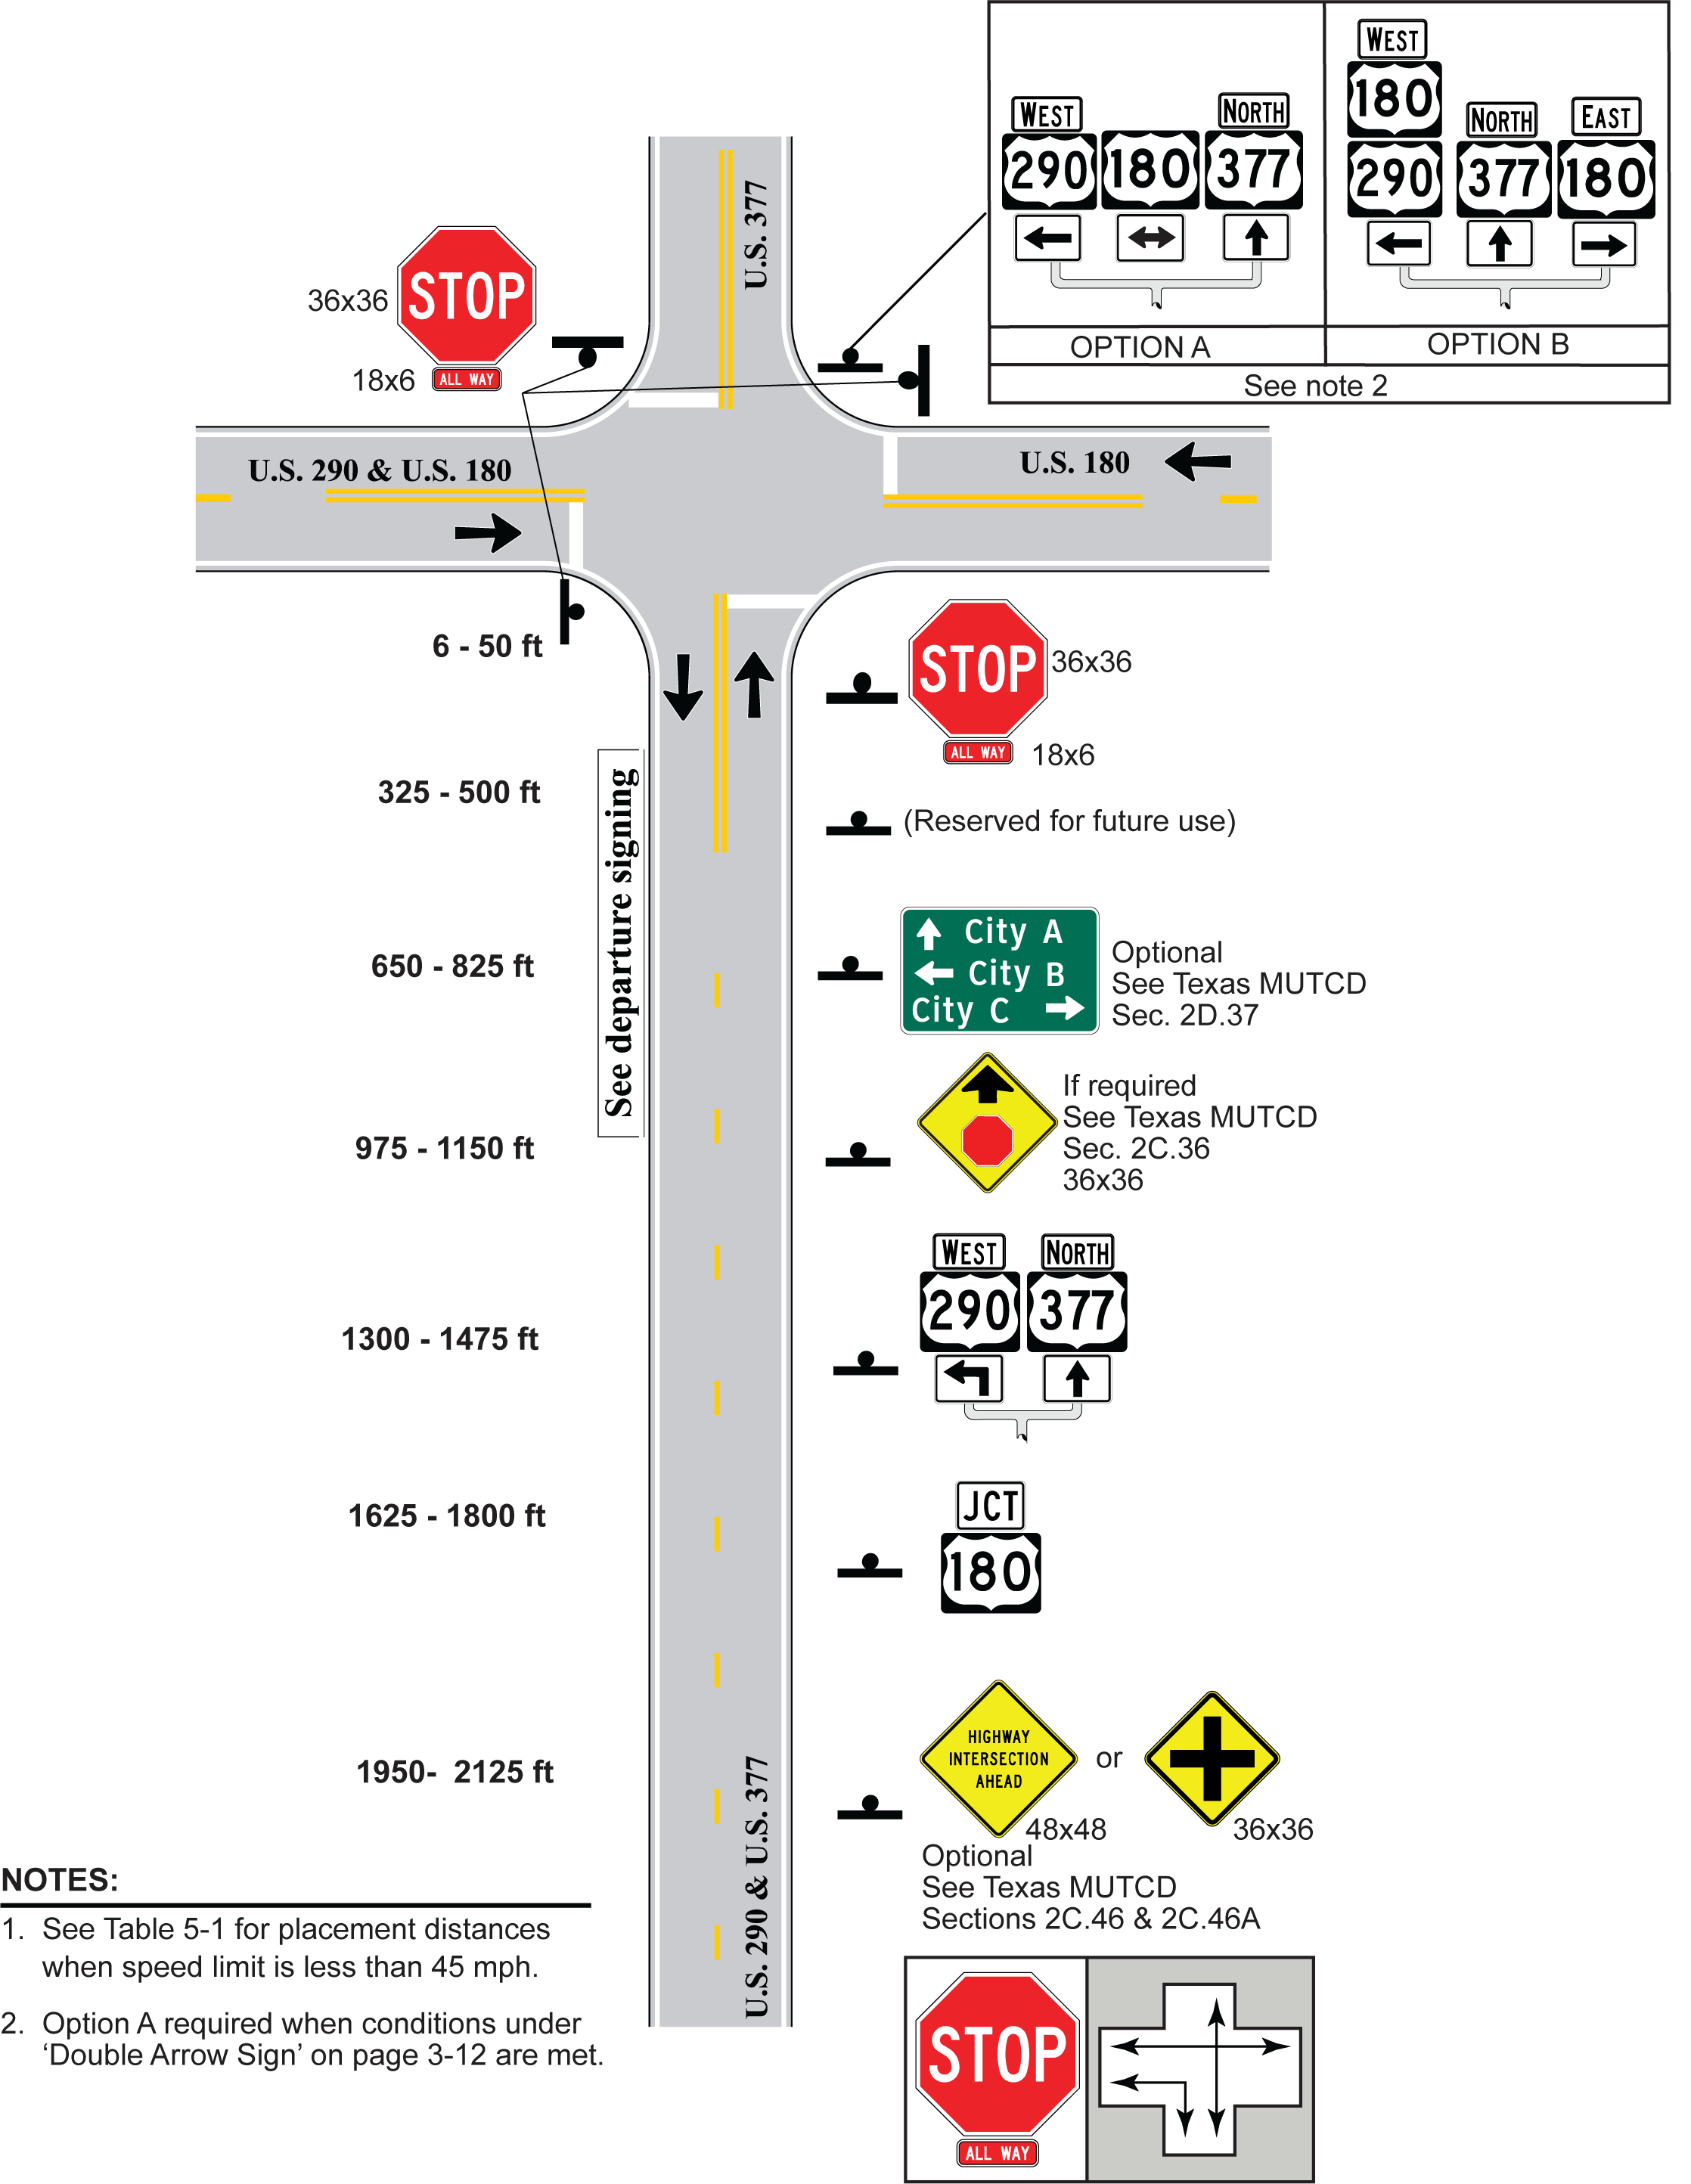
Figure 5-19. 4-Leg, 1 Approach Lane, Stop Control, Approach Route Goes Through and Left
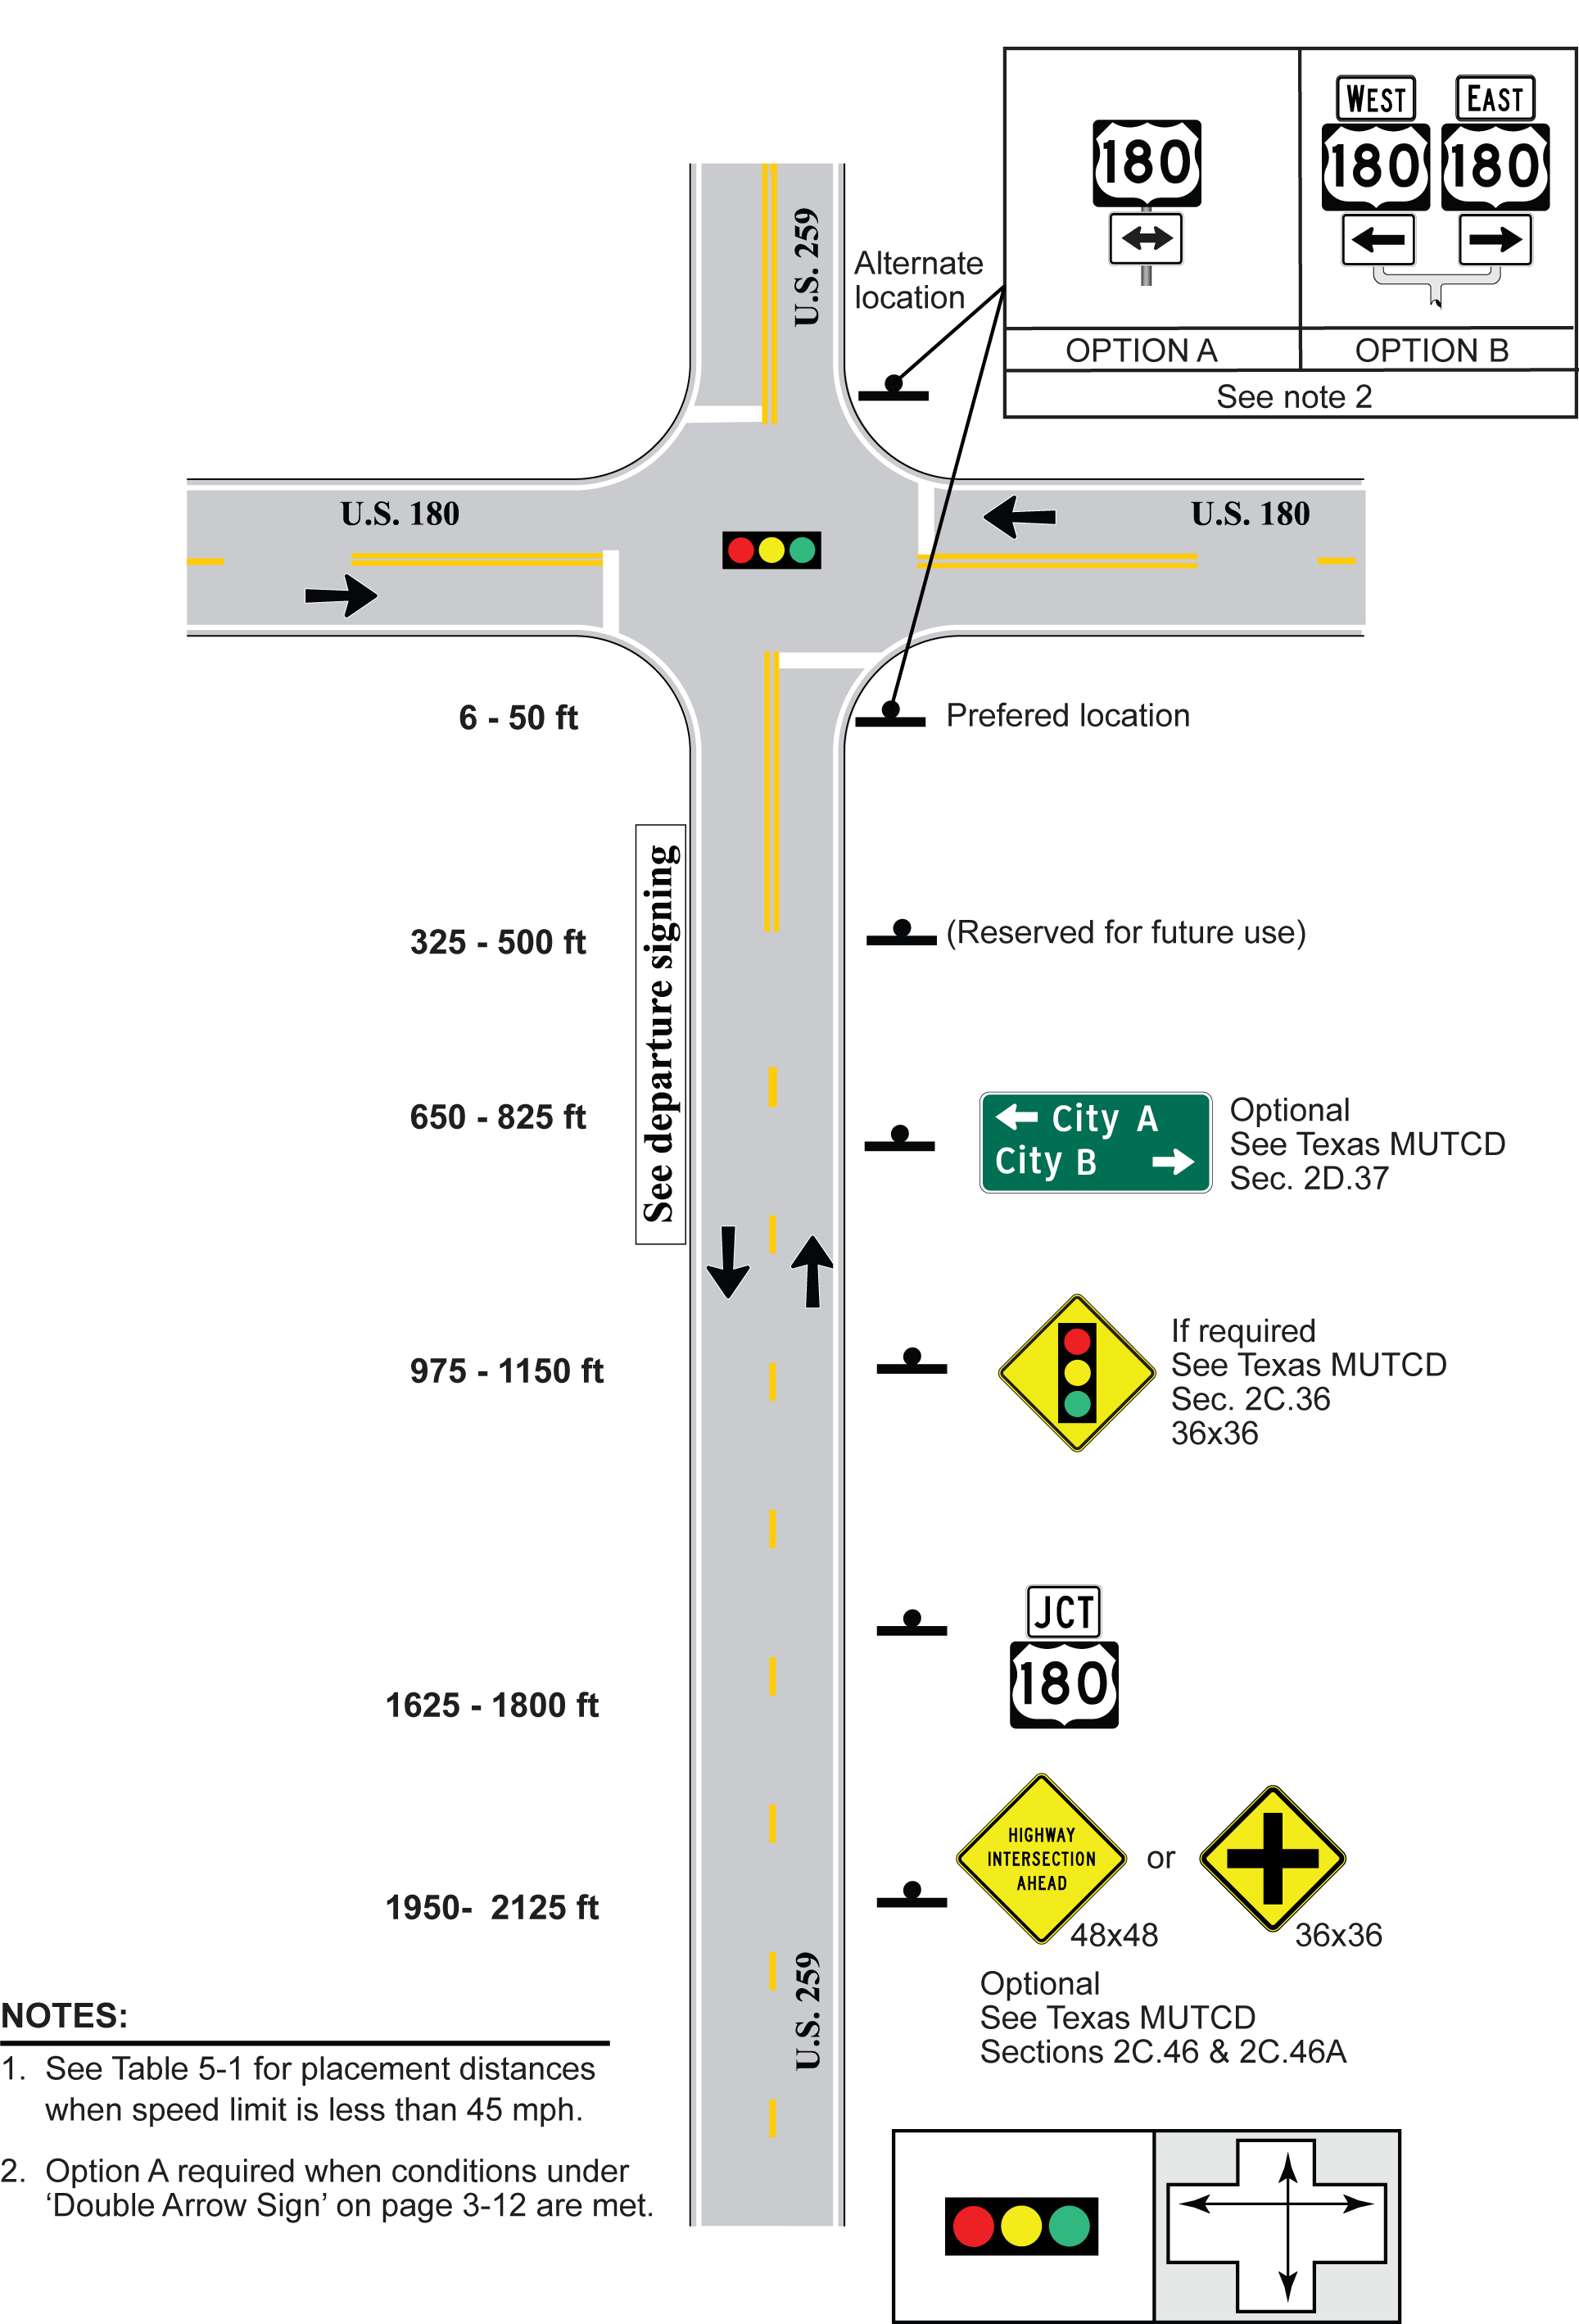
Figure 5-20. 4-Leg, 1 Approach Lane, Signal Control, Approach Route Goes Through
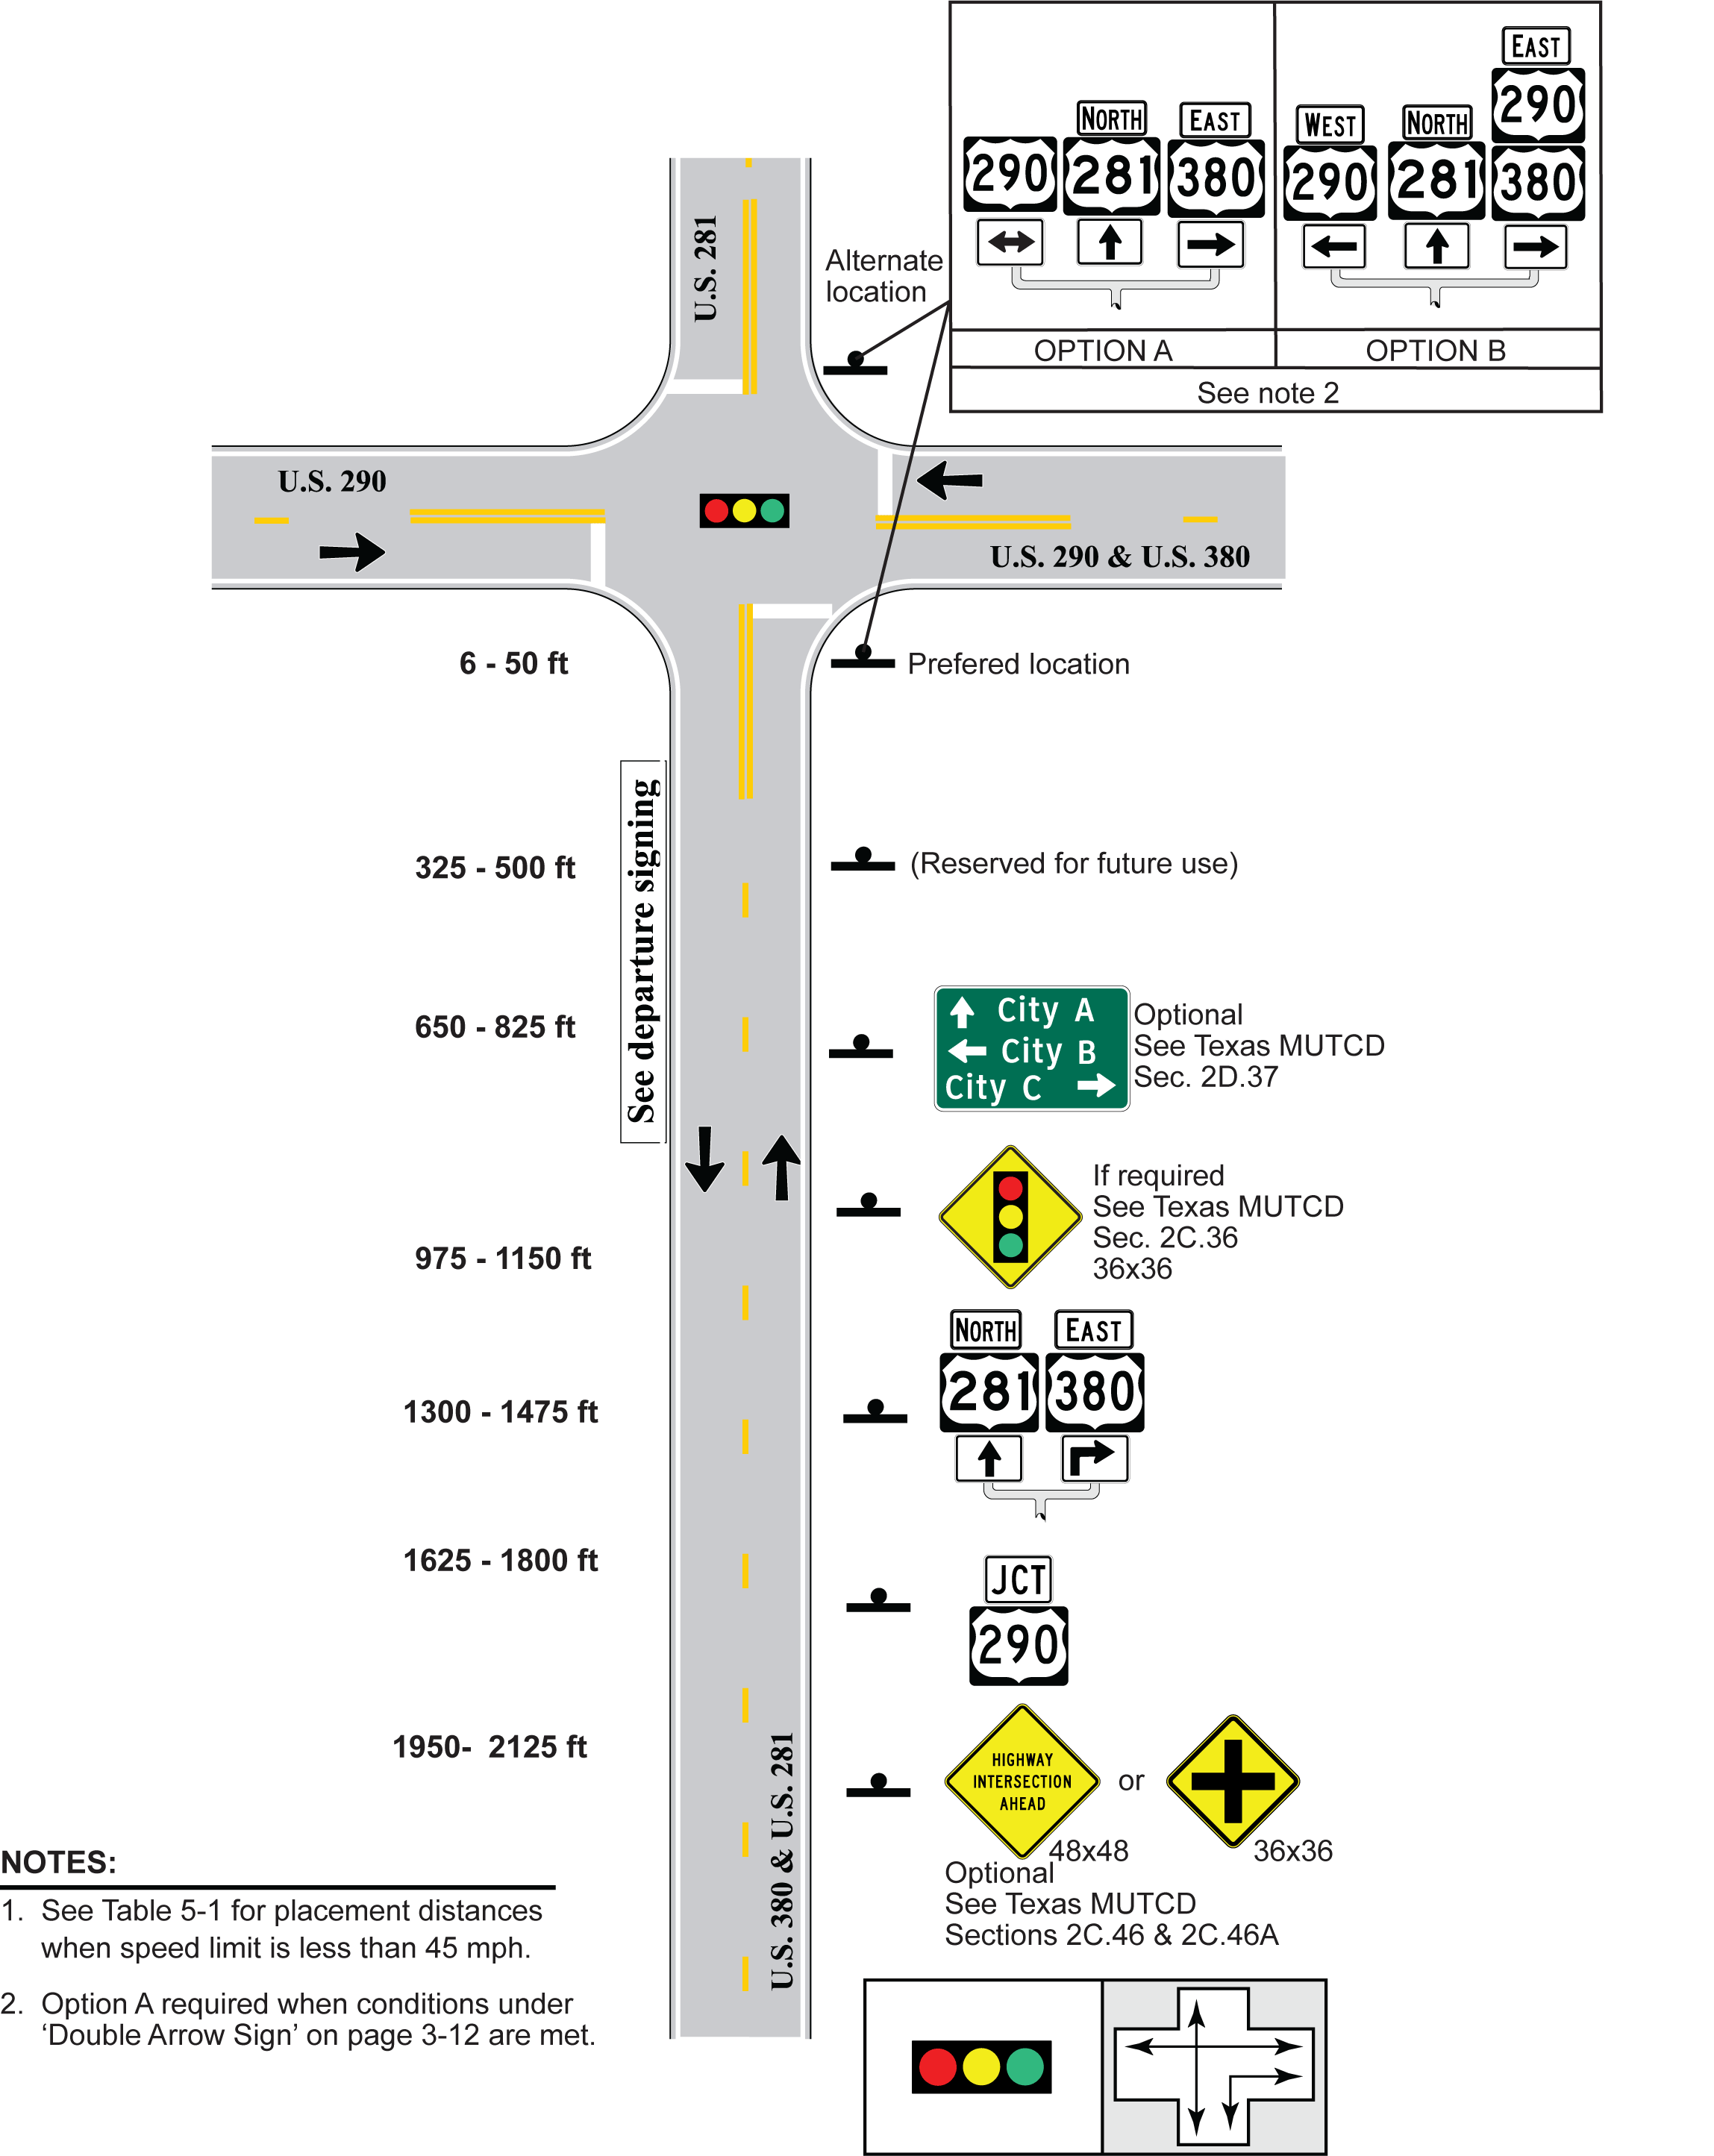
Figure 5-21. 4-Leg, 1 Approach Lane, Signal Control, Approach Route Goes Through and Right
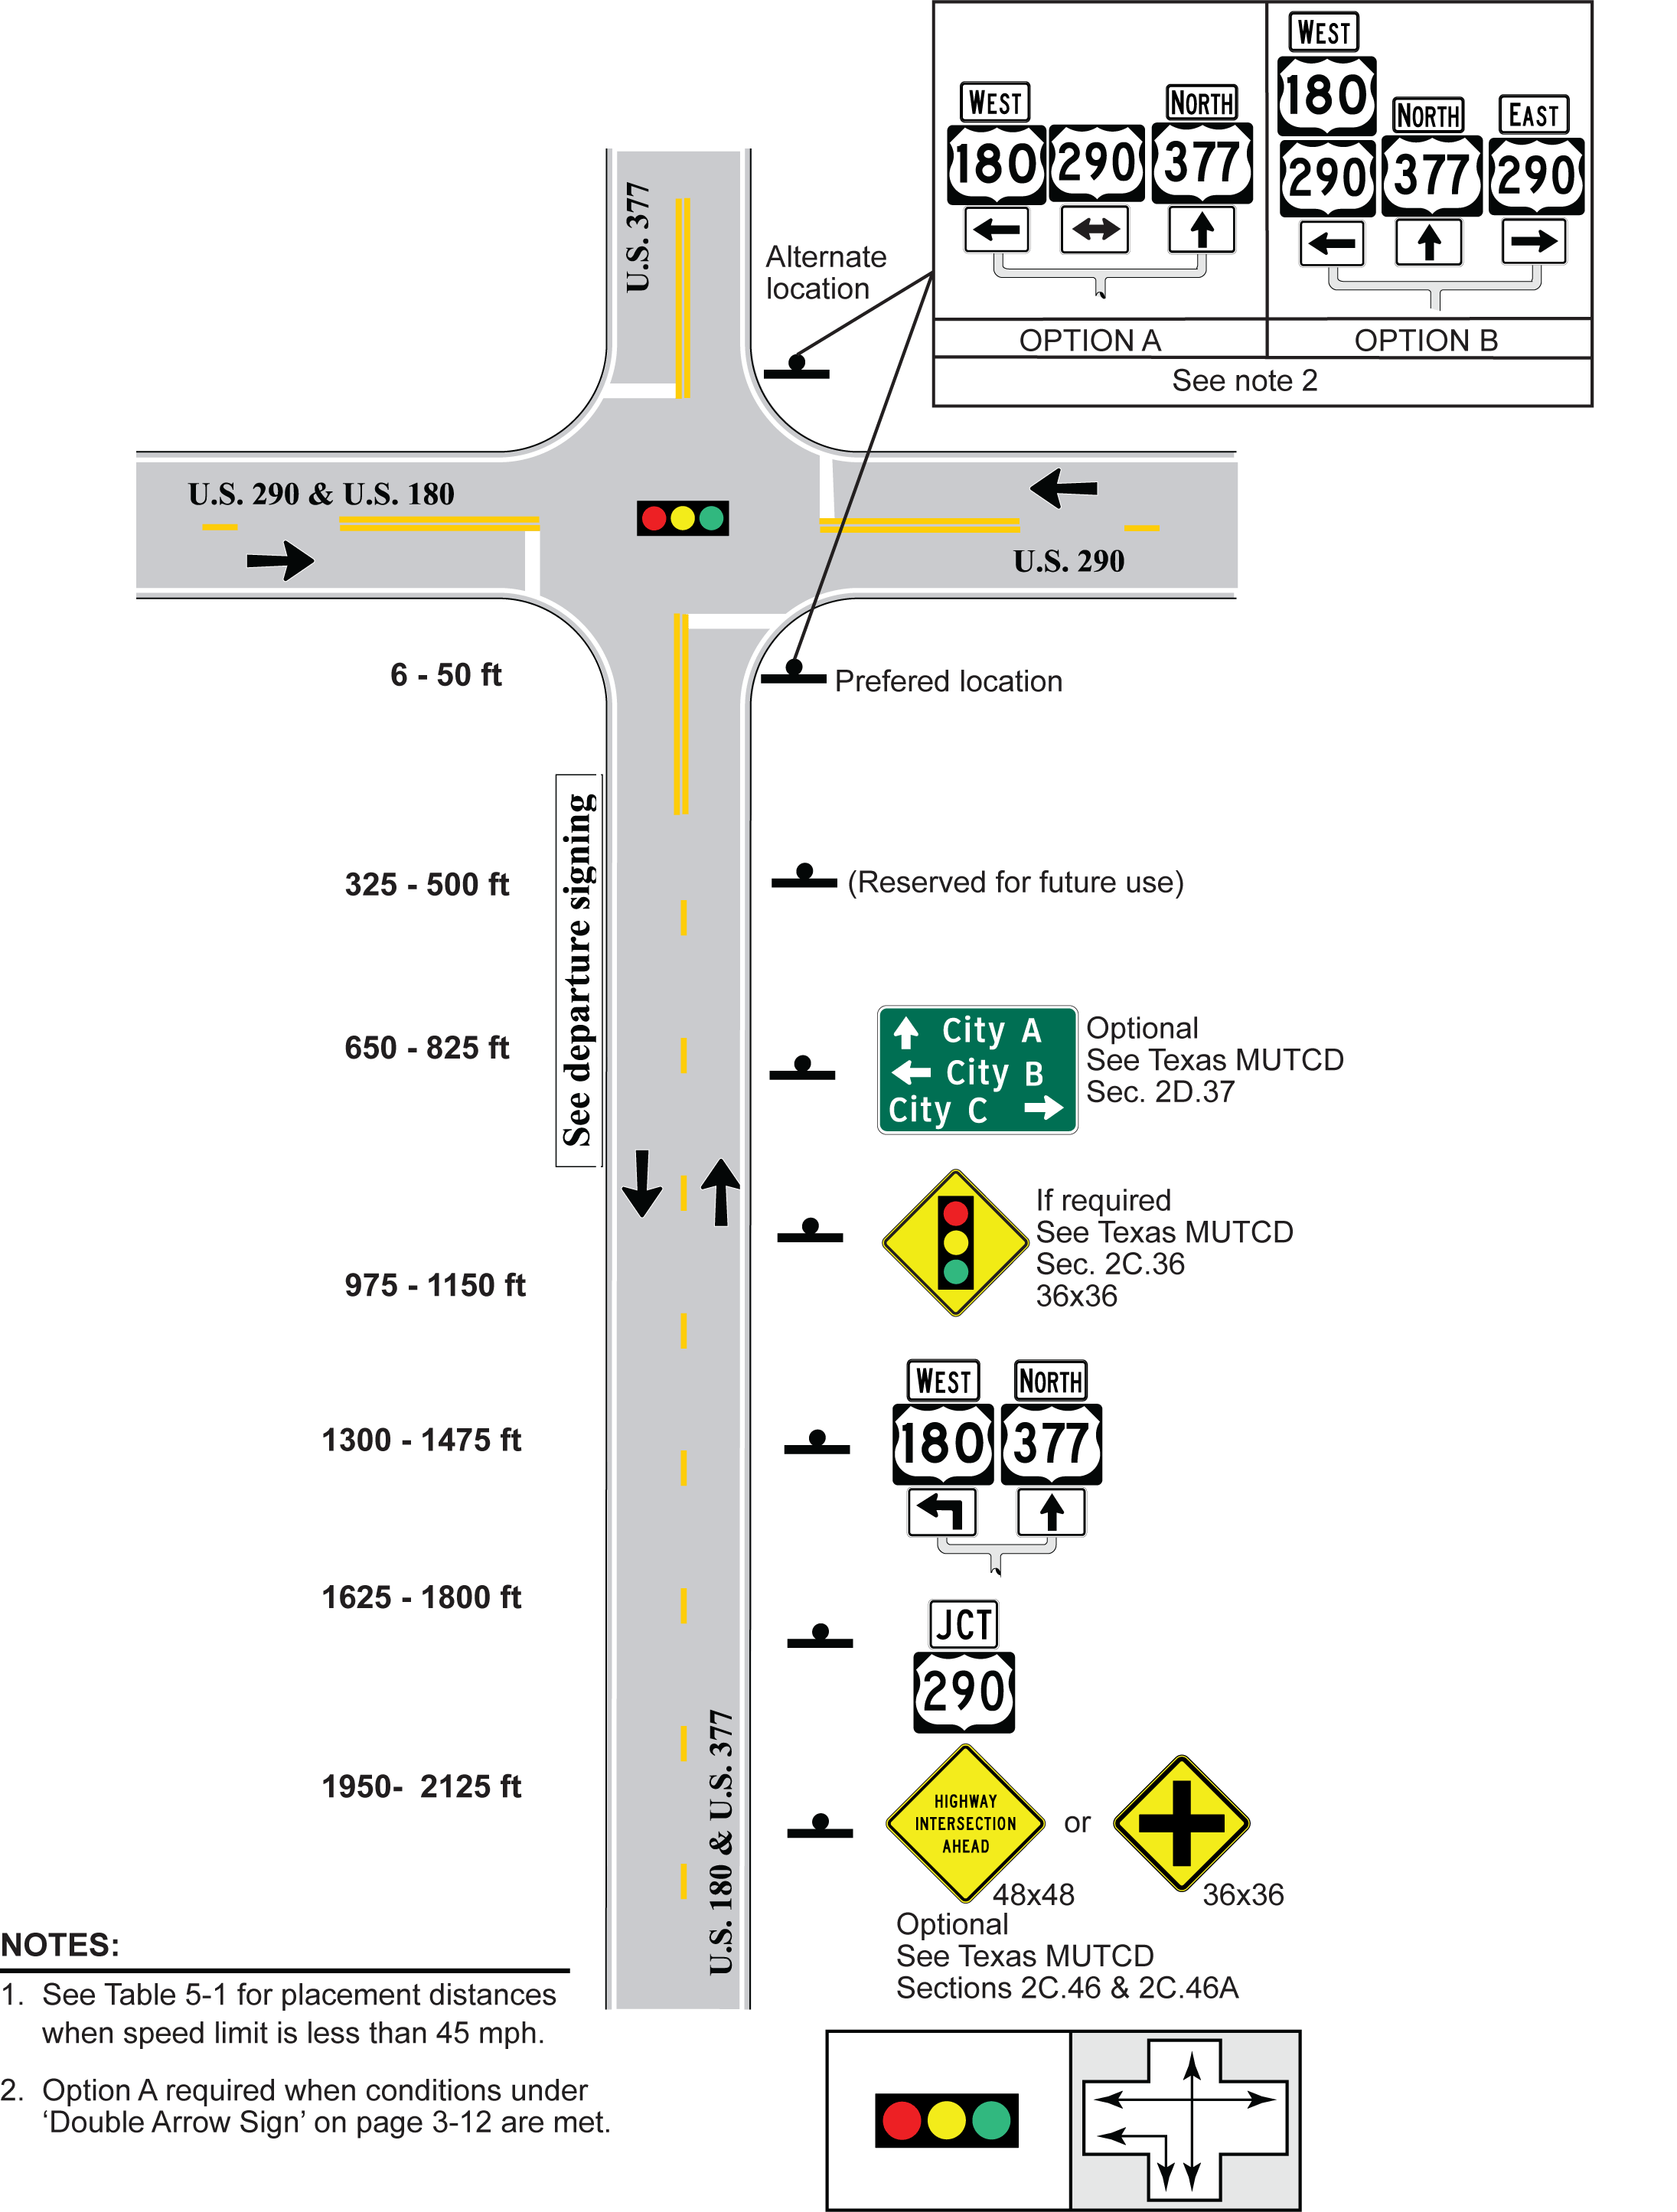
Figure 5-22. 4-Leg, 1 Approach Lane, Signal Control, Approach Route Goes Through and Left
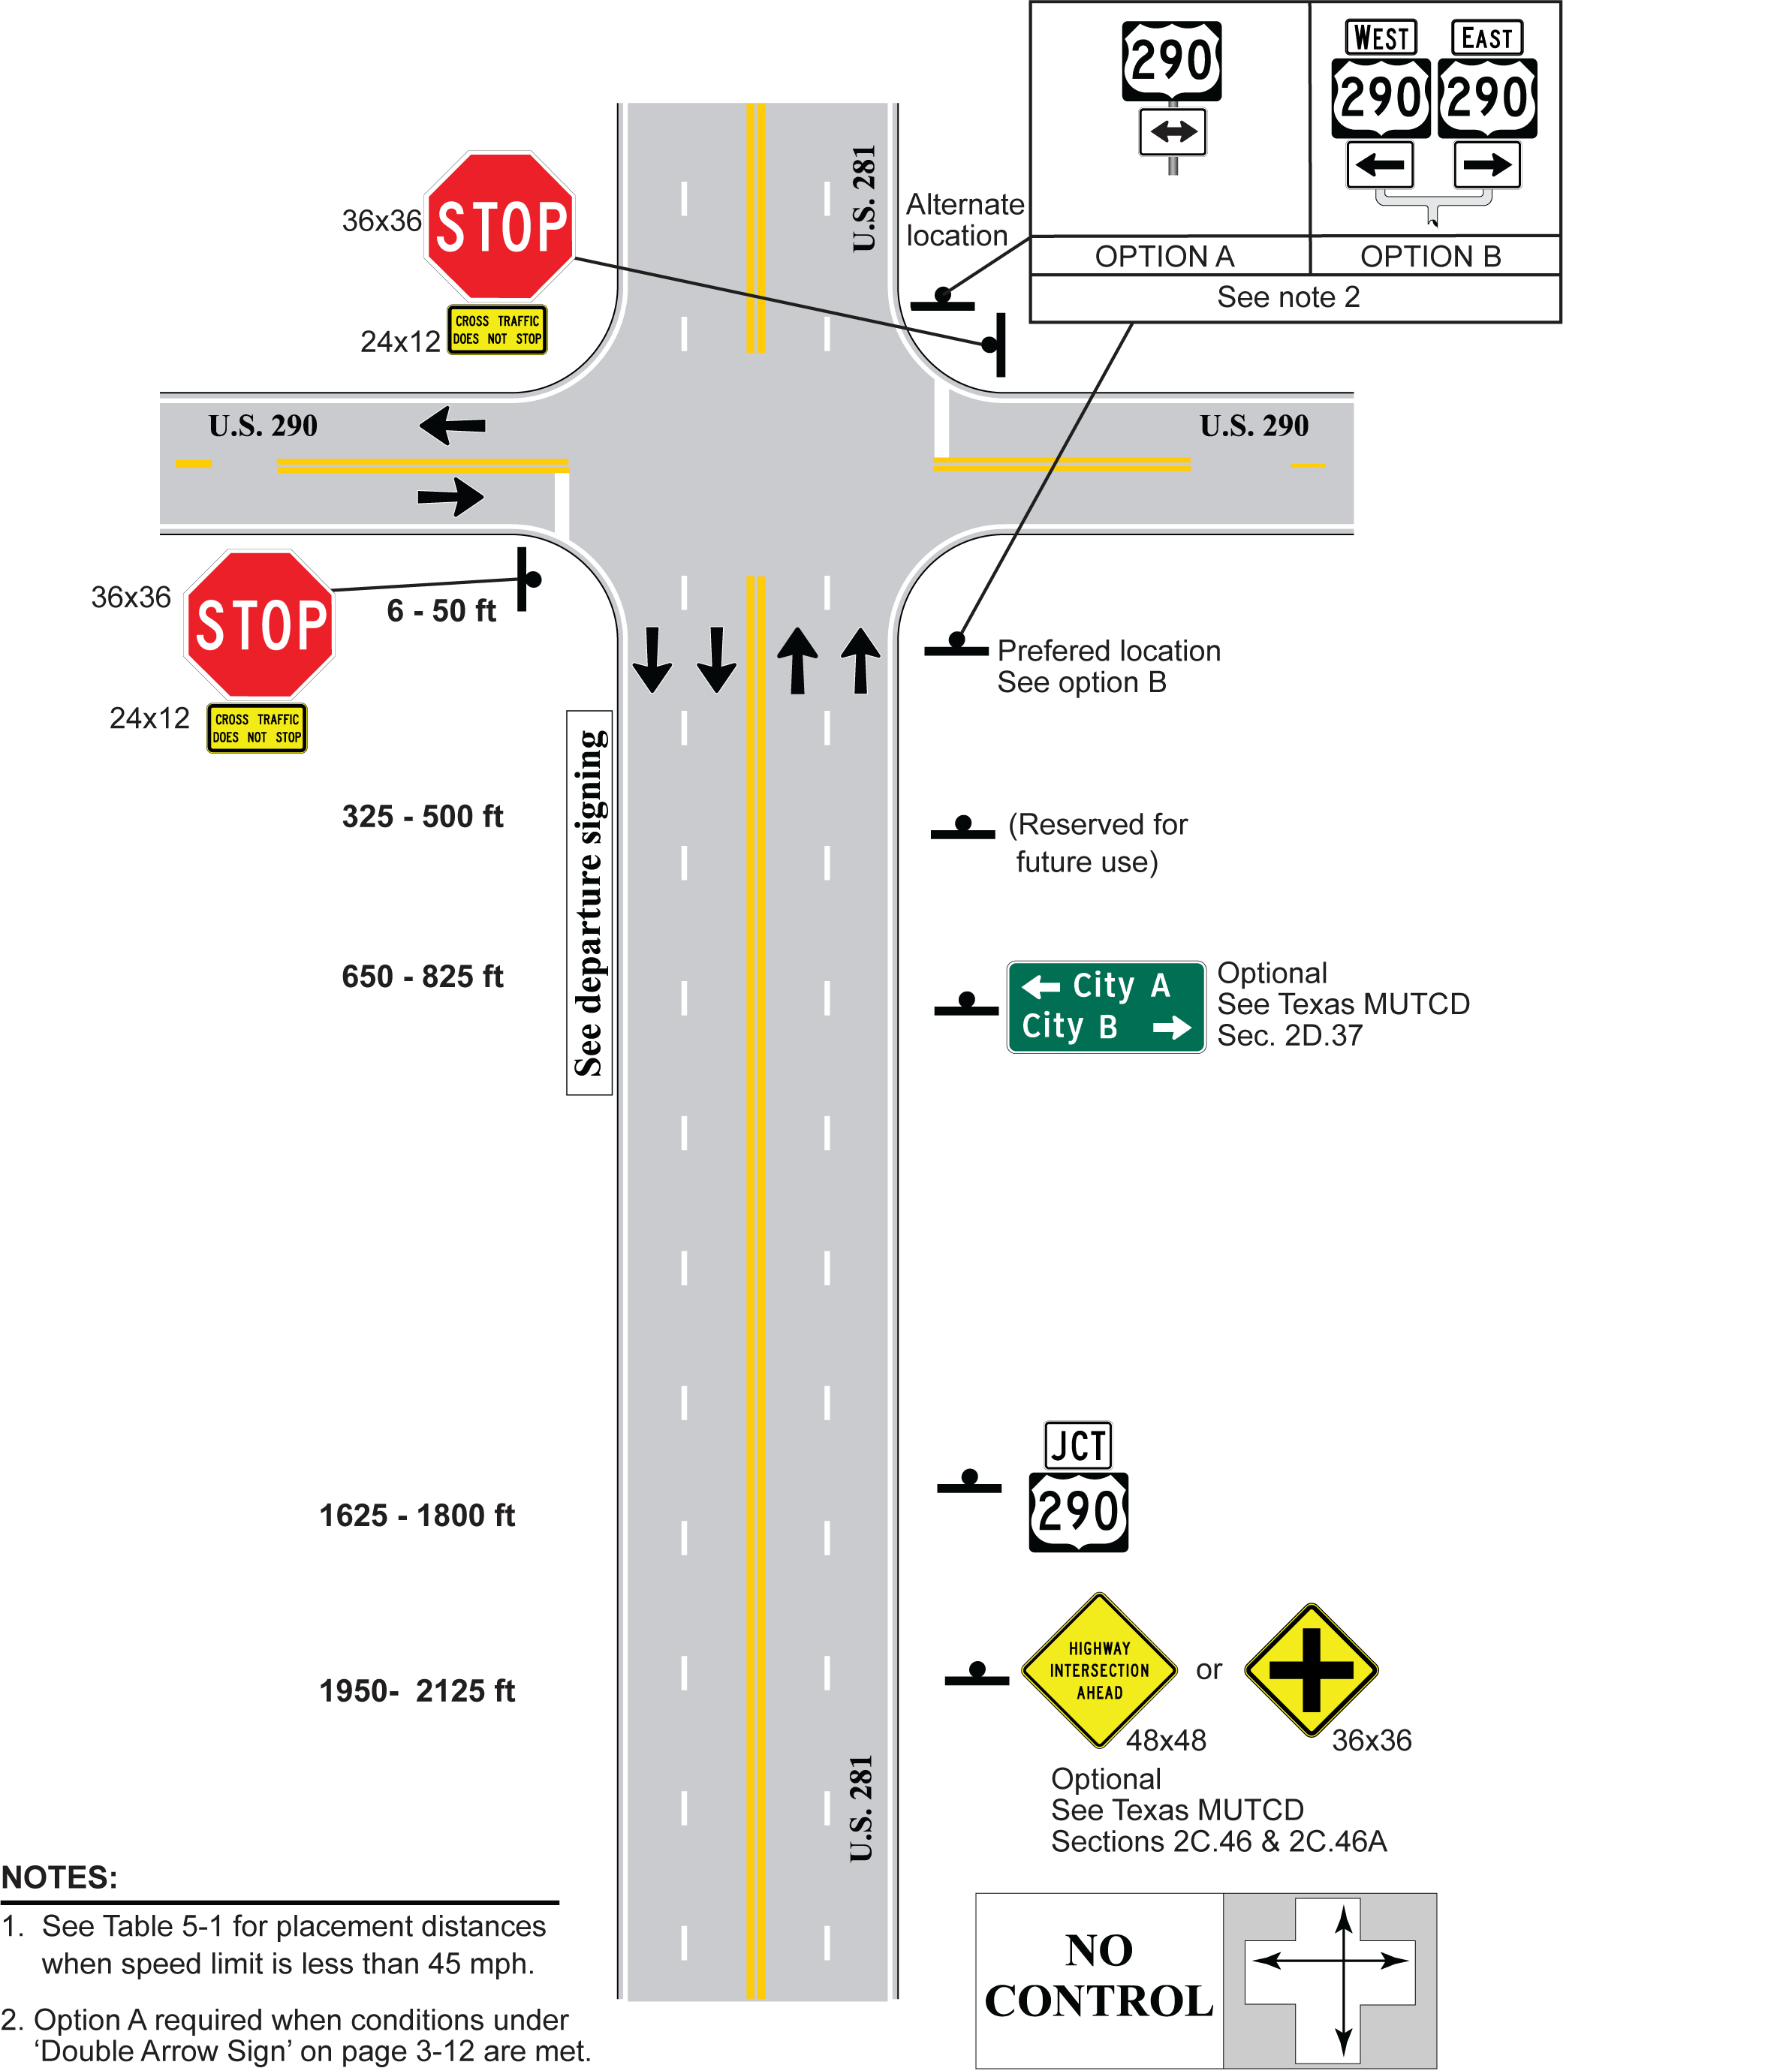
Figure 5-23. 4-Leg, 2 Approach Lanes, No Control, Approach Route Goes Through
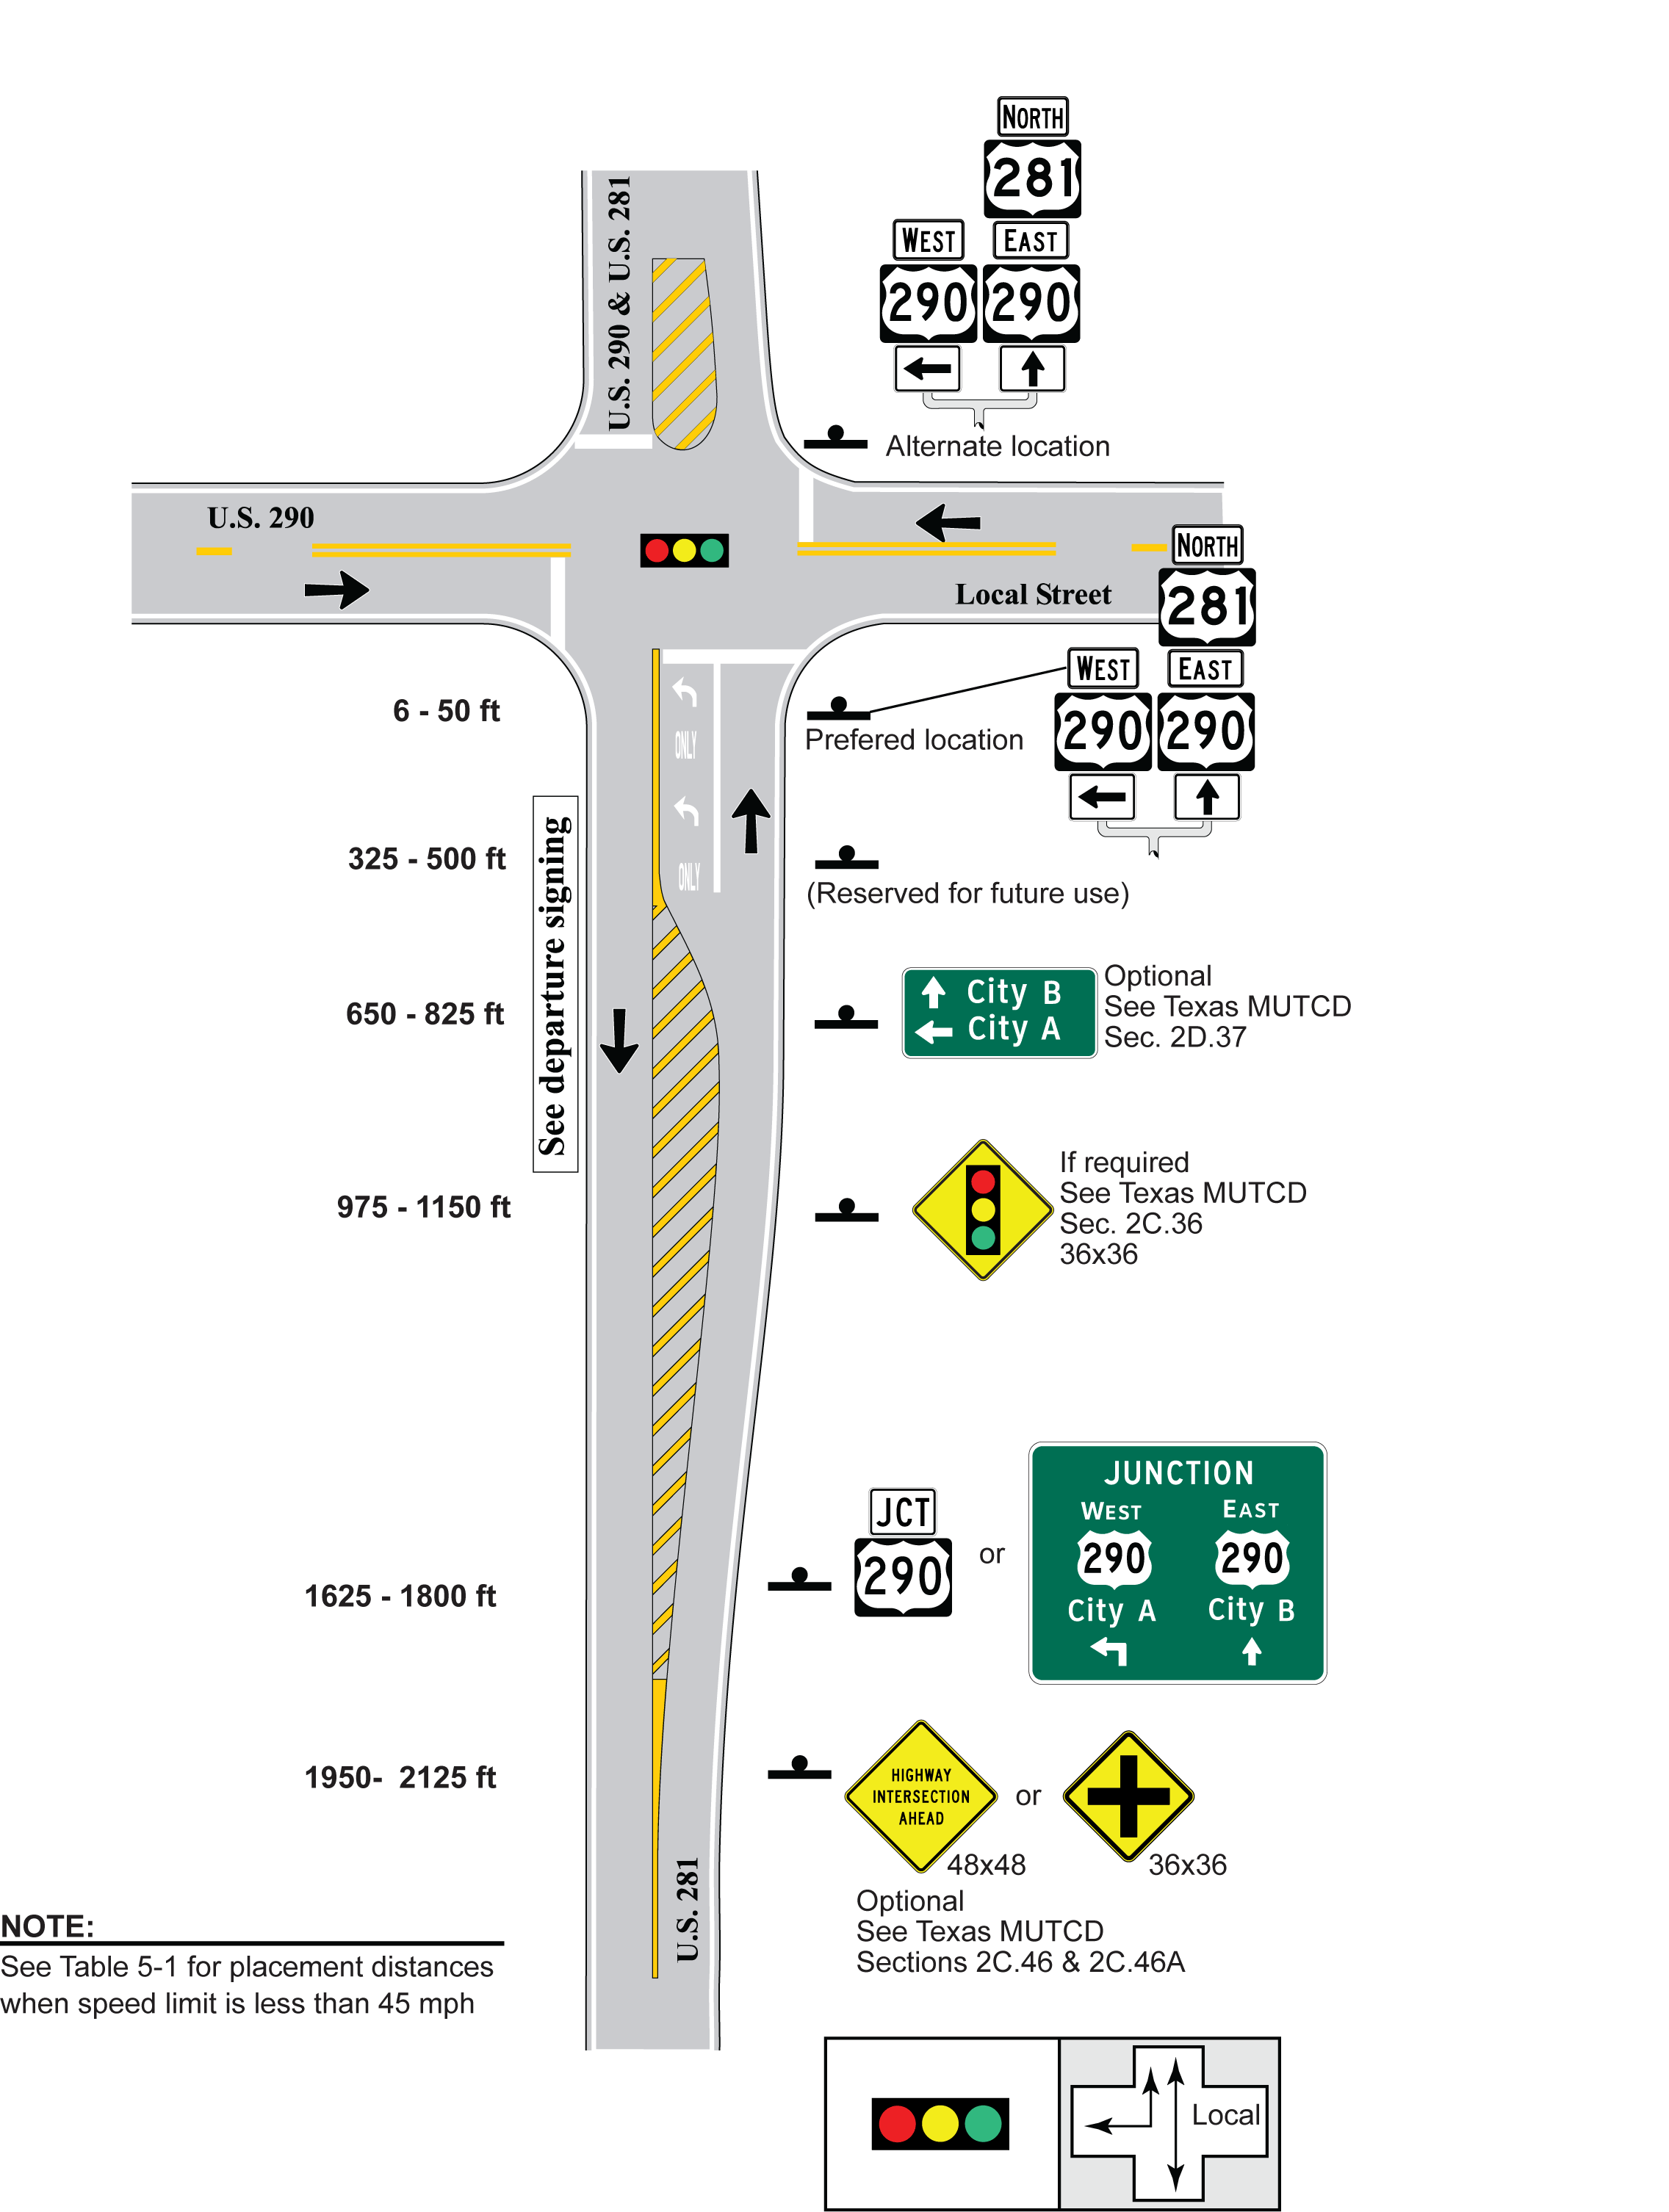
Figure 5-24. 4-Leg, 1 Approach Lane + LT, Signal Control, Approach Route Goes Through
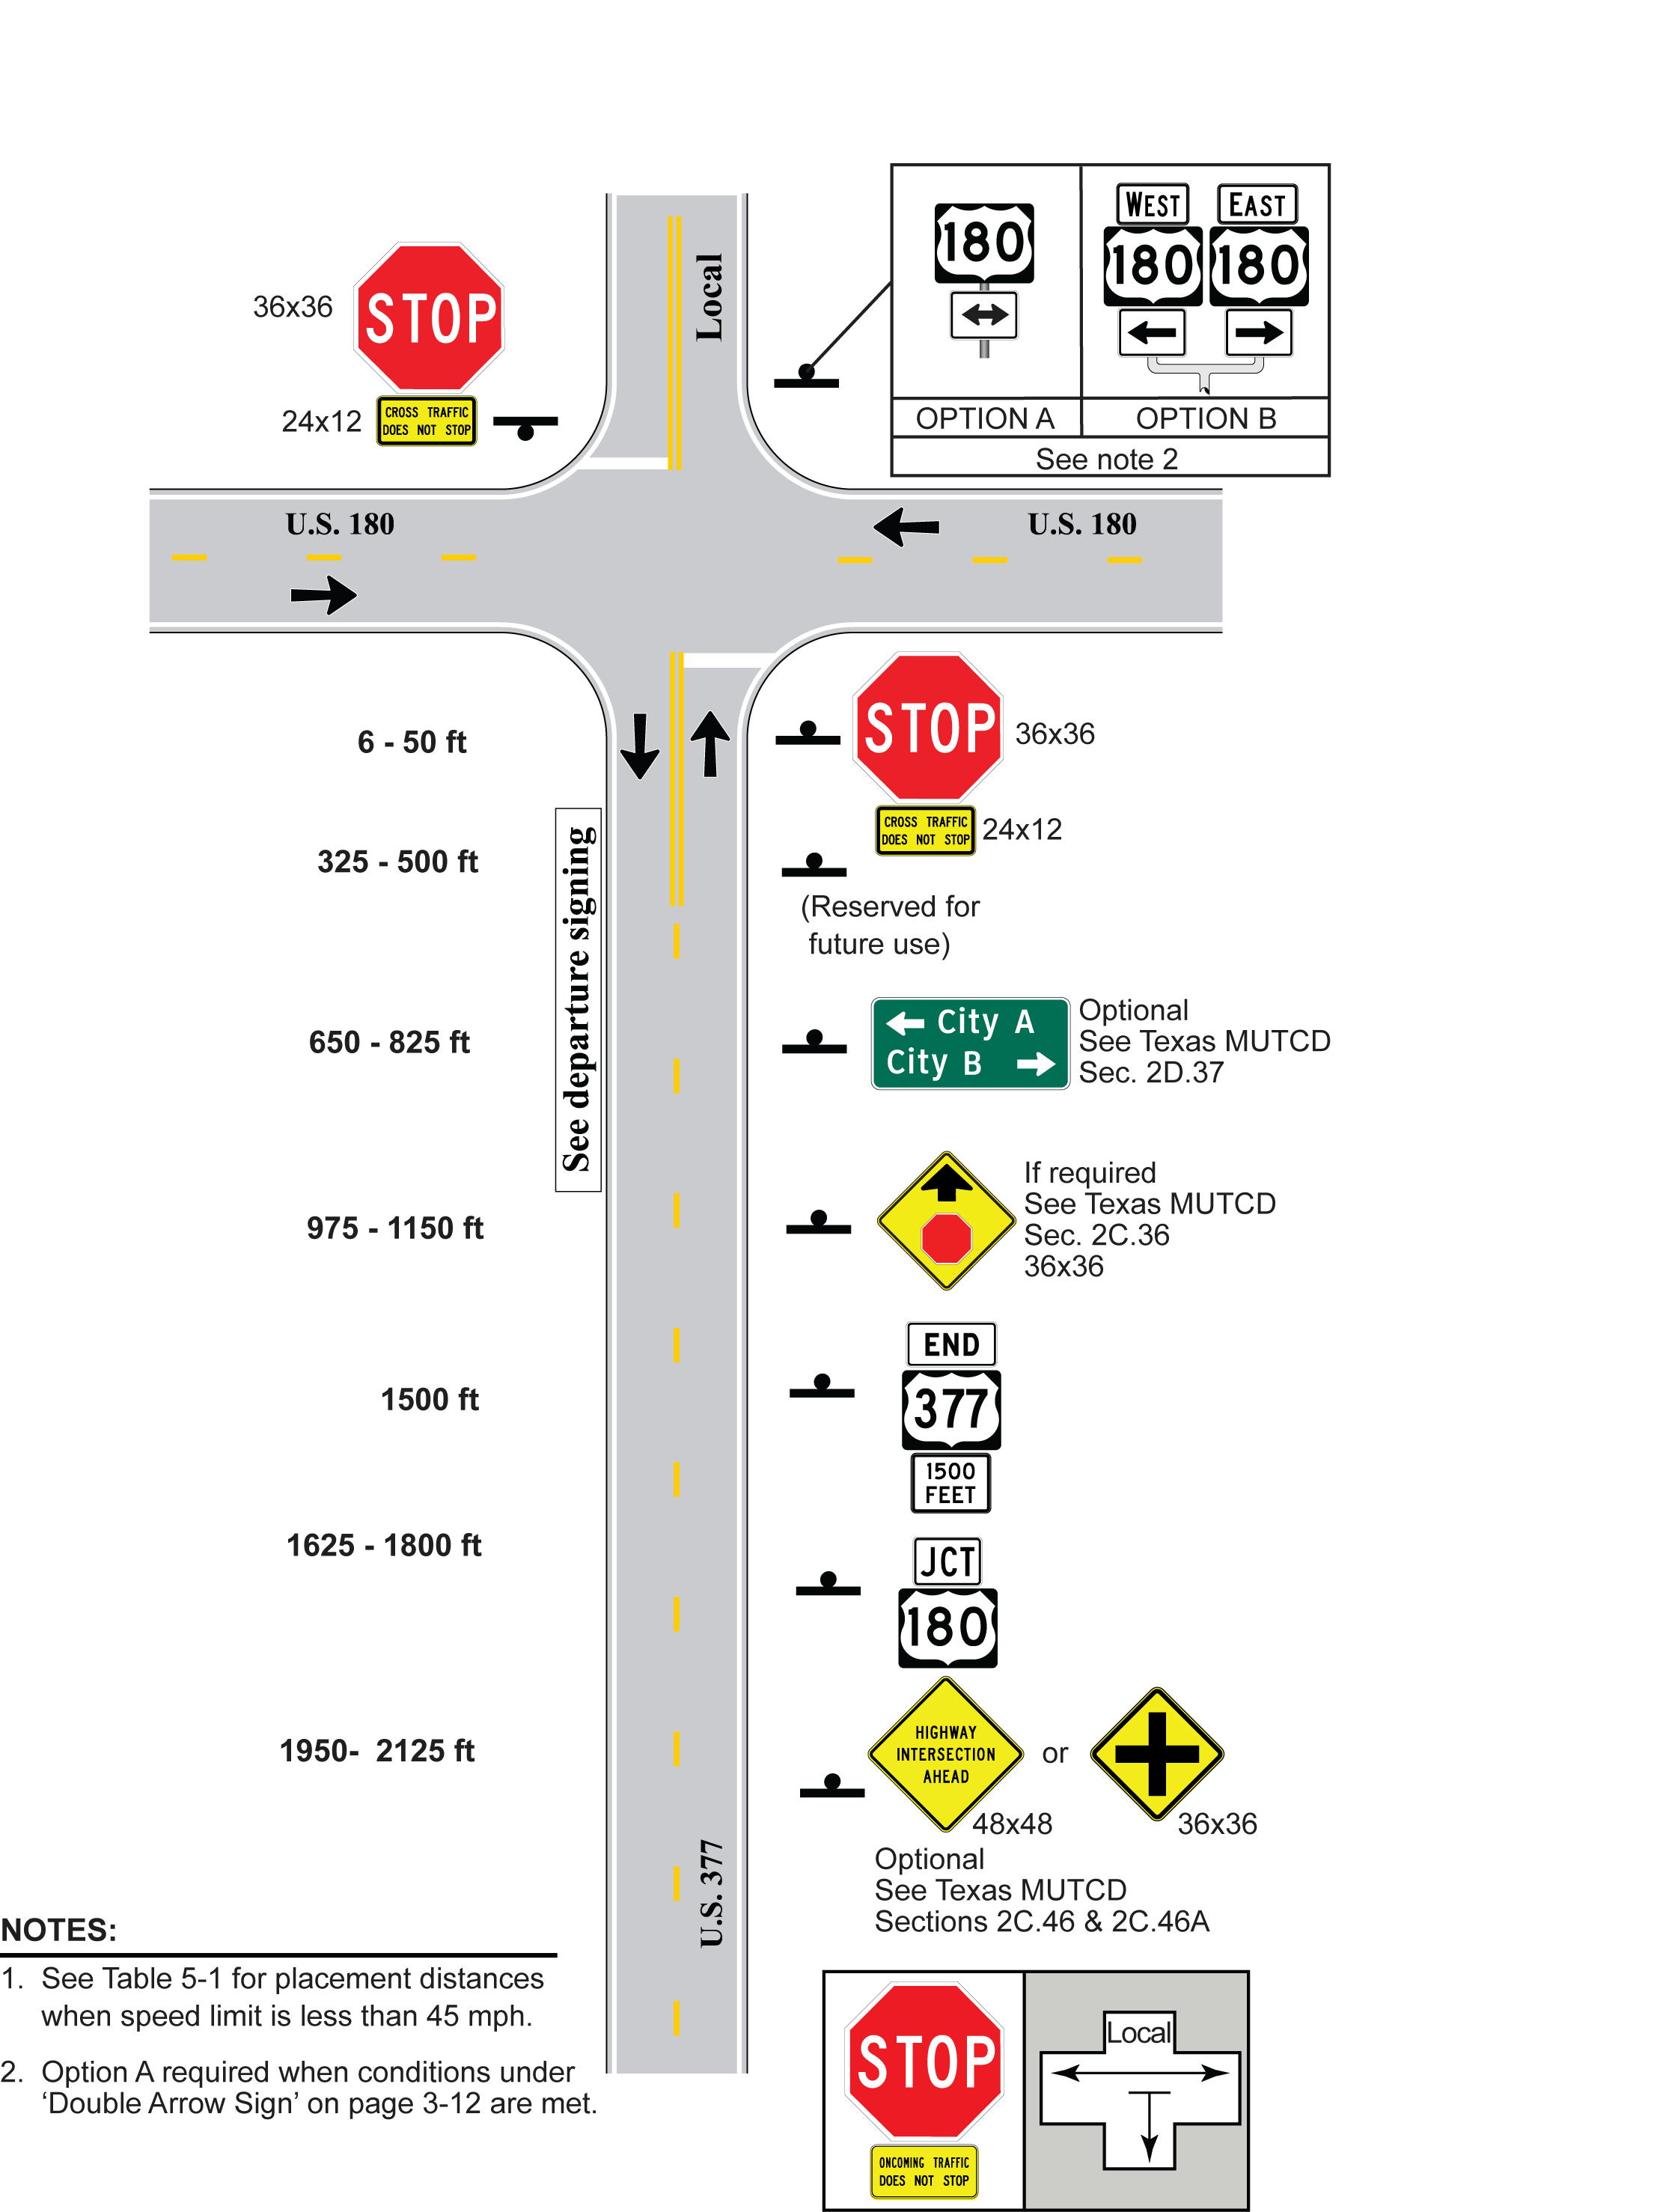
Figure 5-25. 4-Leg with Local Street, 1 Approach Lane, Stop Control, Approach Route Ends
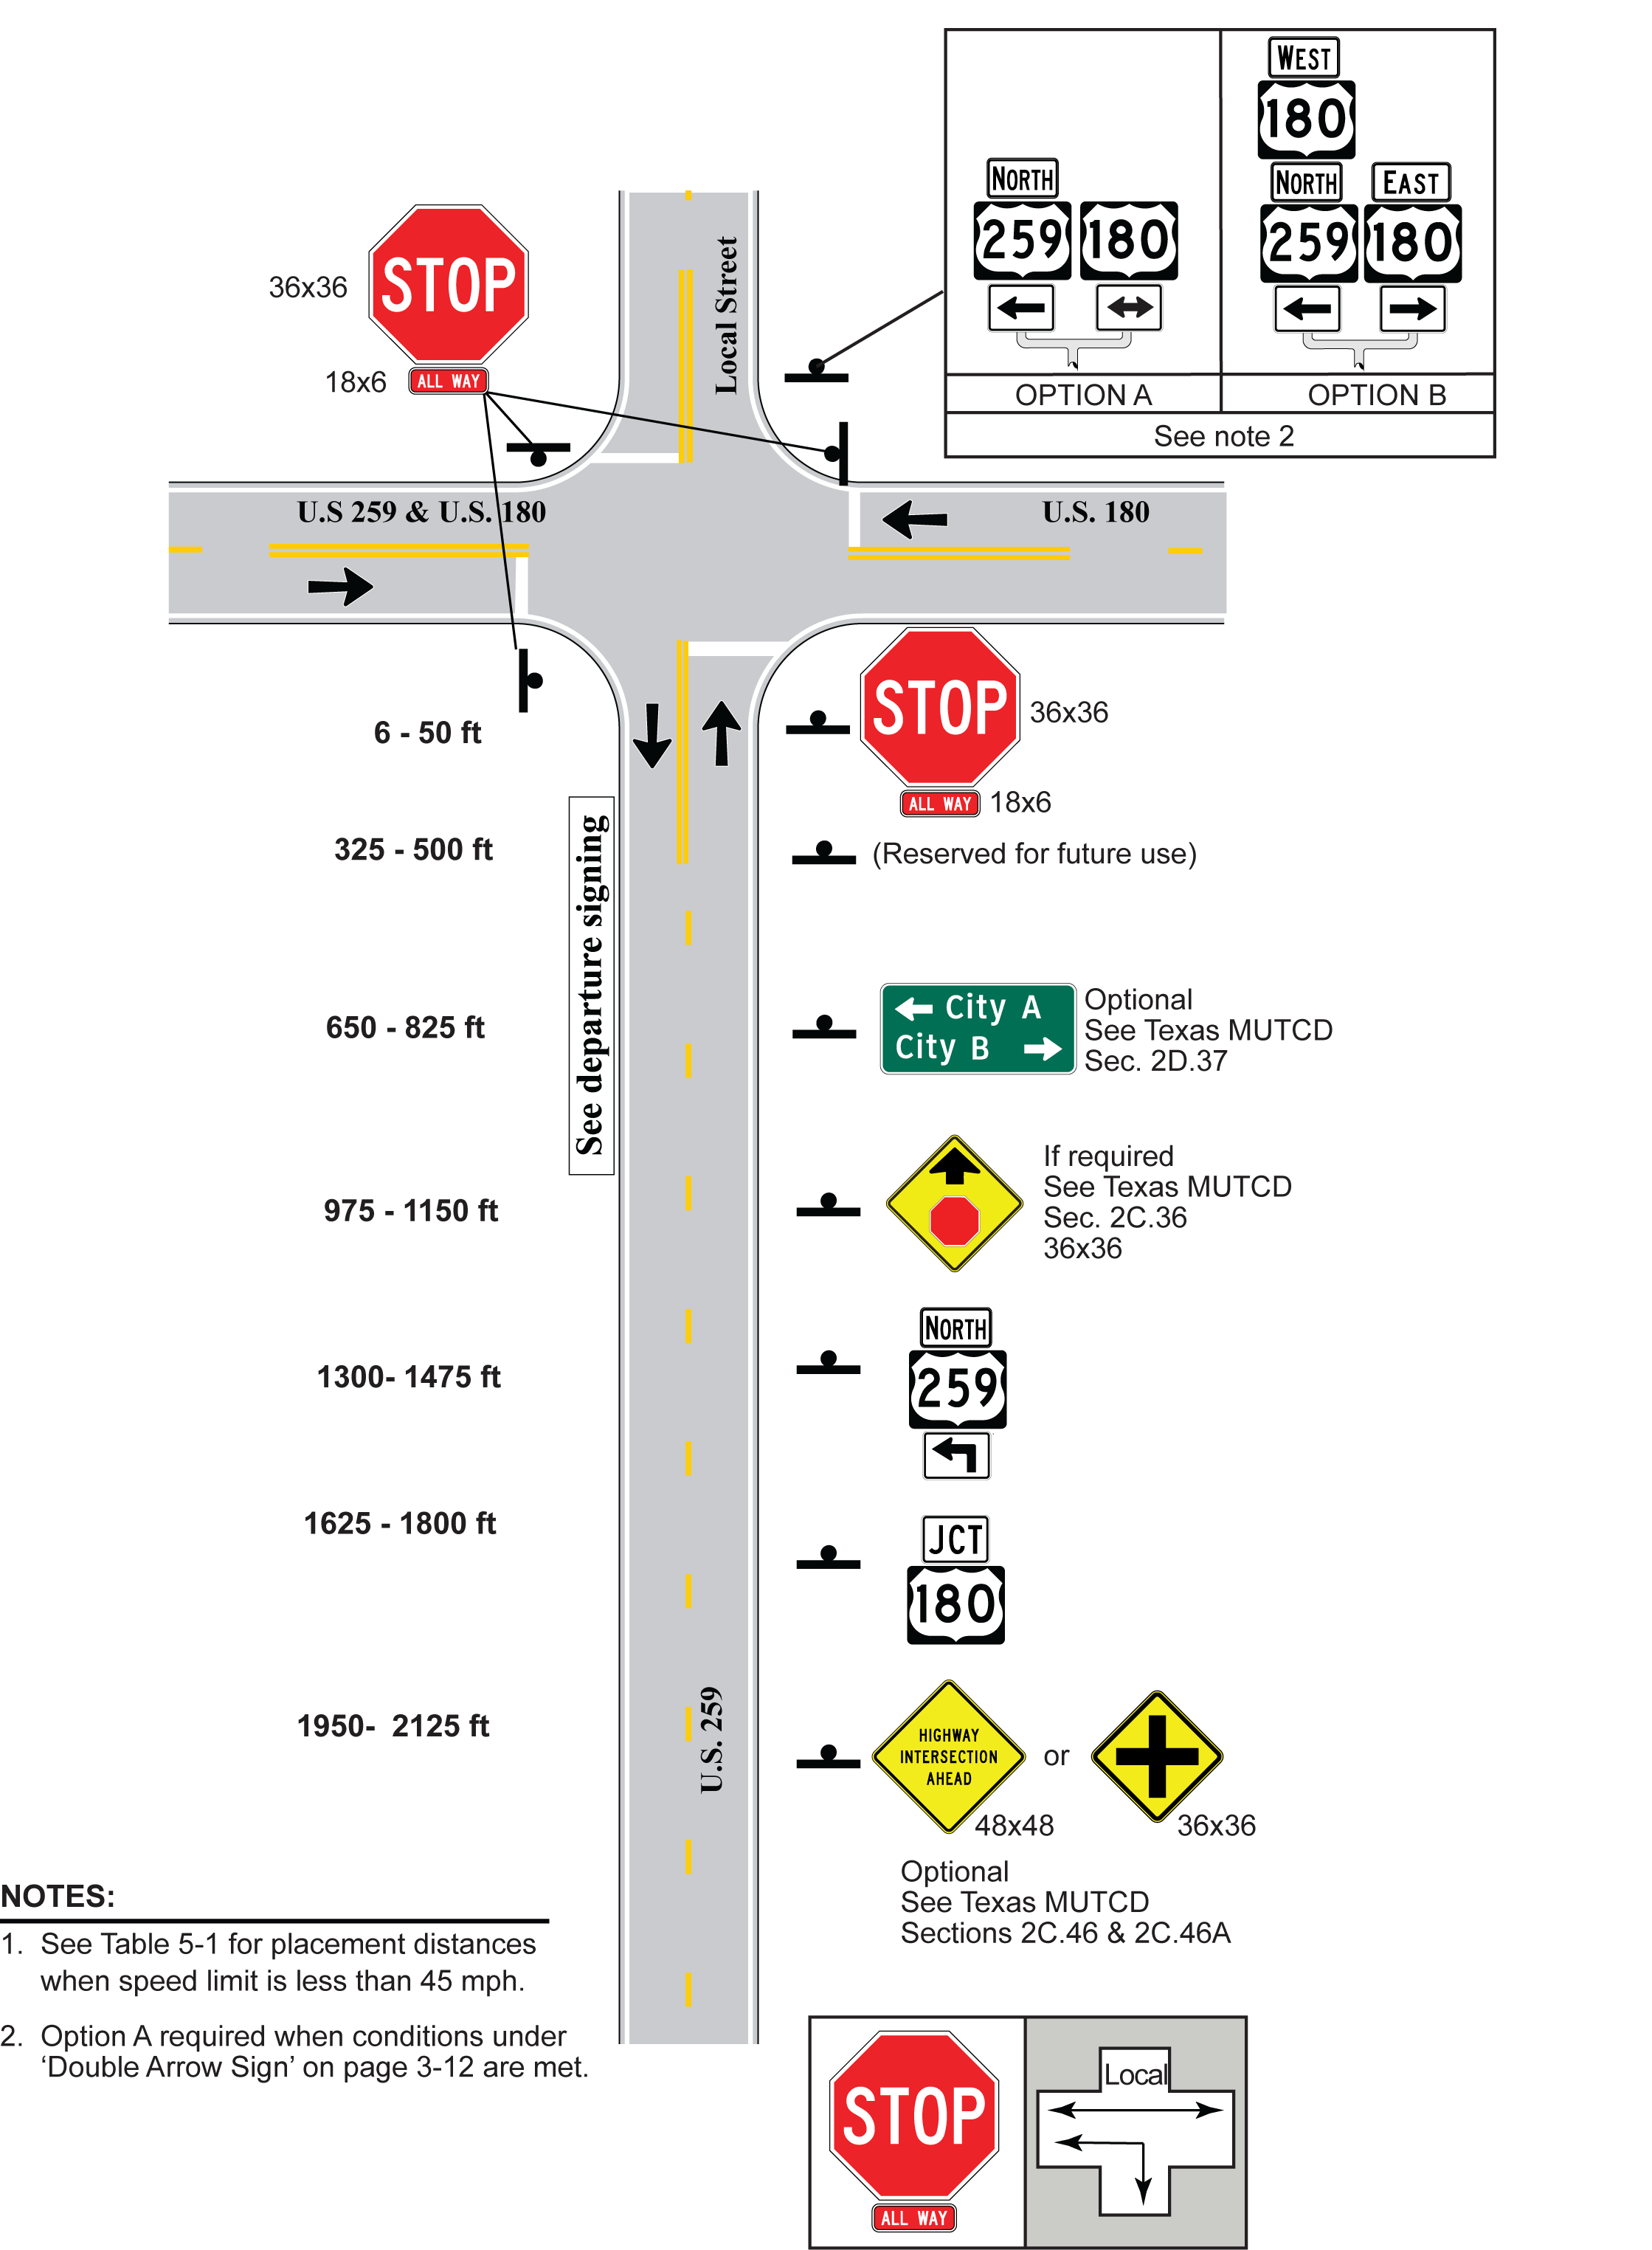
Figure 5-26. 4-Leg with Local Street, 1 Approach Lane, Stop Control, Approach Route Goes Left
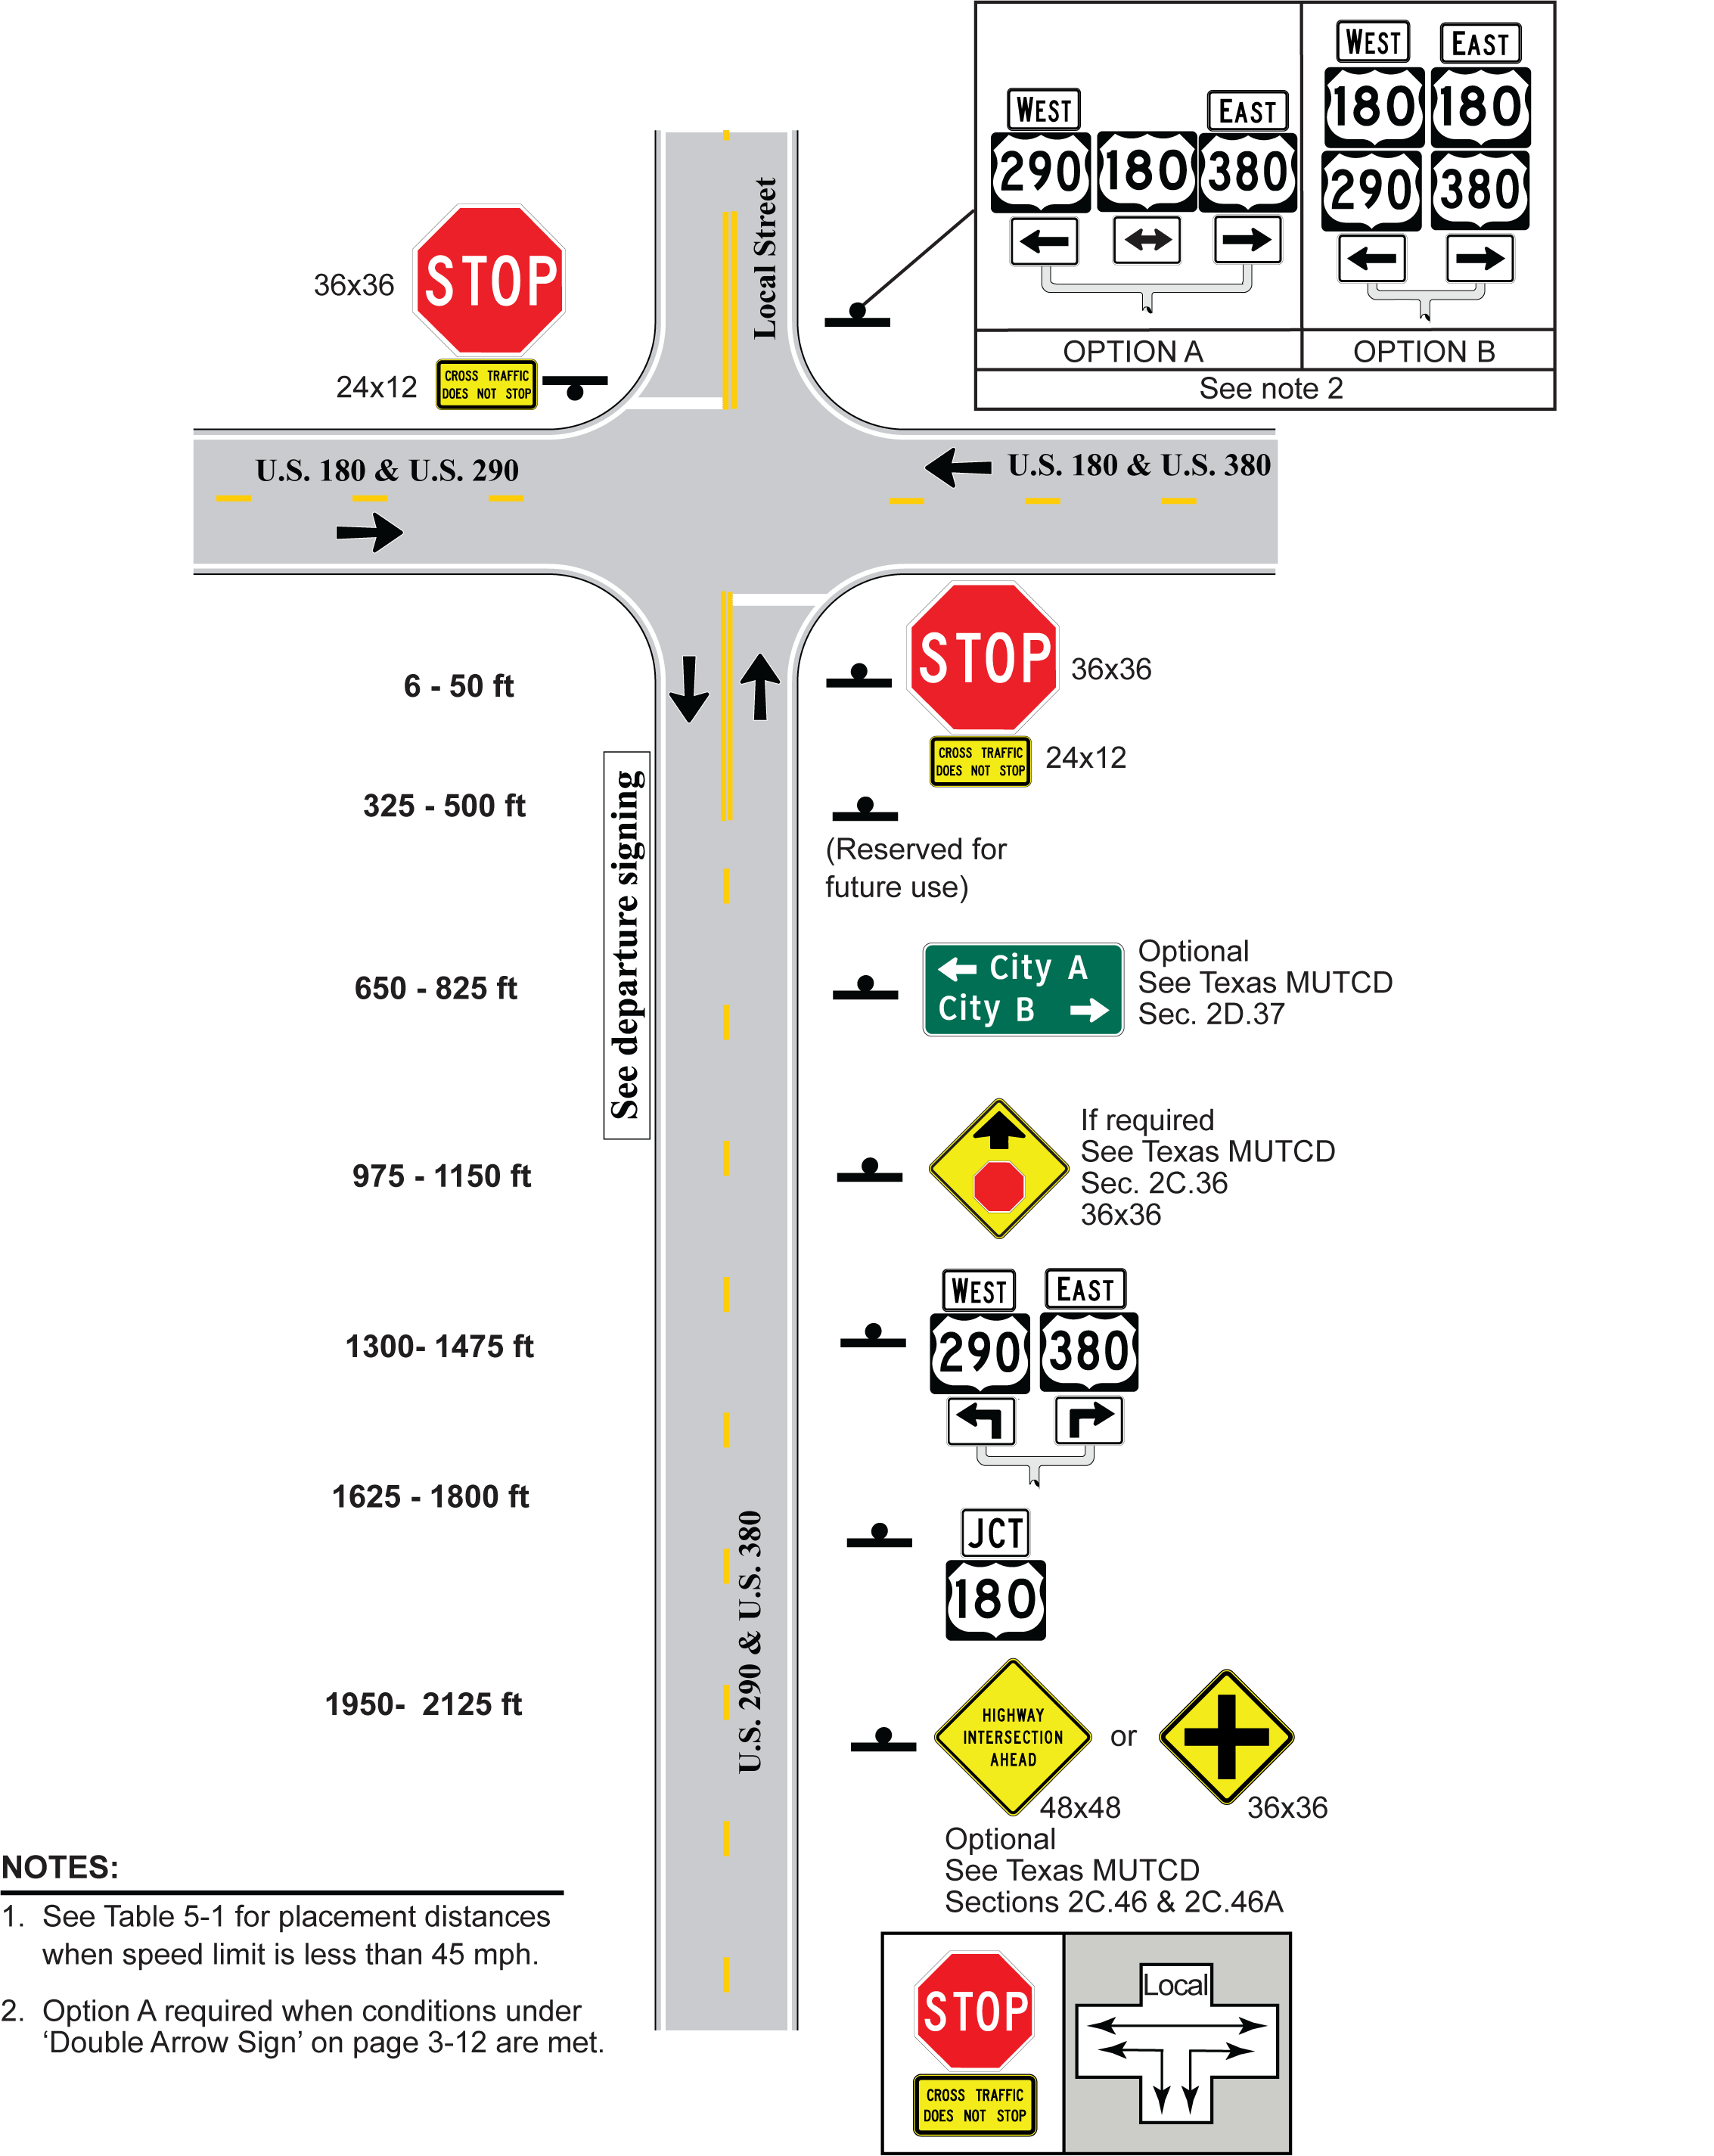
Figure 5-27. 4-Leg with Local Street, 1 Approach Lane, Stop Control, Approach Route Goes Left and Right
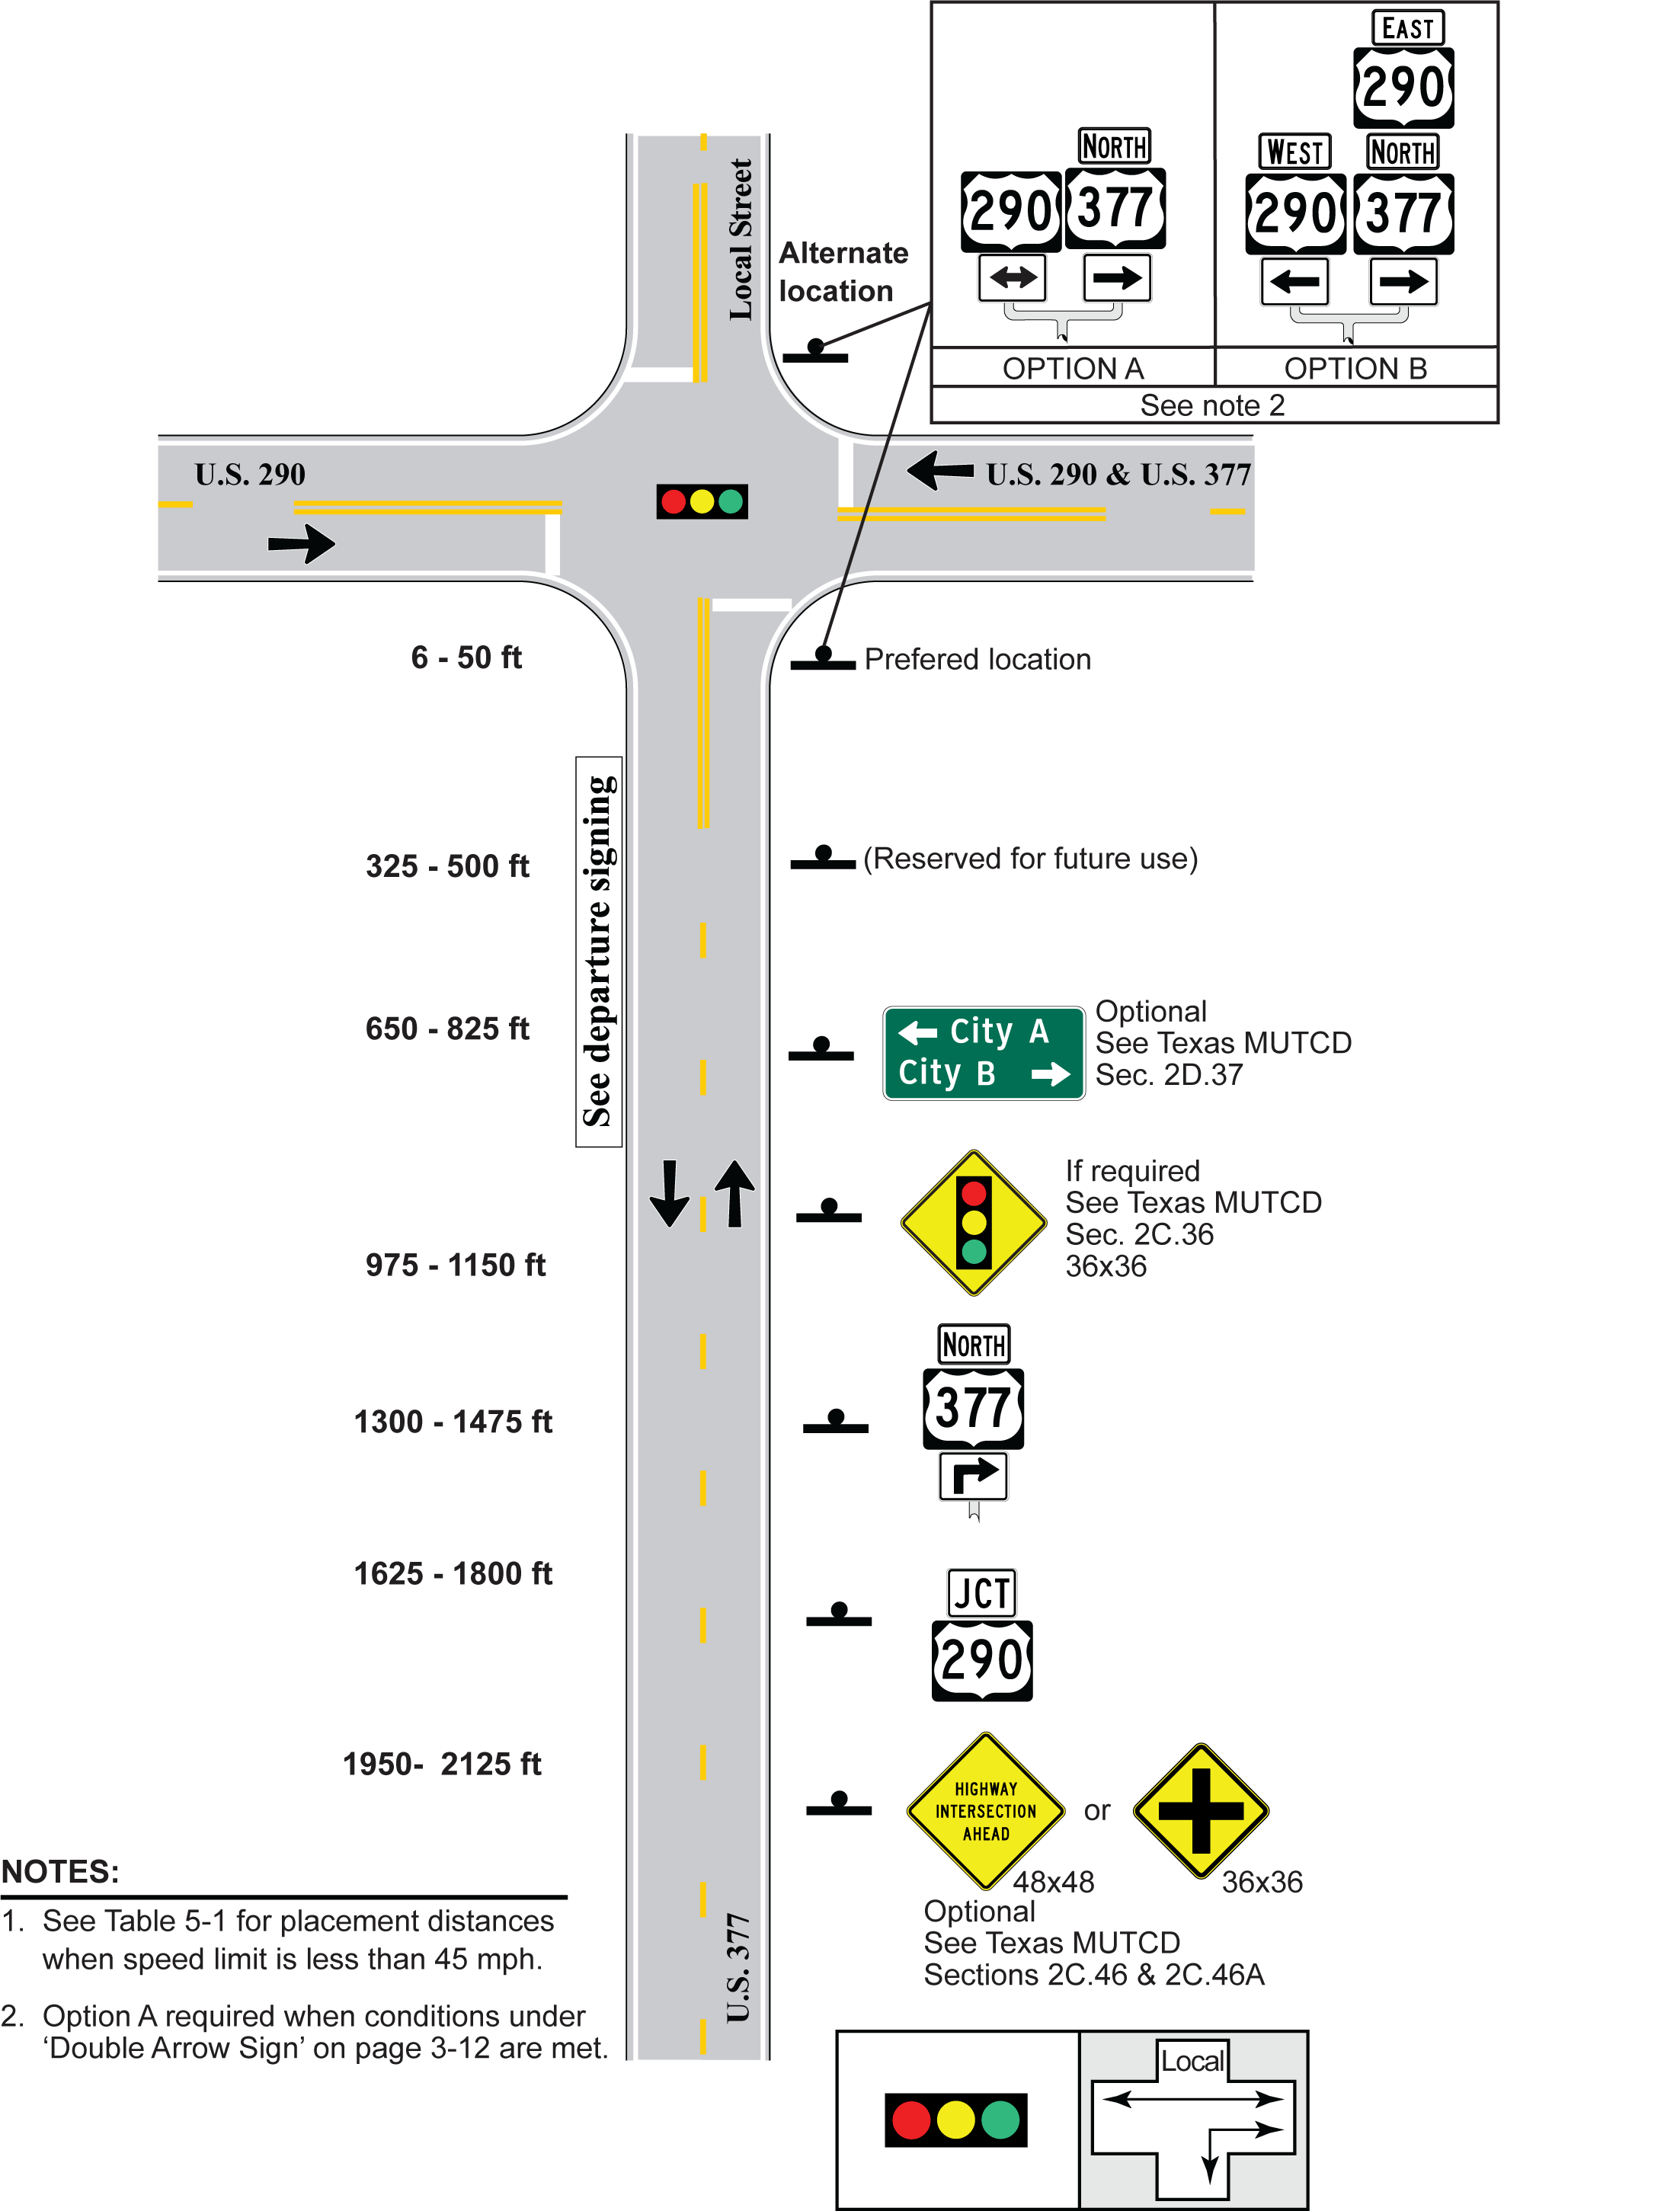
Figure 5-28. 4-Leg with Local Street, 1 Approach Lane, Signal Control, Approach Route Goes Right
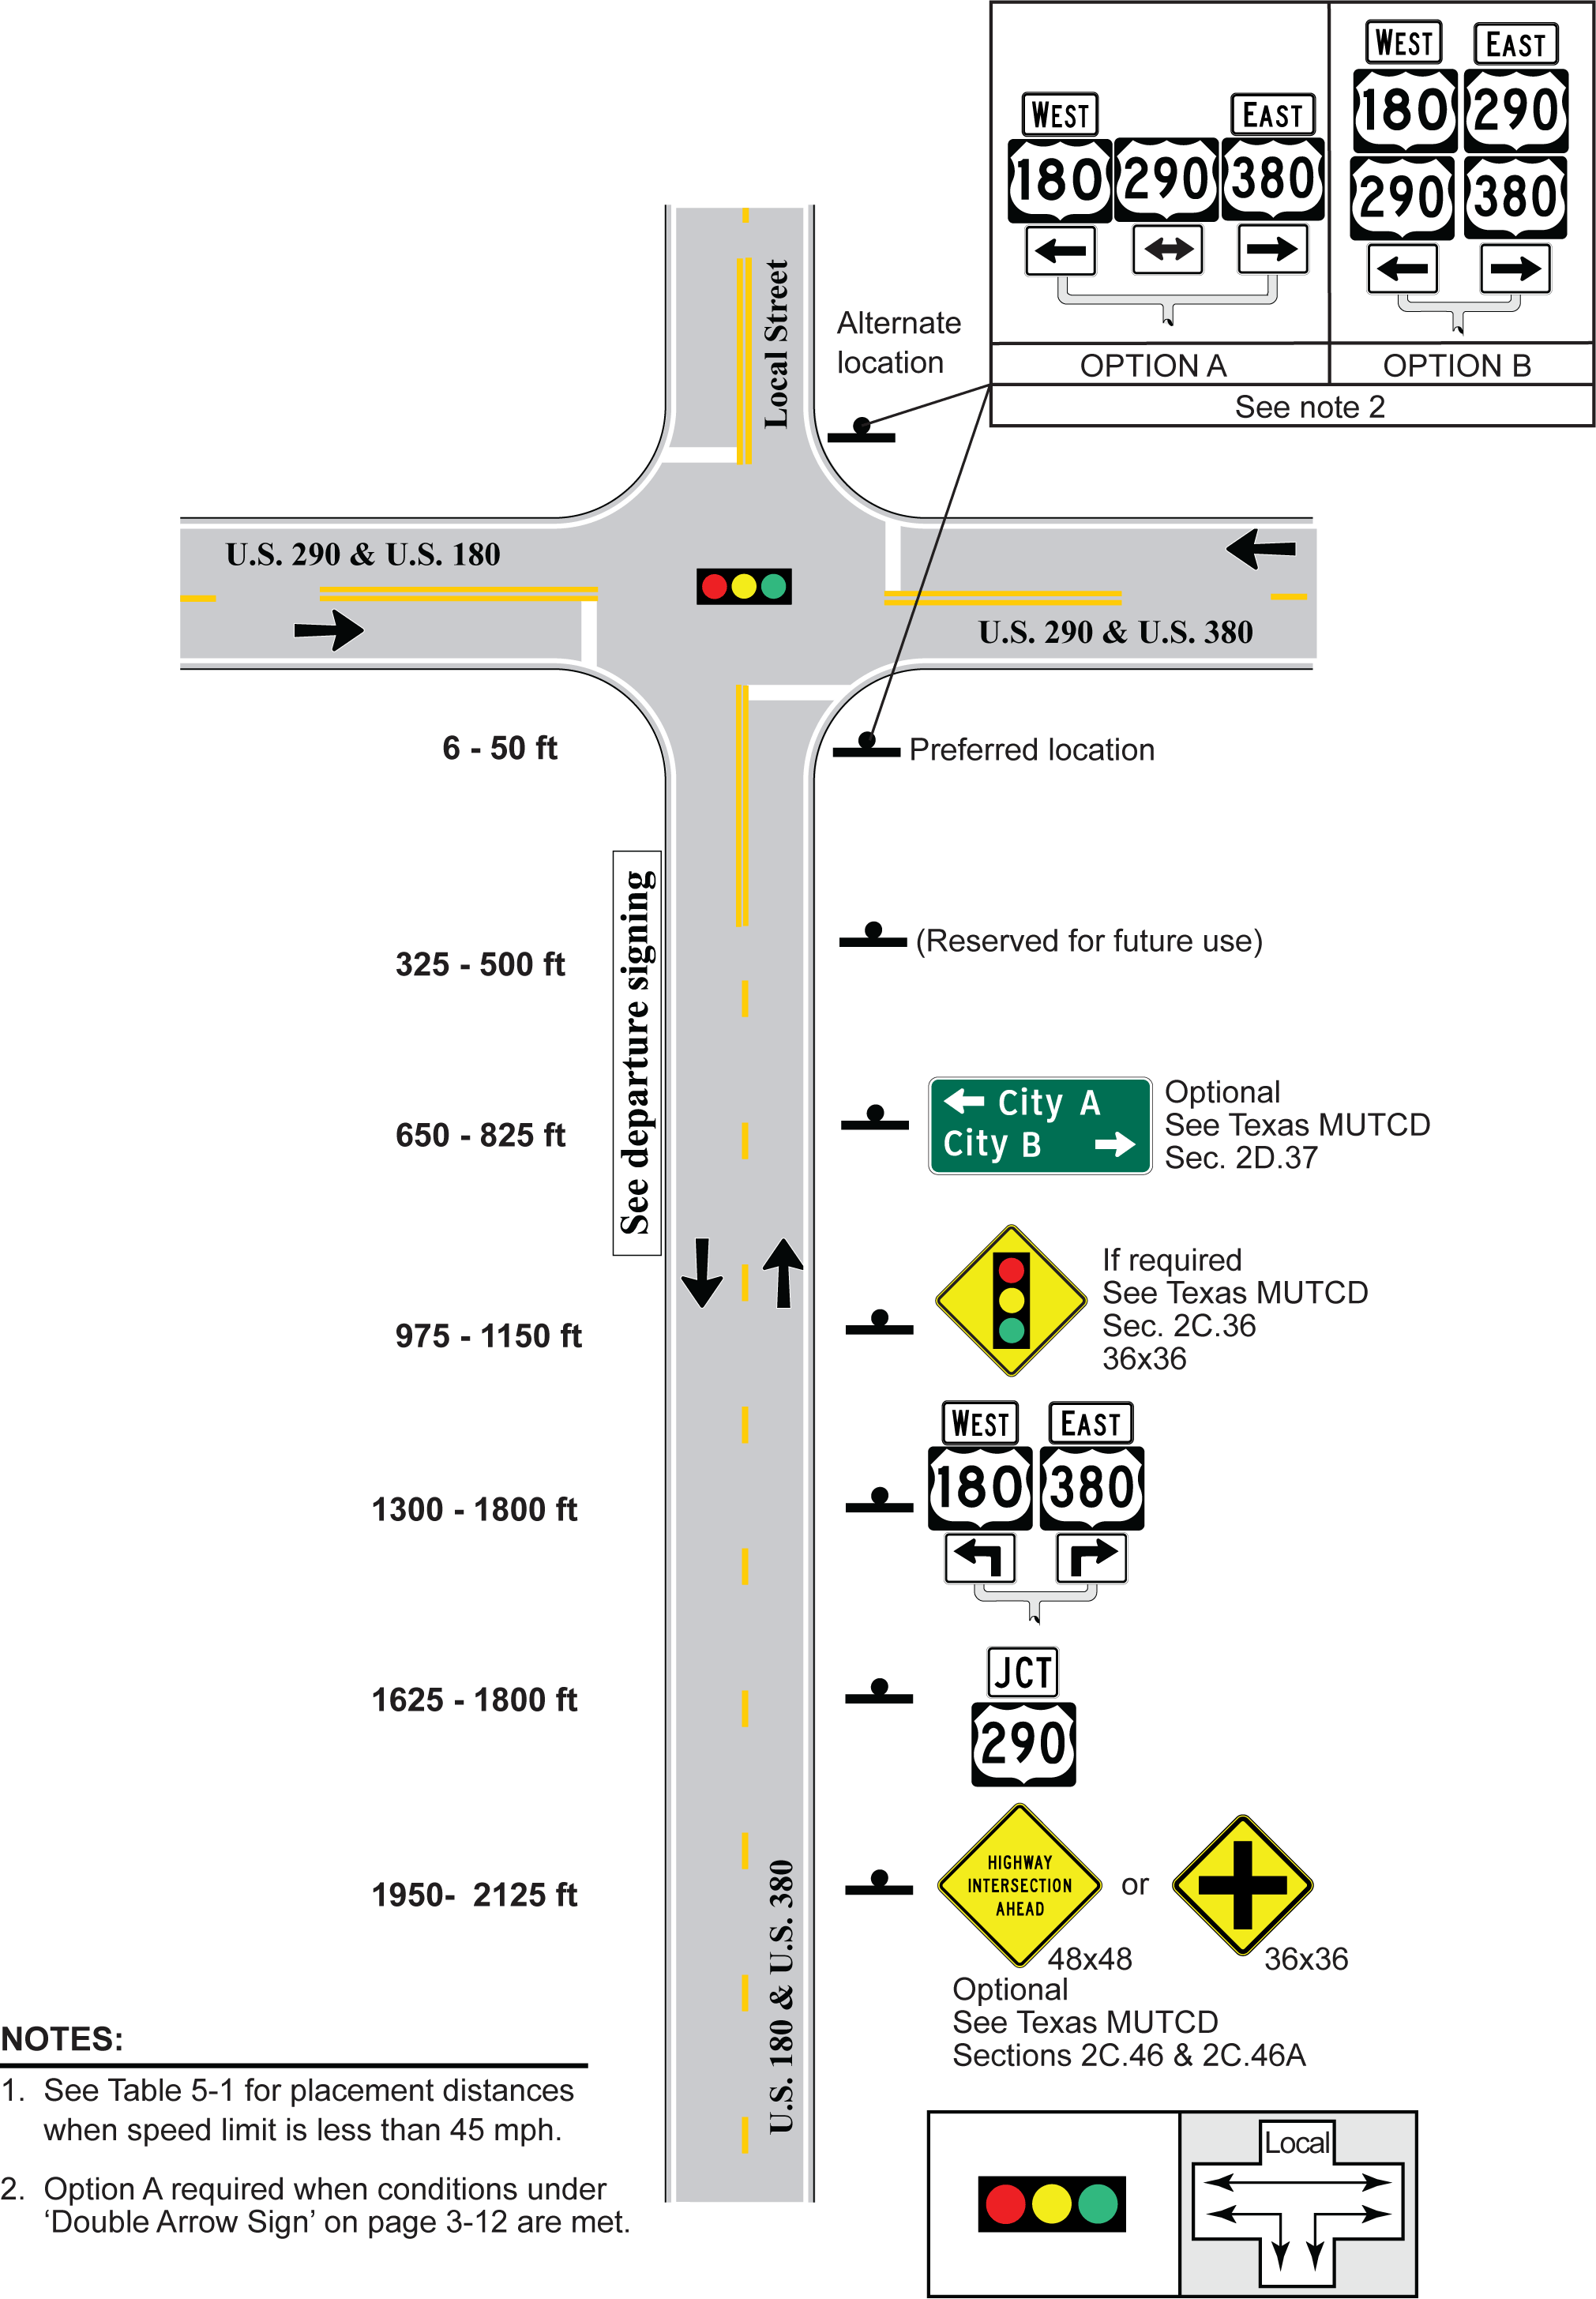
Figure 5-29. 4-Leg, 1 Approach Lane, Signal Control, Approach Route Goes Left and Right