Repair Procedure
- Mixing.
- Except in very small applications (less than 1 cubic yard), use a mortar or volumetric mixer. Ready-Mix suppliers and trucks should typically provide batched concrete (Class K or Class S), though the Engineer may approve volumetric mixers on a case-by-case basis.
- For small applications (less than 1 cubic yard total), mix the components thoroughly by mechanical means (electric drill or mortar mixer) per the manufacturer's requirements. Do not mix repair material by hand.
- Regardless of the mixer type, carefully proportion the water to ensure water-to-cement ratio falls within manufacturer limits. Do not guess at proper quantities or add water to attain a desired consistency.NOTE: Contractors often use “5-gallon” buckets to proportion water. The actual volumes of these buckets can vary significantly. The Contractor and Inspector should verify actual volumes rather than assuming the buckets actually hold exactly 5 gallons.
- Do not mix material until surface preparation is complete. Ensure that there are sufficient amounts of material, mixing equipment, and labor to provide a continuous supply of mixed concrete until the placement is complete. Take sufficient steps to prevent cold joints between lifts, keeping in mind that many proprietary materials set up very rapidly (less than 15 minutes) in hot weather.
- Removal of Concrete.
- Saw-cut the perimeter of the proposed repair approximately 1/2 to 3/4 inches but do not cut existing reinforcing steel. Adjust depth as necessary to avoid damaging deck steel.
- Use power-driven chipping tools or hydro-demolition equipment to remove concrete. Avoid damage to sound concrete to remain. Contractor may use up to 30-lb. hammers for the bulk of the work. However, 15-lb. hammers or smaller must be used at the base and perimeter of the repair area to avoid damaging the surrounding concrete.
- Remove additional concrete as necessary to keep the repair area to a reasonably uniform depth.
- Partial-Depth Deck Repair
- Remove a sufficient amount of damaged concrete to ensure that the remaining deck is sound. Provide a uniformly rough surface with a chipped appearance (1/4 inch minimum surface profile or ICRI Concrete Surface Profile 9).
- Even if defective material does not extend beyond top layer of reinforcement, remove enough concrete to ensure there is minimum ¾ inch clearance below the top layer of steel in order to provide mechanical bond for new patch material.
- Repairs over precast deck panels (PCPs): Completely remove cast-in-place concrete to expose roughened PCP surface. Ensure that demolition operations do not damage the PCPs.
- Full-Depth Deck Repair: Square or slightly undercut the repair perimeter.
- The Engineer or the Inspector may sound the perimeter of the repair area to determine whether concrete removal operations caused damage beyond the intended perimeter. If that is the case the repair area must be extended to include the unintentionally damaged area.
- For full-depth repairs, remove the concrete and place forms in accordance with Item 422, Concrete Superstructures, or as approved by the Engineer.
- Obtain approval from the Engineer of the completed concrete removal before proceeding with surface preparation.
- Reinforcing Steel.
- Remove all rust and other deleterious material from reinforcing steel.
- For non-epoxy coated reinforcing and for epoxy coated steel bars with coating failure, abrasive blast clean steel. Inspect cleaned steel for damage. Replace bars when cross-section is reduced greater than 25 percent.
- Apply an approved epoxy coating to repair minor damage to existing epoxy coated bars.
- When the original epoxy coating on the bars was removed by abrasive blasting, apply an epoxy coat around the entire circumference of the bars extending a minimum of 3 inches from the repair perimeter into the repair area.
- Install reinforcing steel as indicated on the plans or as directed by the Engineer. Place reinforcement parallel to the finished surface. Lap adjacent sheets or bars at least 6 inches and tie them together securely at a spacing of at most 18 inches.
- Pre-bend reinforcing steel fabric to fit around corners and into re-entrant angles before installing it. Place and secure reinforcement to prevent displacement due to repair material application.
- Surface Preparation.
- Just prior to repairing, thoroughly clean the concrete surfaces (bottom and sides).
- Clean the area to be repaired by high-pressure water blasting, or other approved methods. Remove all loose particles, dirt, deteriorated concrete, or other substances that would impair the bond of the repair material. Follow this with a high-pressure air blast for final cleaning.
- Ensure the surface of the existing concrete is in a saturated surface-dry (SSD) condition but remove all free (ponded) water just before placing repair material. Achieve an SSD condition by high-pressure water blasting at least 15 minutes before placing the repair material.
- Formwork.
- Formwork should be tight to prevent leakage of grout or mortar.
- Formwork surfaces should not be too hot, preferably not higher than 90°F, to avoid flash set of fresh concrete.
- Placement.
- Place the repair material onto the prepared surfaces. Consolidate using immersion-type vibrators or other methods acceptable to the Engineer.
- Curing.Moist curing is often neglected in deck repairs due to the need to return the bridge to service quickly. However, lack of adequate curing leads to problems on deck repair materials just as it does on any other cementitious repair. Bridge deck repairs should be moist cured for as long as possible. Although 72 hours of curing time is ideal, that is seldom practical in deck repair applications. Even a few hours of moist curing can be beneficial.Steps for full-depth deck repair
- Define repair boundary areas
- Sound the concrete to determine the boundary of repair area.
- Typically add 3 in. in both directions unless otherwise noted on plans.
- Delineate straight edges for repairs.
- Saw cut the repair boundary repair boundary areas
- Square or slightly undercut the repair perimeter.
- Do not cut reinforcement steel
- Remove deteriorated/unsound concrete
- Use power-driven chipping tools or hydro-demolition equipment to remove concrete. Avoid damage to sound concrete to remain. Contractor may use up to 30-lb. hammers for the bulk of the work. However, 15-lb. hammers or smaller must be used at the base and perimeter of the repair area to avoid damaging the surrounding concrete.
- Installation of formwork
- Formwork should be tight to prevent leakage of repair material.
- Prepare repair area
- Clean the area to be repaired by high-pressure water blasting, or other approved methods.
- Use abrasive blasting to remove rust from exposed steel surfaces.
- Remove all loose particles, dirt, deteriorated concrete, or other substances that would impair the bond of the repair material. Follow this with a high-pressure air blast for final cleaning.
- Mixing
- Prepare repair material in accordance with the approved methods for batching concrete.
- Place and finish concrete
- Place the repair material onto the prepared surfaces. Consolidate using immersion-type vibrators or other methods acceptable to the Engineer.
- Distribute the concrete evenly to avoid the need of excessive shoving. Use vertical penetrations of an approved vibrator to adequately consolidate the concrete. Do not drag the vibrator through the mix as this may cause segregation and loss of entrained air.
- Cure and insulate concrete
- Curing is important to help the concrete achieve intended strength and durability.
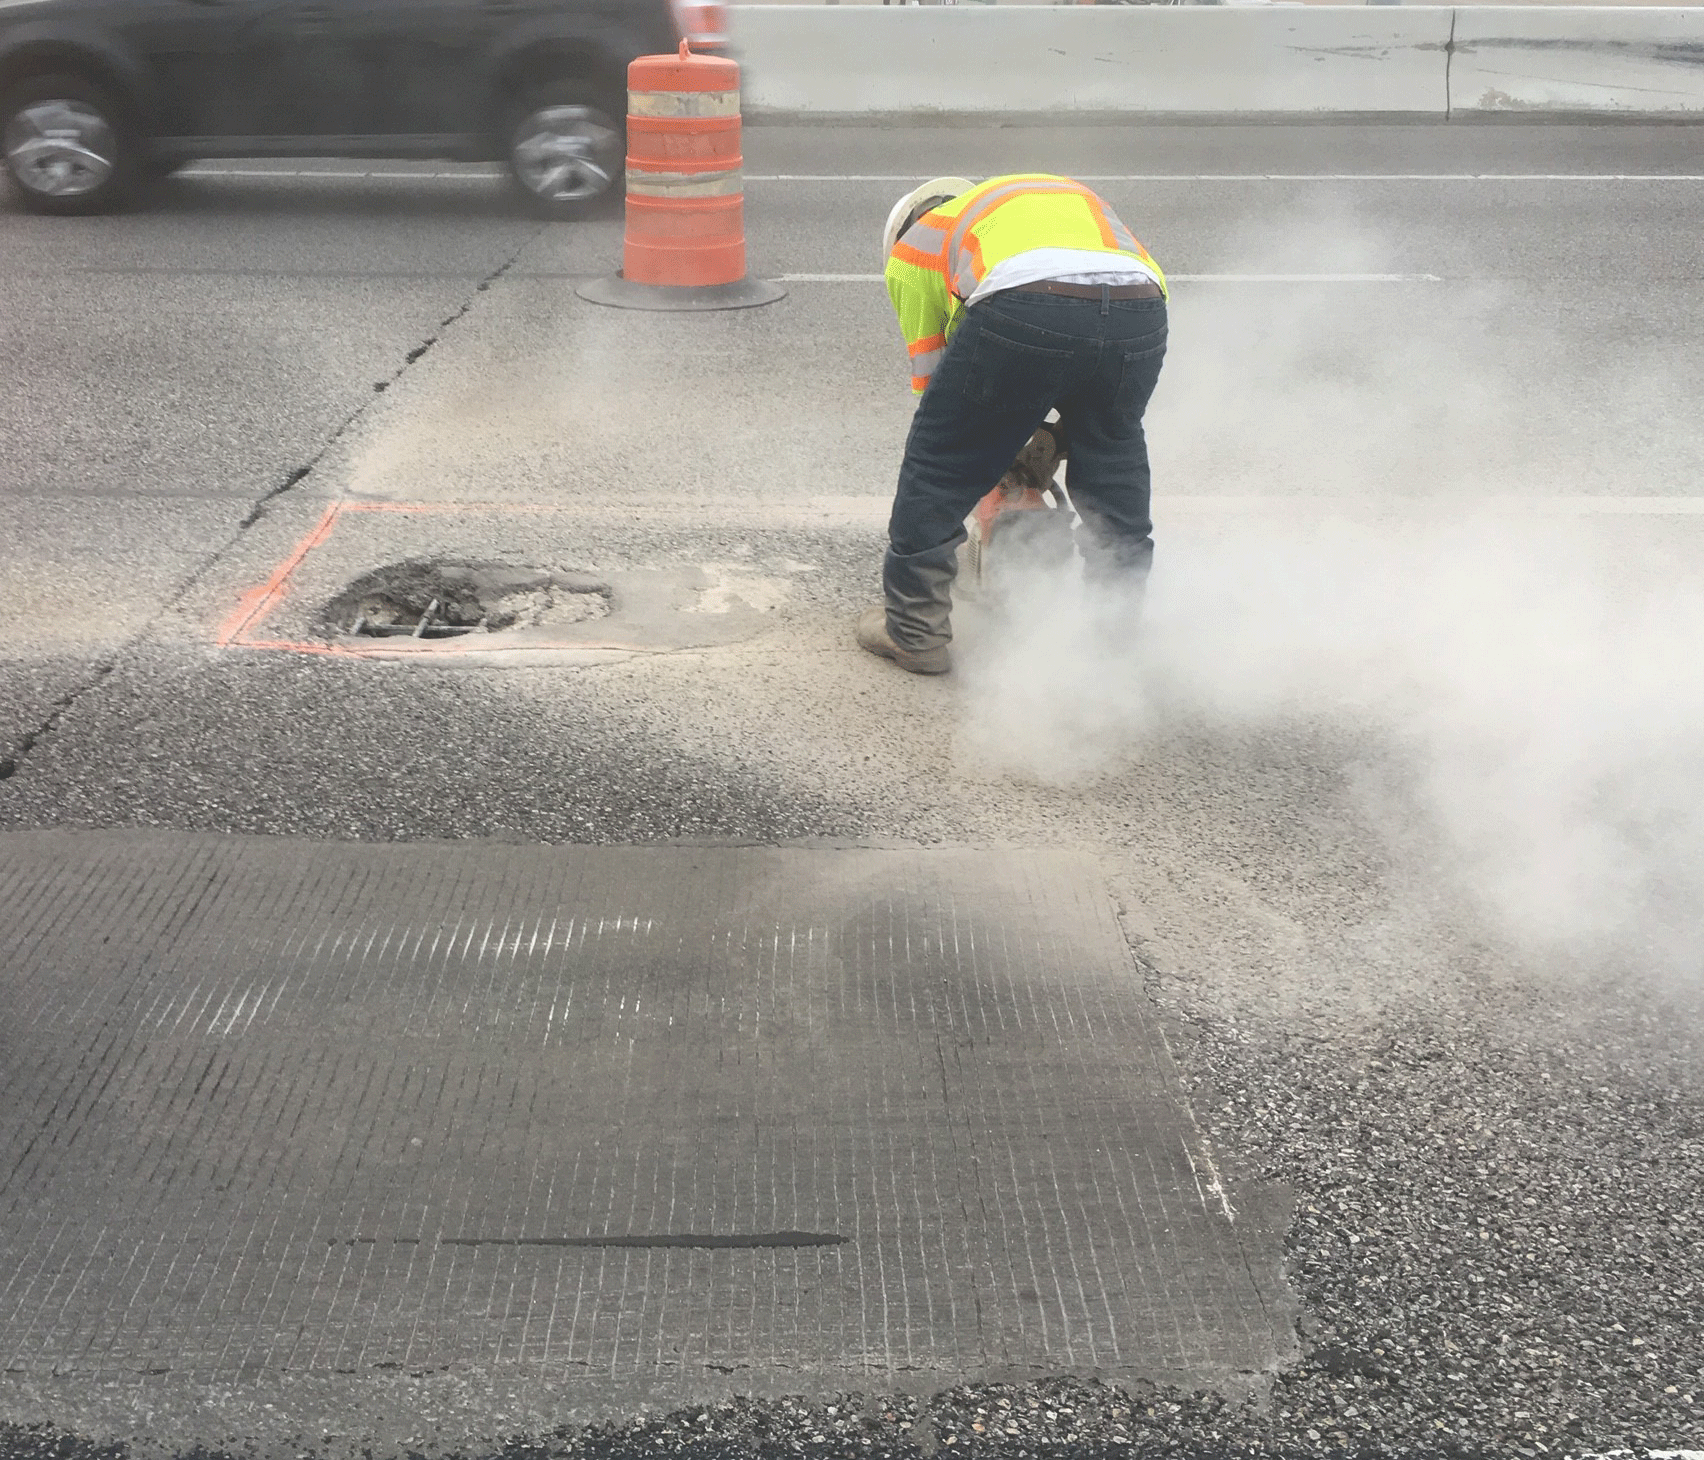 Figure 3-9. Saw-cutting along defined repair boundaries
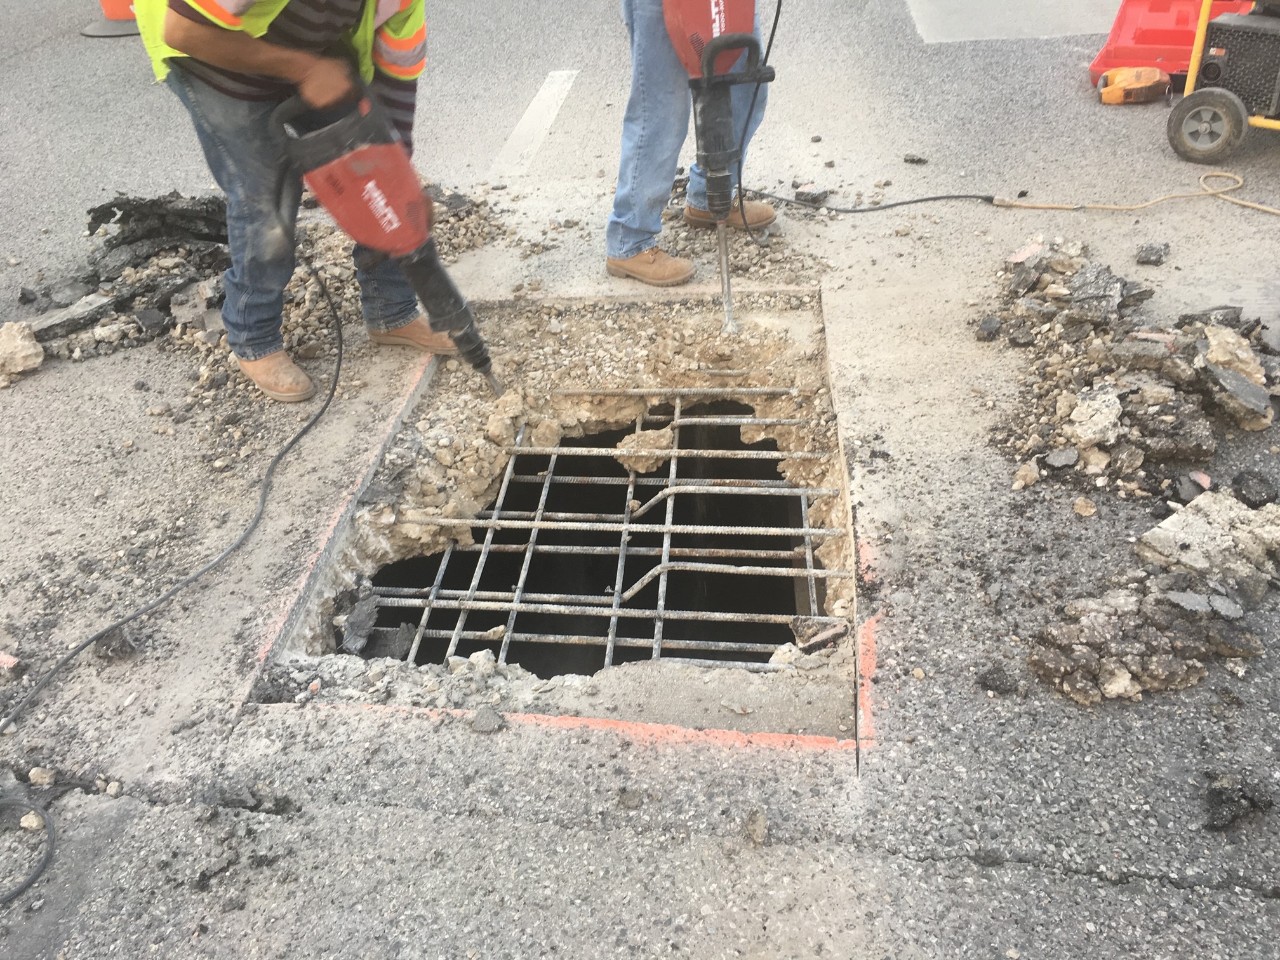 Figure 3-10. Remove deteriorated/unsound concrete
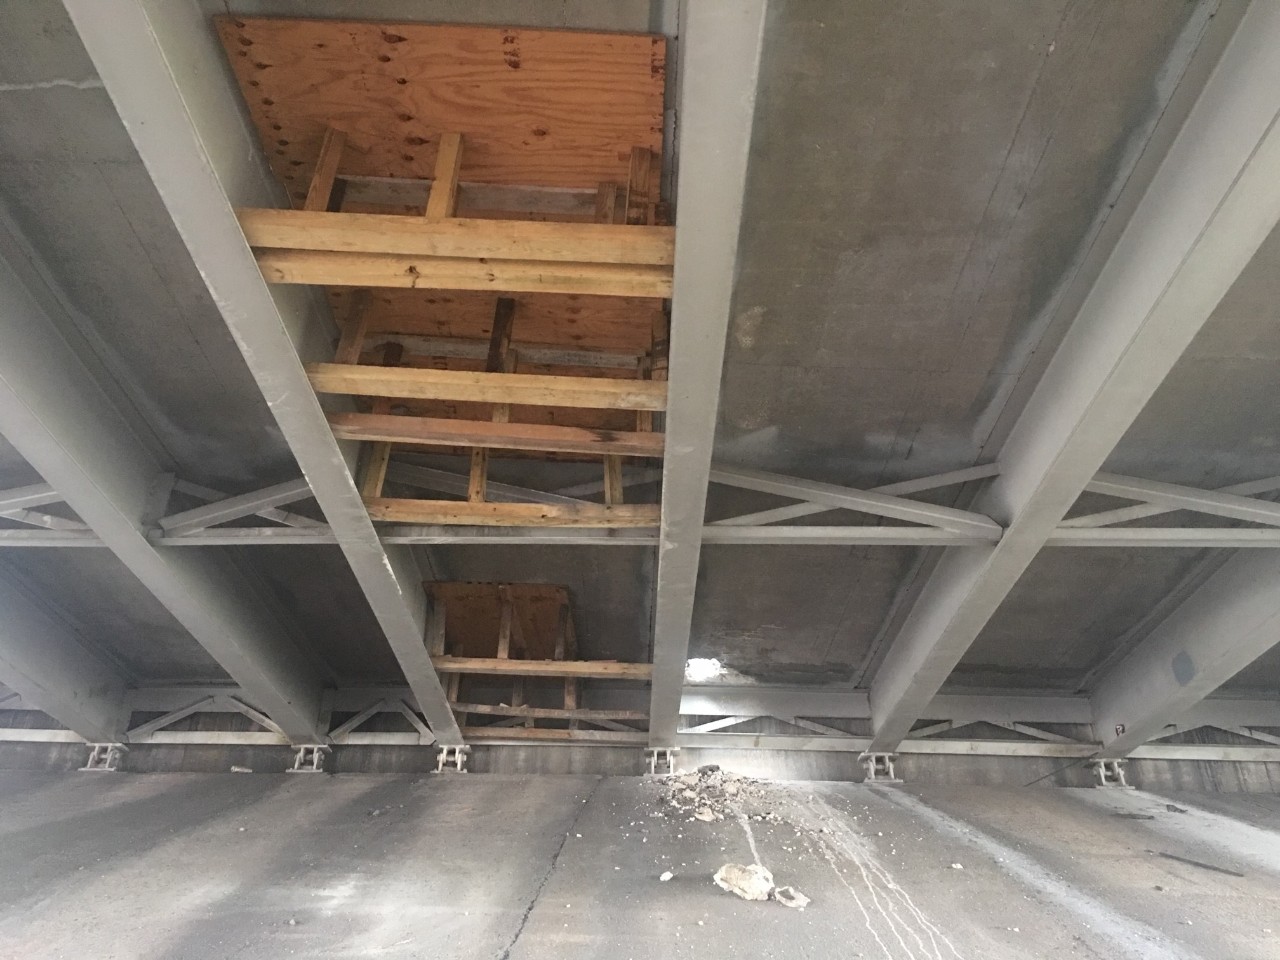 Figure 3-11. Installation of formwork
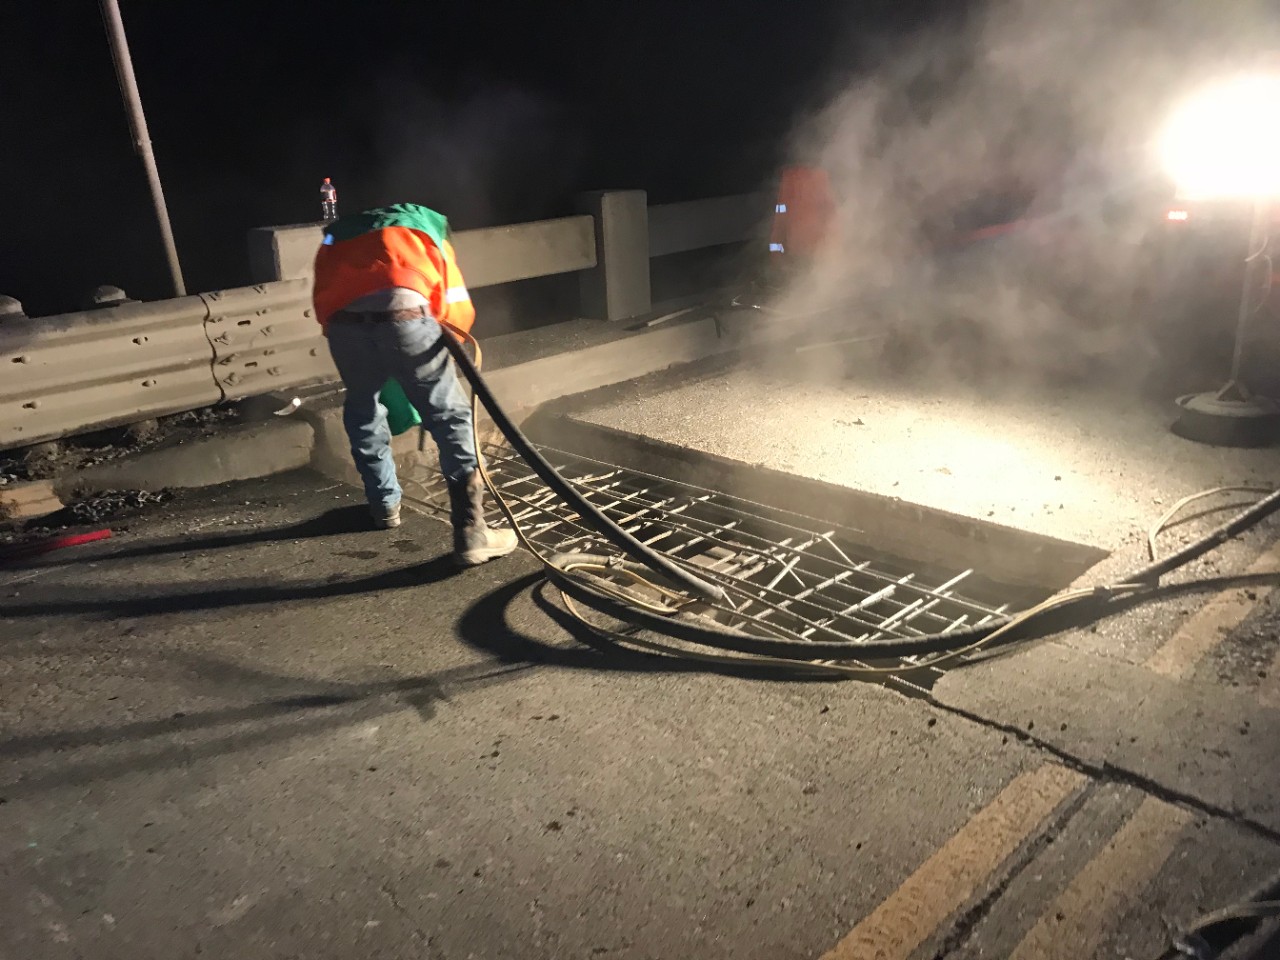 Figure 3-12. Repair area preparation (high-pressure water blasting, or other approved methods to remove dust and debris. Abrasive blasting to remove rust from exposed steel surfaces)
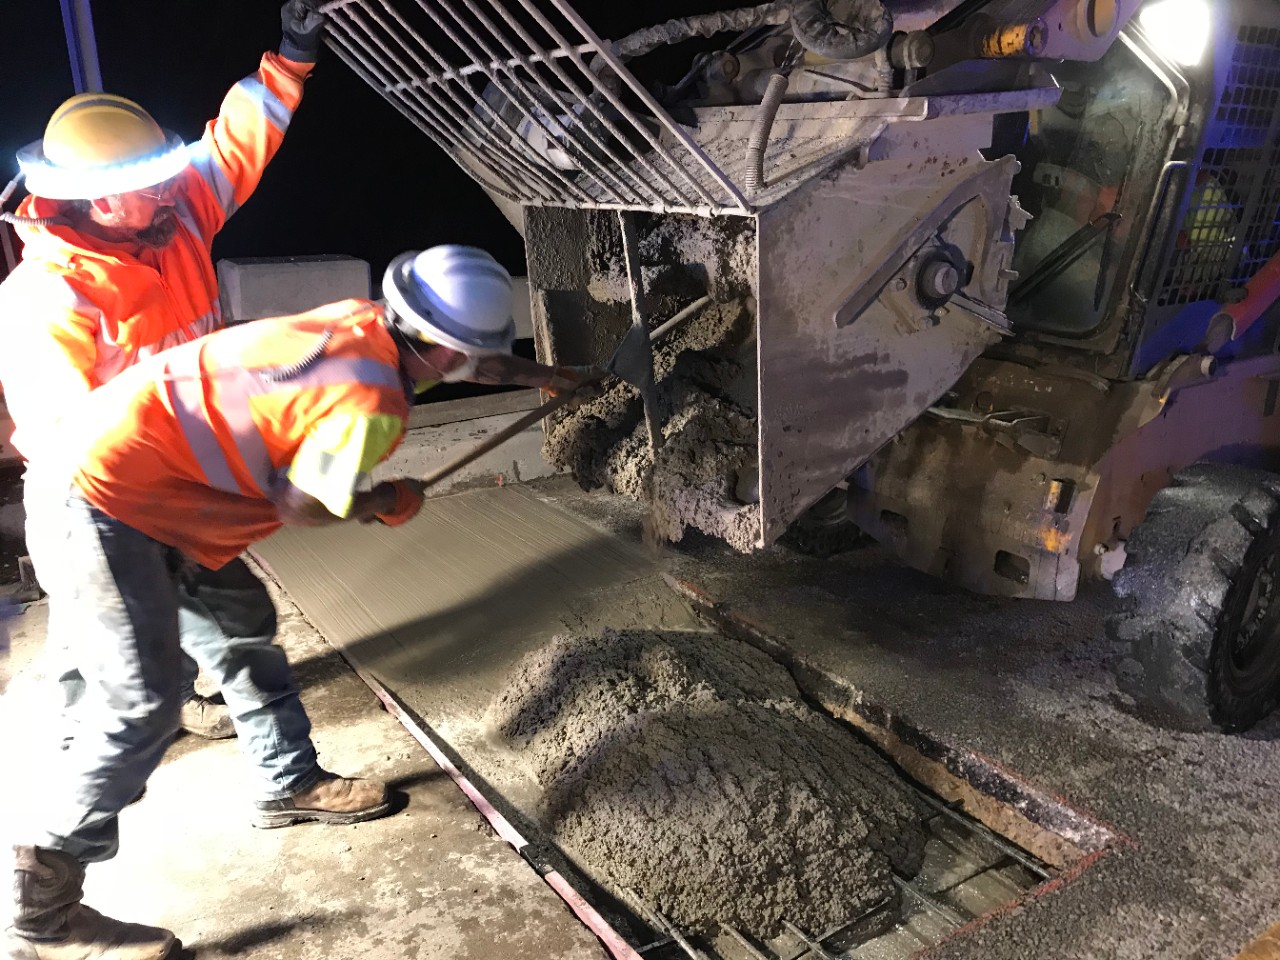 Figure 3-13. Placing the concrete
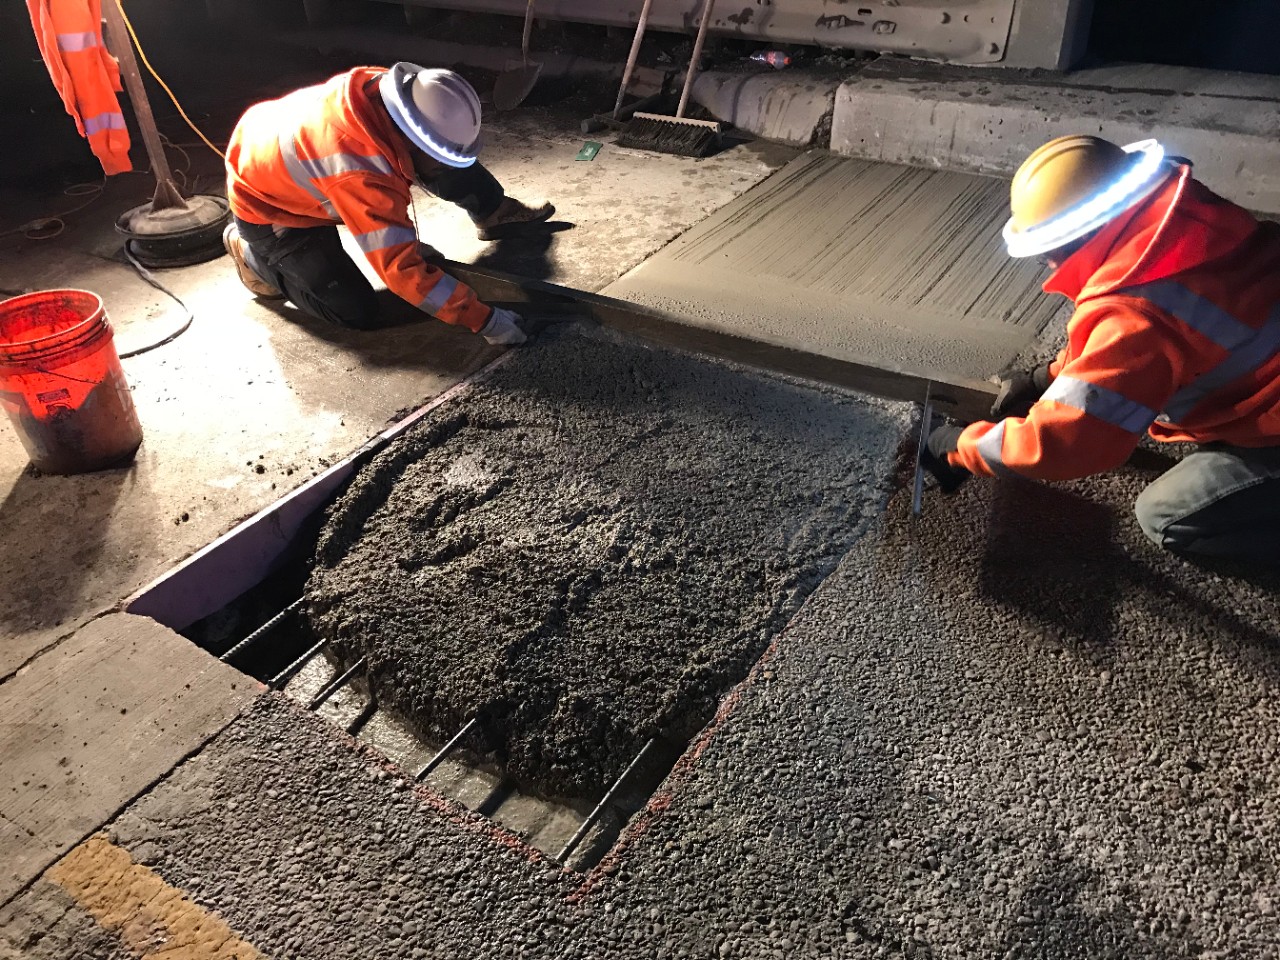 Figure 3-14. Finishing the concrete
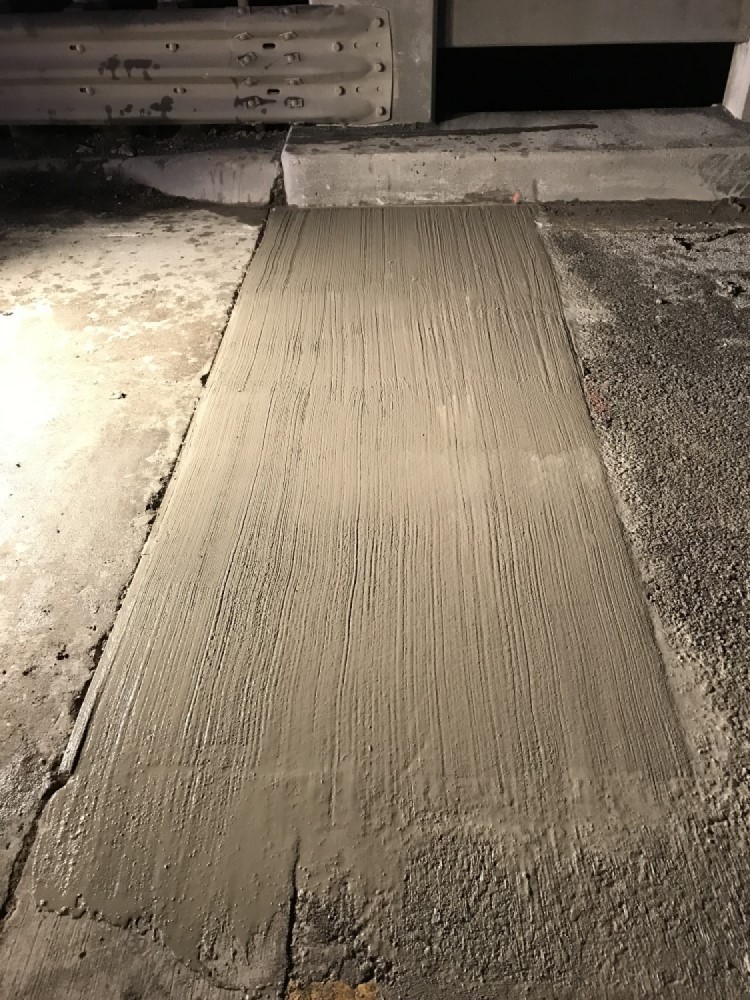 Figure 3-15. Cure and insulate concrete